Im going to need you to stop right there!
 Often times I have a proof of concept type scenario, where I am building some basic infrastructure to demonstrate code or applications to clients, co-workers or the public at large. Having Amazon’s limitless infrastructure at our fingertips makes this easy and fun. But let’s assume for a moment I do not want everyone with a URL to access what i’ve build, how do I protect my code/infrastructure?
Obviously I could implement AWS Cognito and set up a pool of identities, but for a simple POC this might be a bit much.
Enter Basic Auth.
Here is an excerpt from the HTTP Authentication MDN page:
The challenge and response flow works like this:
- The server responds to a client with a 401 (Unauthorized) response status and provides information on how to authorize with a WWW-Authenticate response header containing at least one challenge.
- A client that wants to authenticate itself with the server can then do so by including an Authorization request header with the credentials.
- Usually a client will present a password prompt to the user and will then issue the request including the correct Authorization header.
Reading that list it is not clear how the server knows wether or not the client is allowed to access the content it is requesting, or in more basic terms, wether or not a client is “authenticated”.
The following diagram should help explain the process.

In simplified terms: the server is expecting an authorization http header to be included in the request. The type of the Authorization header in this case is Basic and the credentials is a Base64 encoded string made up of a username and password seperated by a colon.
Constructing your own Authorization header:
Following the MDN docs describing the Authorization Header, a valid authorization header can be constructed as follows:
Authorization: <type> <credentials>
- Define a username, e.g.:
Martin
- Define a password, e.g.:
Caarels
- Join both strings seperated by a colon:
Martin:Caarels
- Encode in base64:
TWFydGluOkNhYXJlbHMK
- Prepend the Authentication type:
Basic TWFydGluOkNhYXJlbHMK
- Prepend the Authorization header name followed by a colon:
Authorization: Basic TWFydGluOkNhYXJlbHMK
And there it is, a fully formed valid HTTP authorization header for the user Martin with the password Caarels.
Now that we know how to create and therefor test a valid Authorization header, lets use that knowledge to implement a basic authentication scheme in a AWS application load balancer.
Lets assume for a moment that I have an EC2 instance running HTTPD (apache) hosting a simple website. And that this instance is sitting comfortably behind an application load balancer.
 Lets also assume I wish to prevent strangers from accessing this site through the use of basic http authentication. Using what we have just learned this should be an easy task, we only need to use the following flowchart:
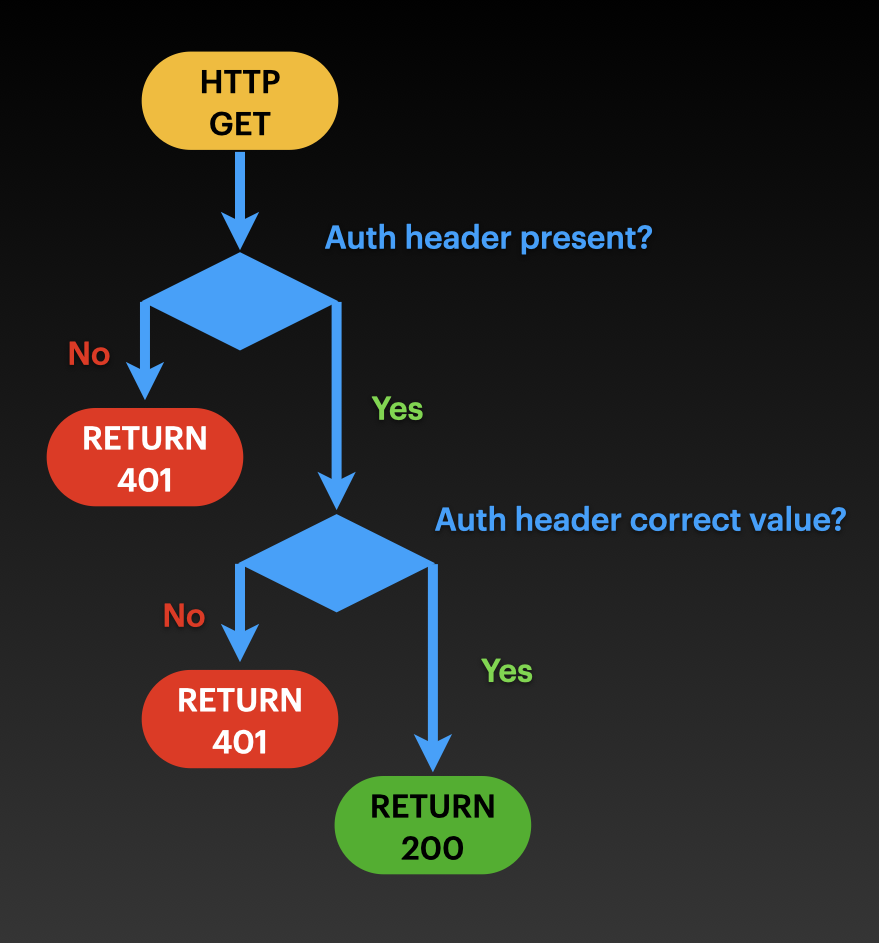 It becomes easier to comprehend once you realize that the default behaviour in the loadbalancer listener rules should be to return a 401 with a WWW-Authenticate response header. The loadbalancer should only forward to the EC2 target group if the Authorization request header is included in the request and has the appropriate value.
In pseudo code that would look something like this:
1
2
3
4
if Request['Headers']['Authorization'] == 'Basic TWFydGluOkNhYXJlbHMK':
  forward to webservers target group
else
  return 401 response
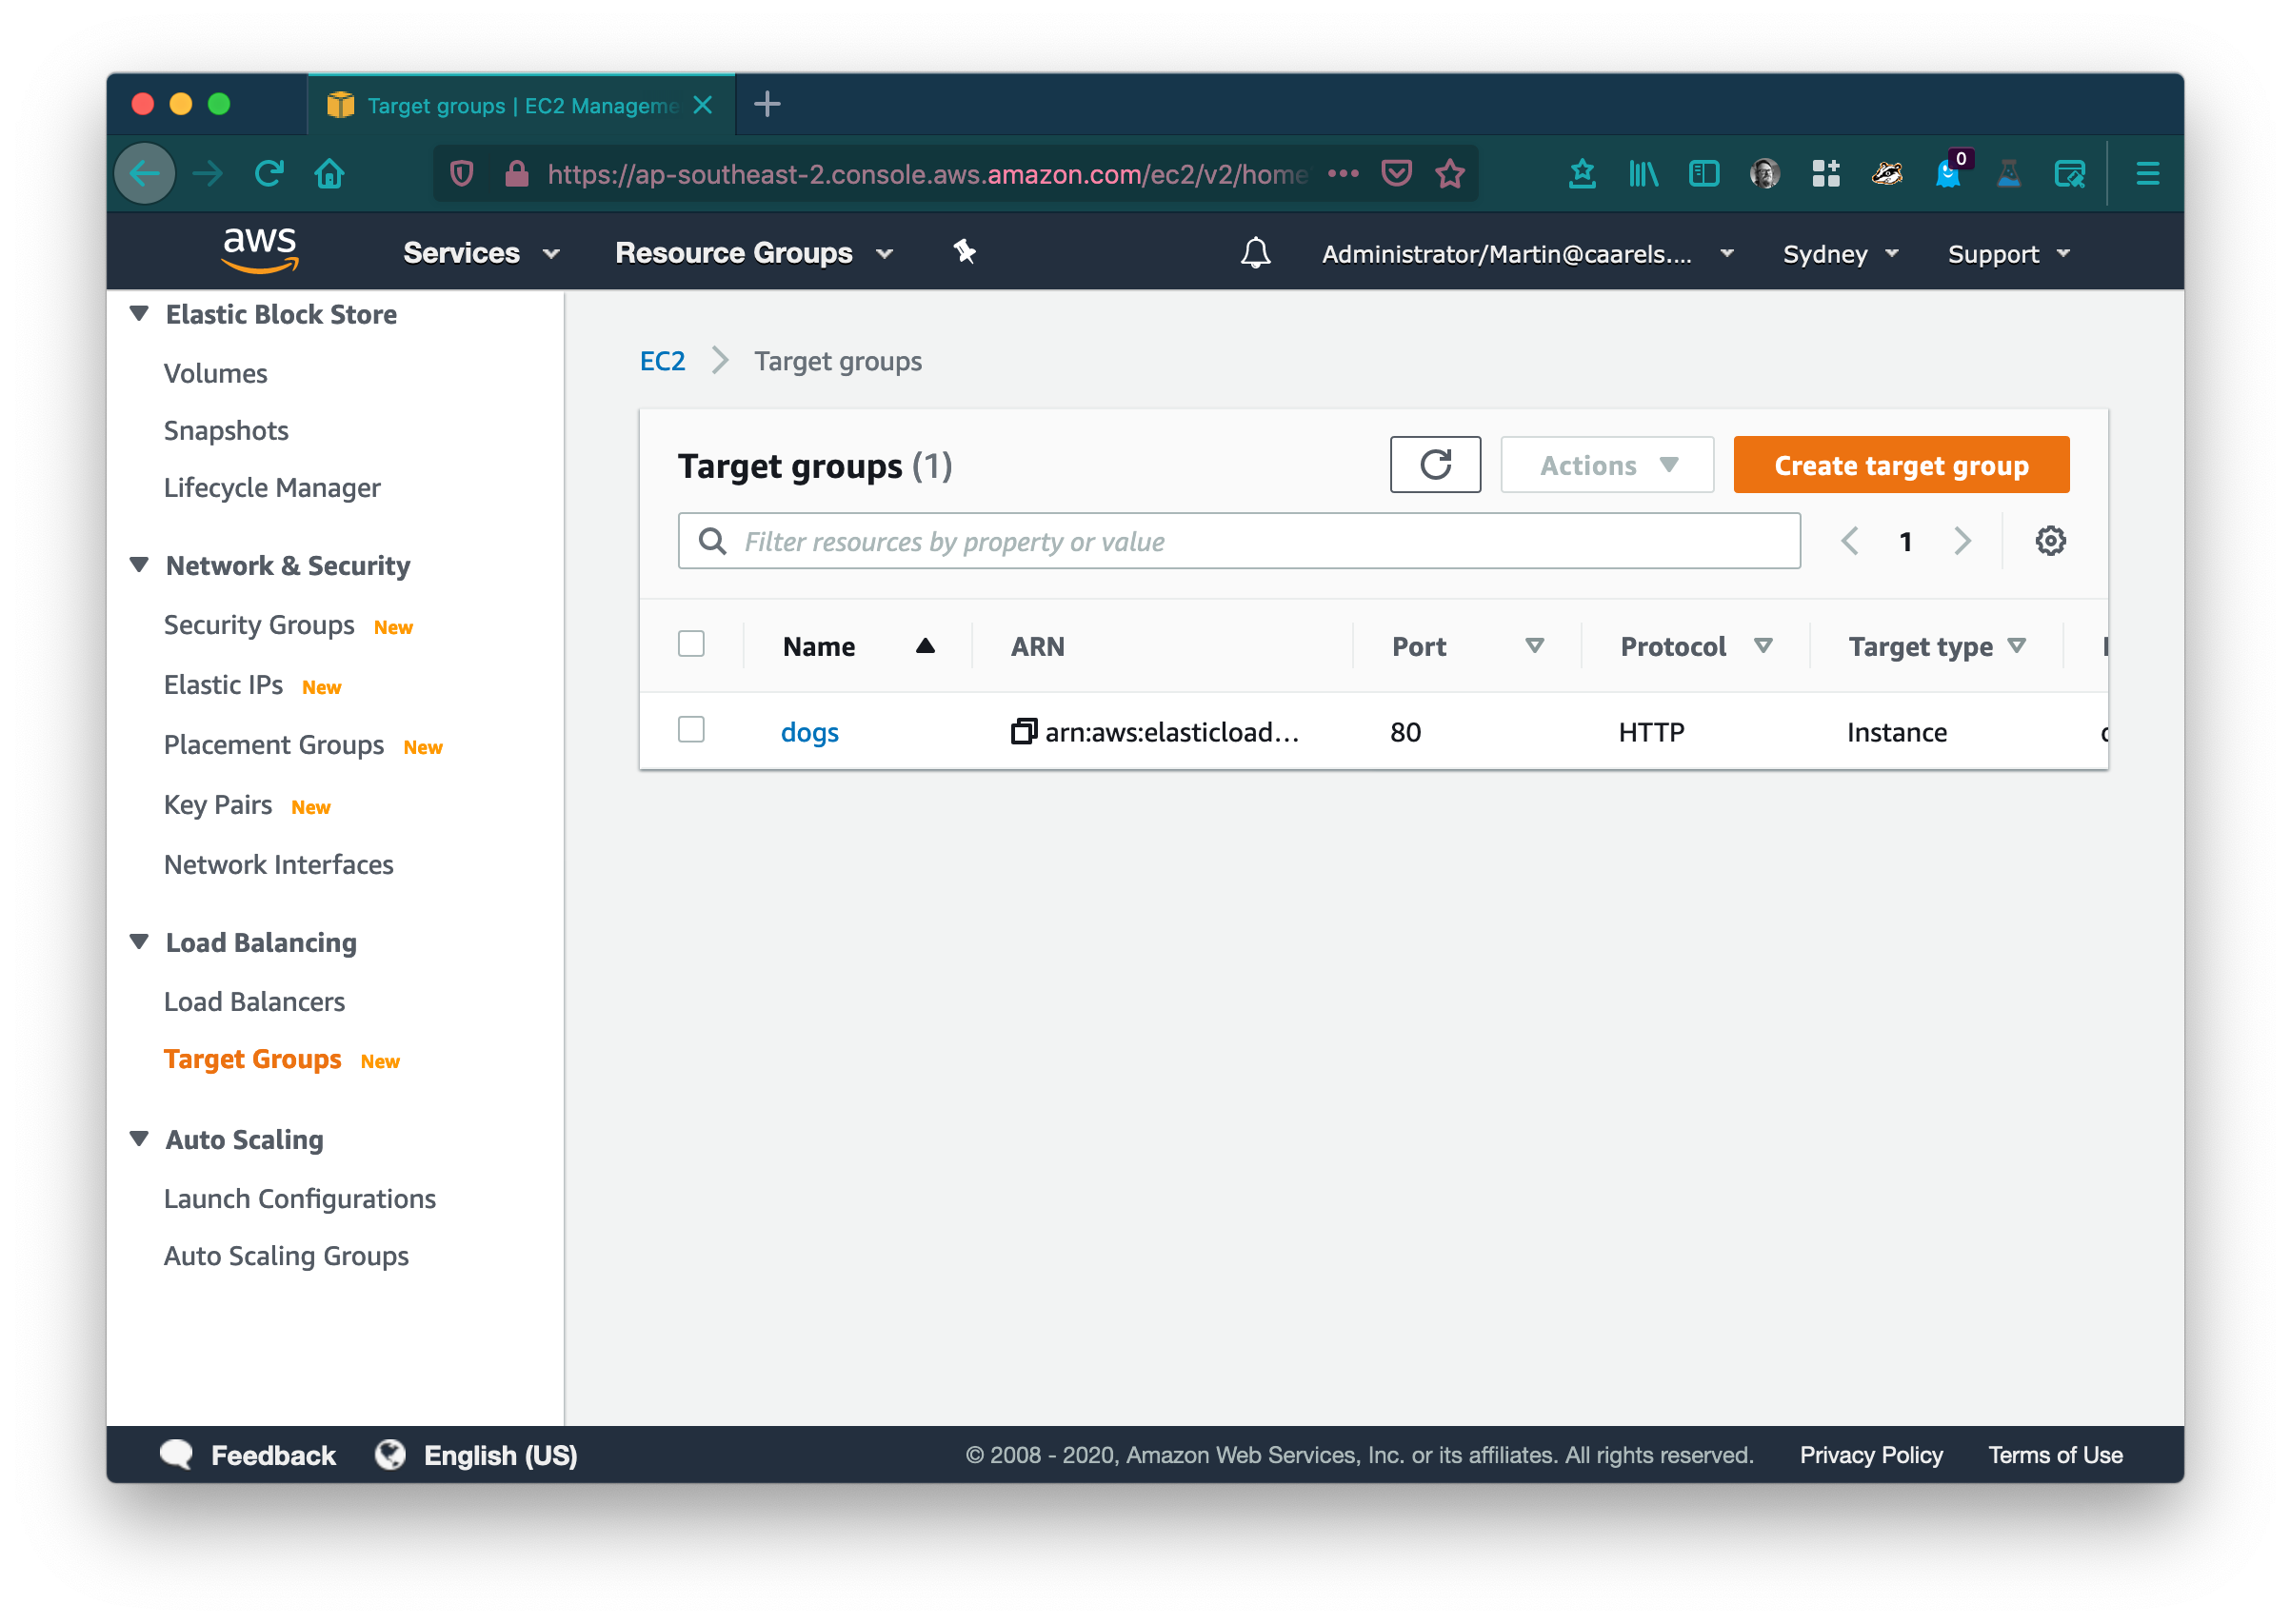
Implementation
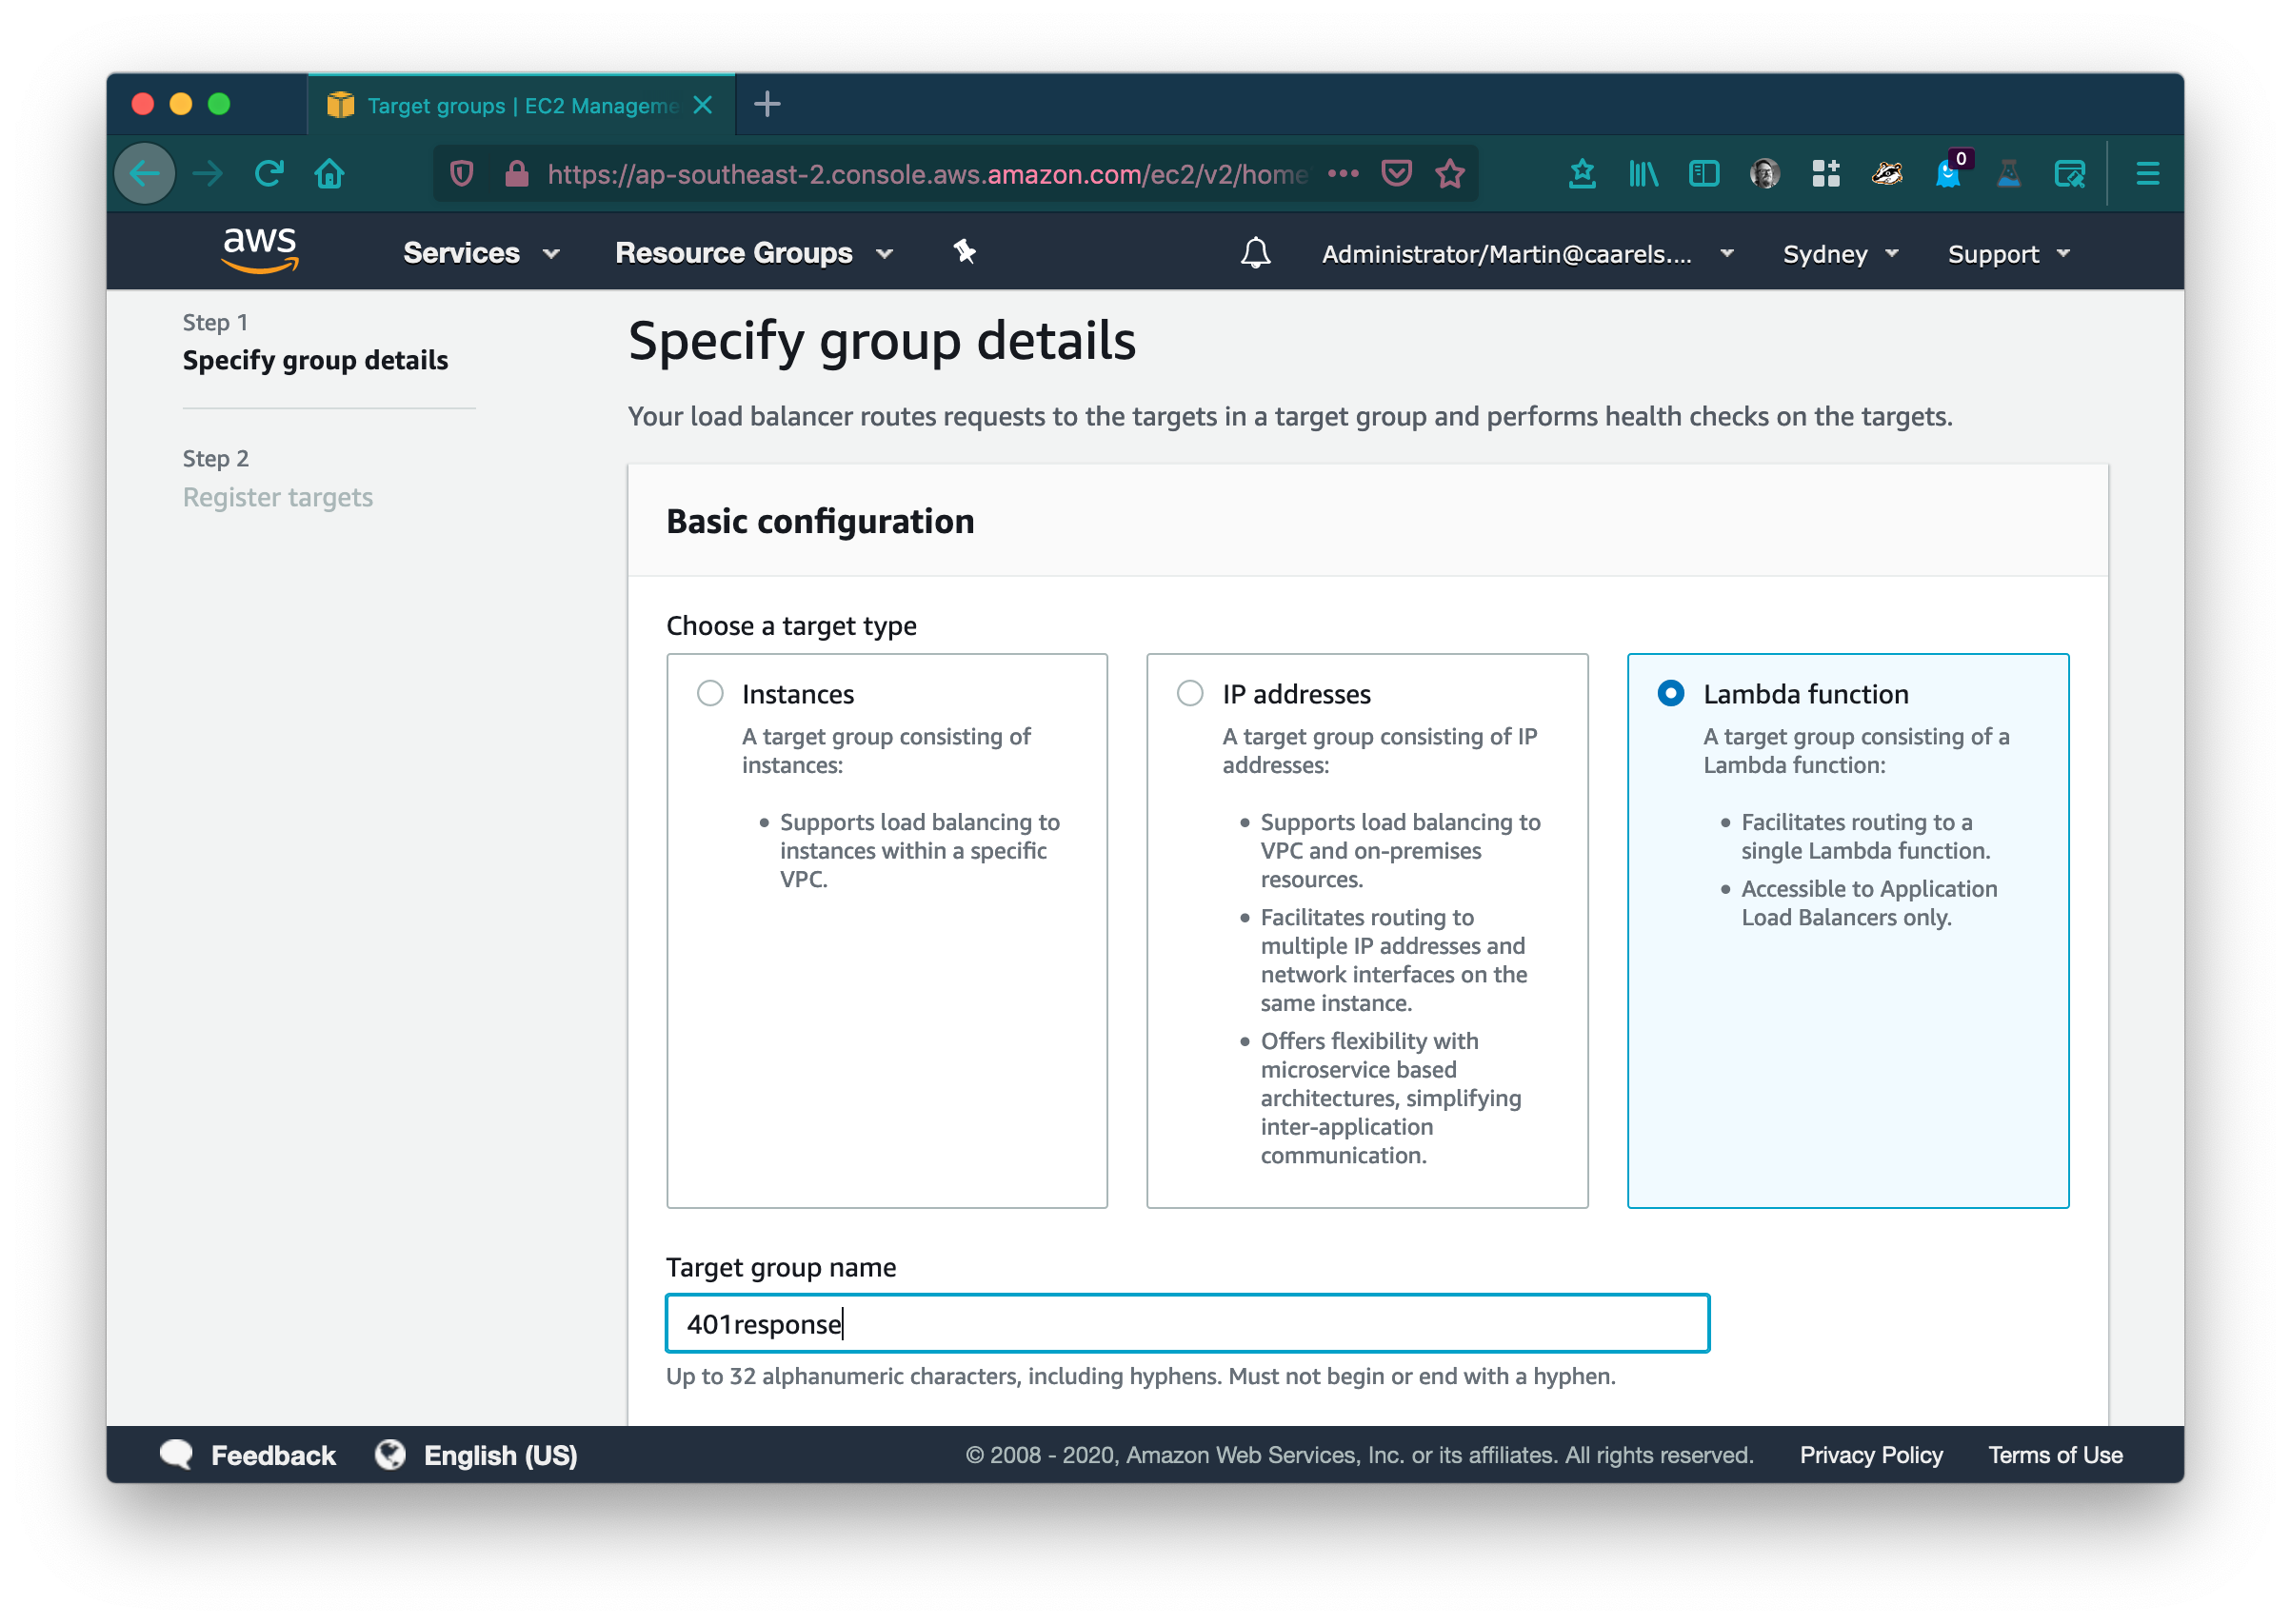
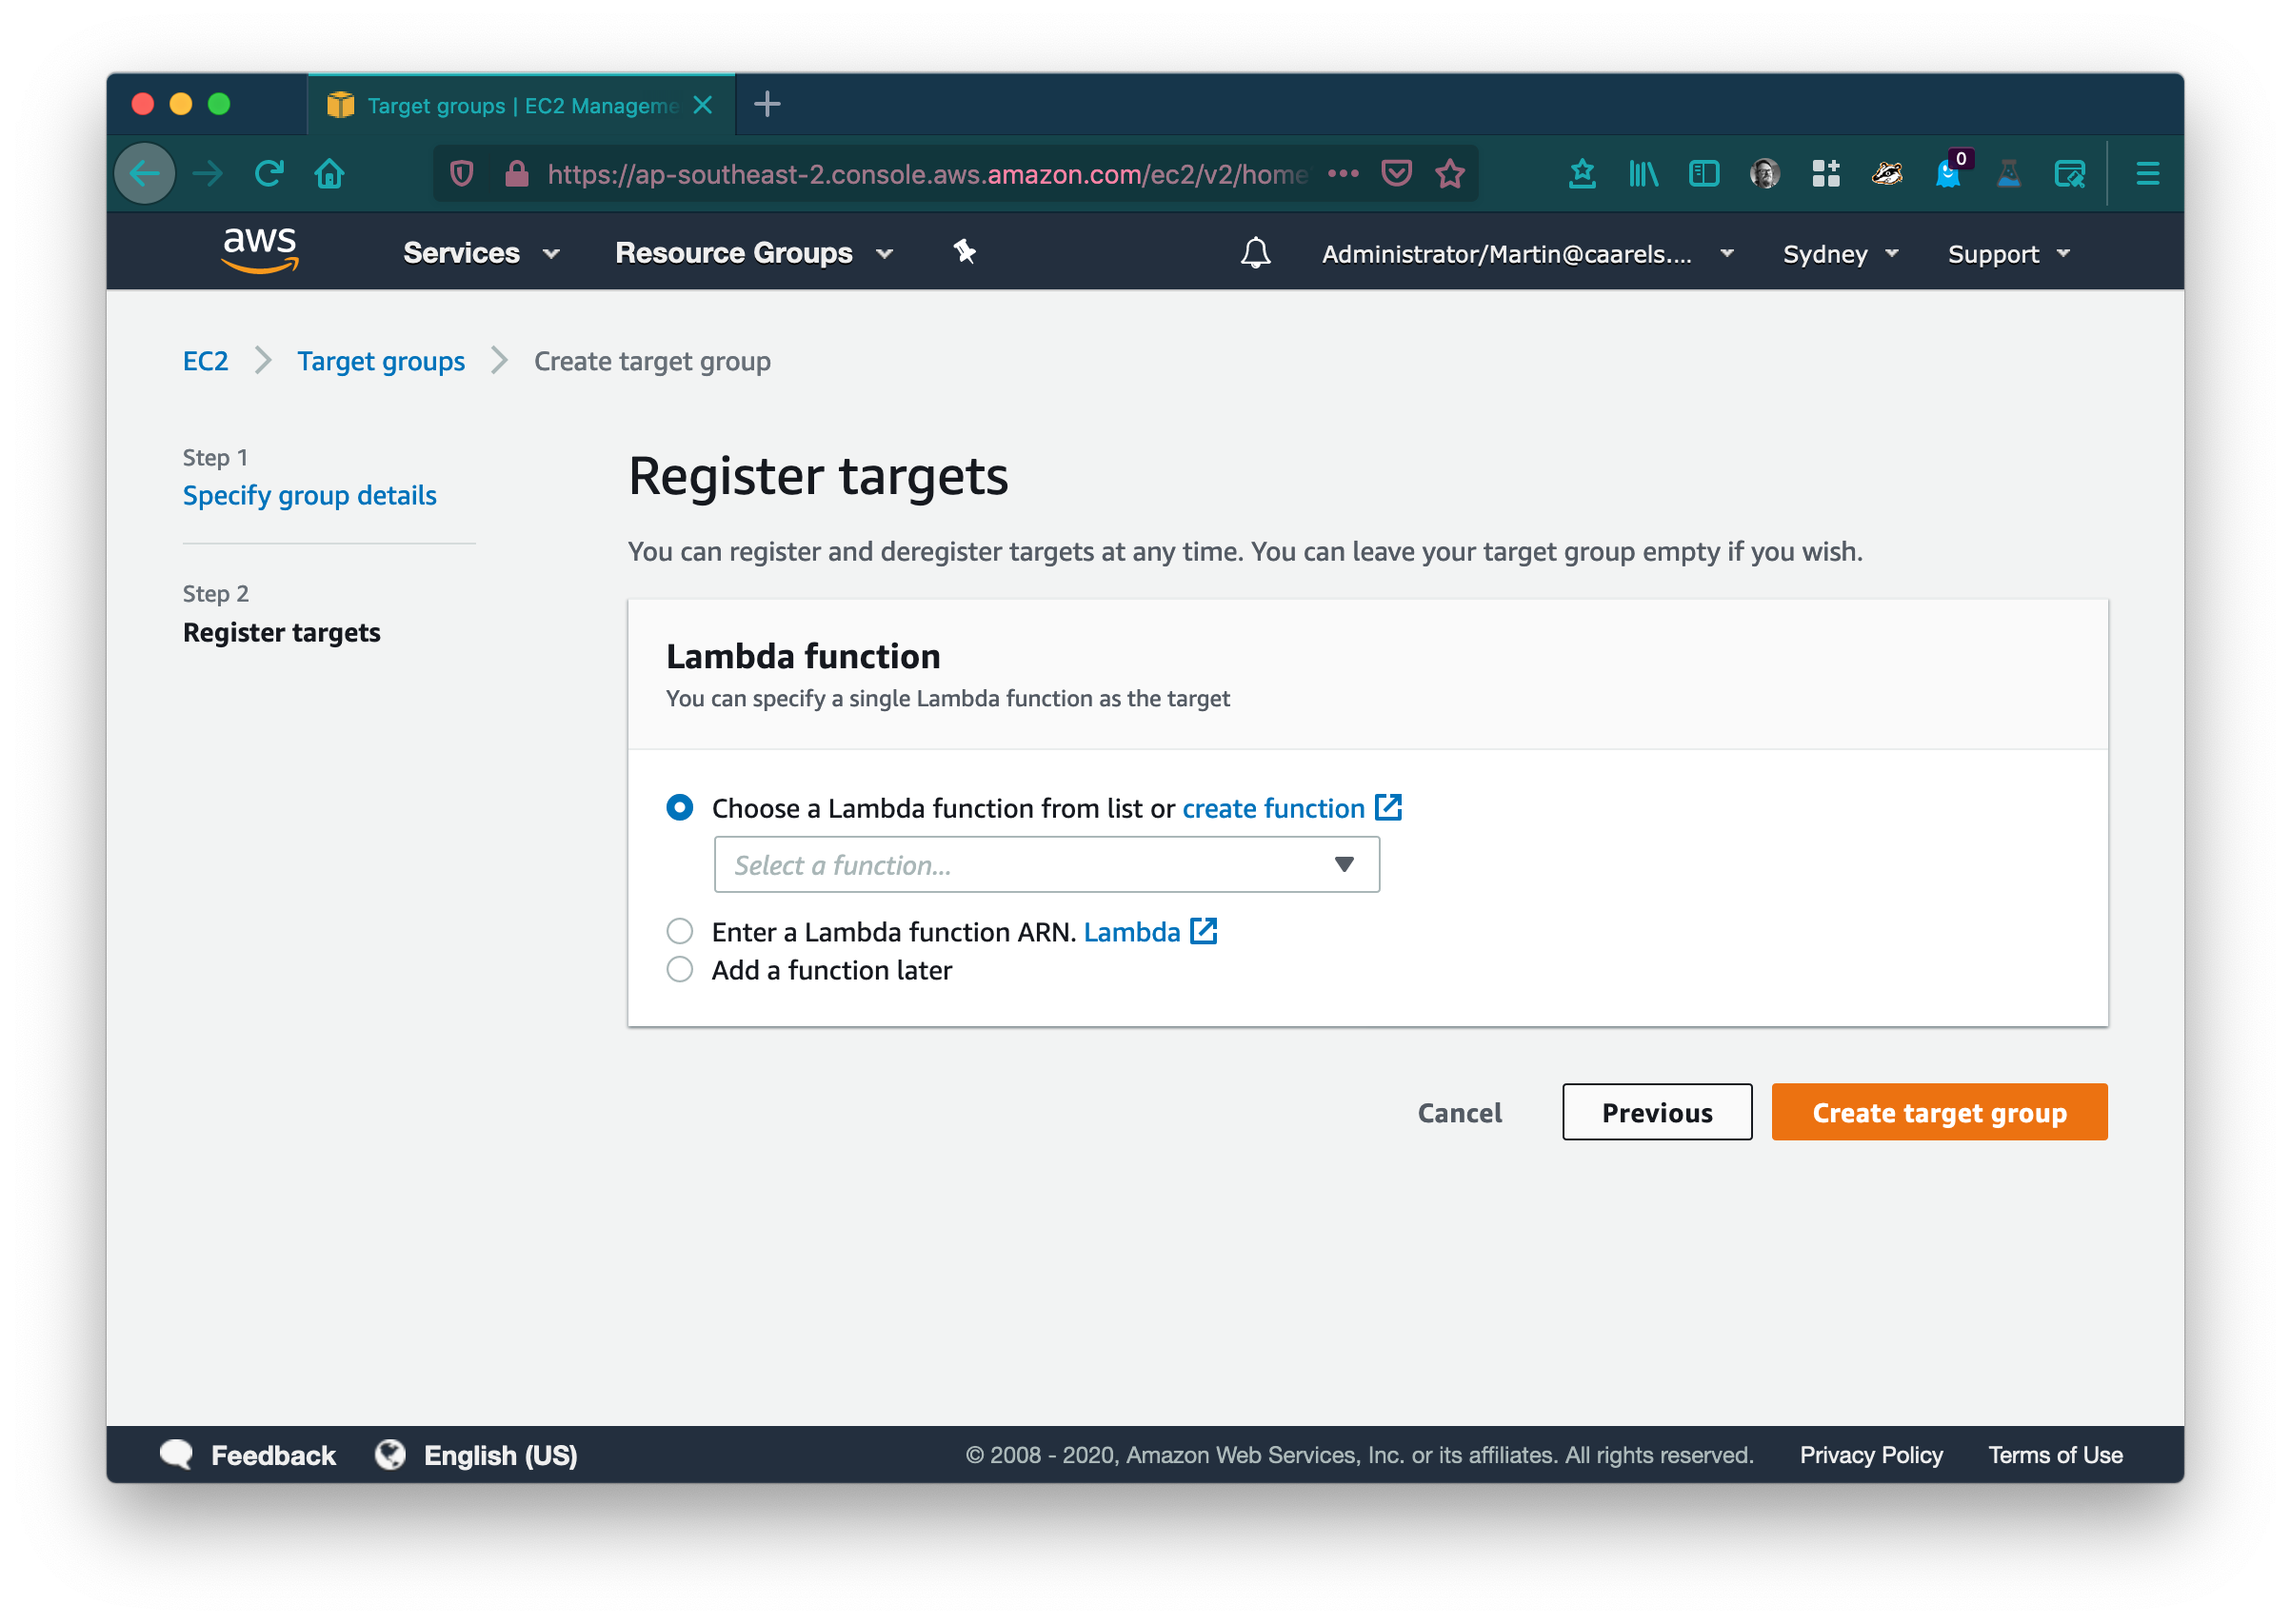
Create a new target group for the 401 response lambda:
In the AWS console go to Target Groups in the EC2 service category. Click Create target group.
Select Lambda function in basic configuration and give the target group a descriptive name.
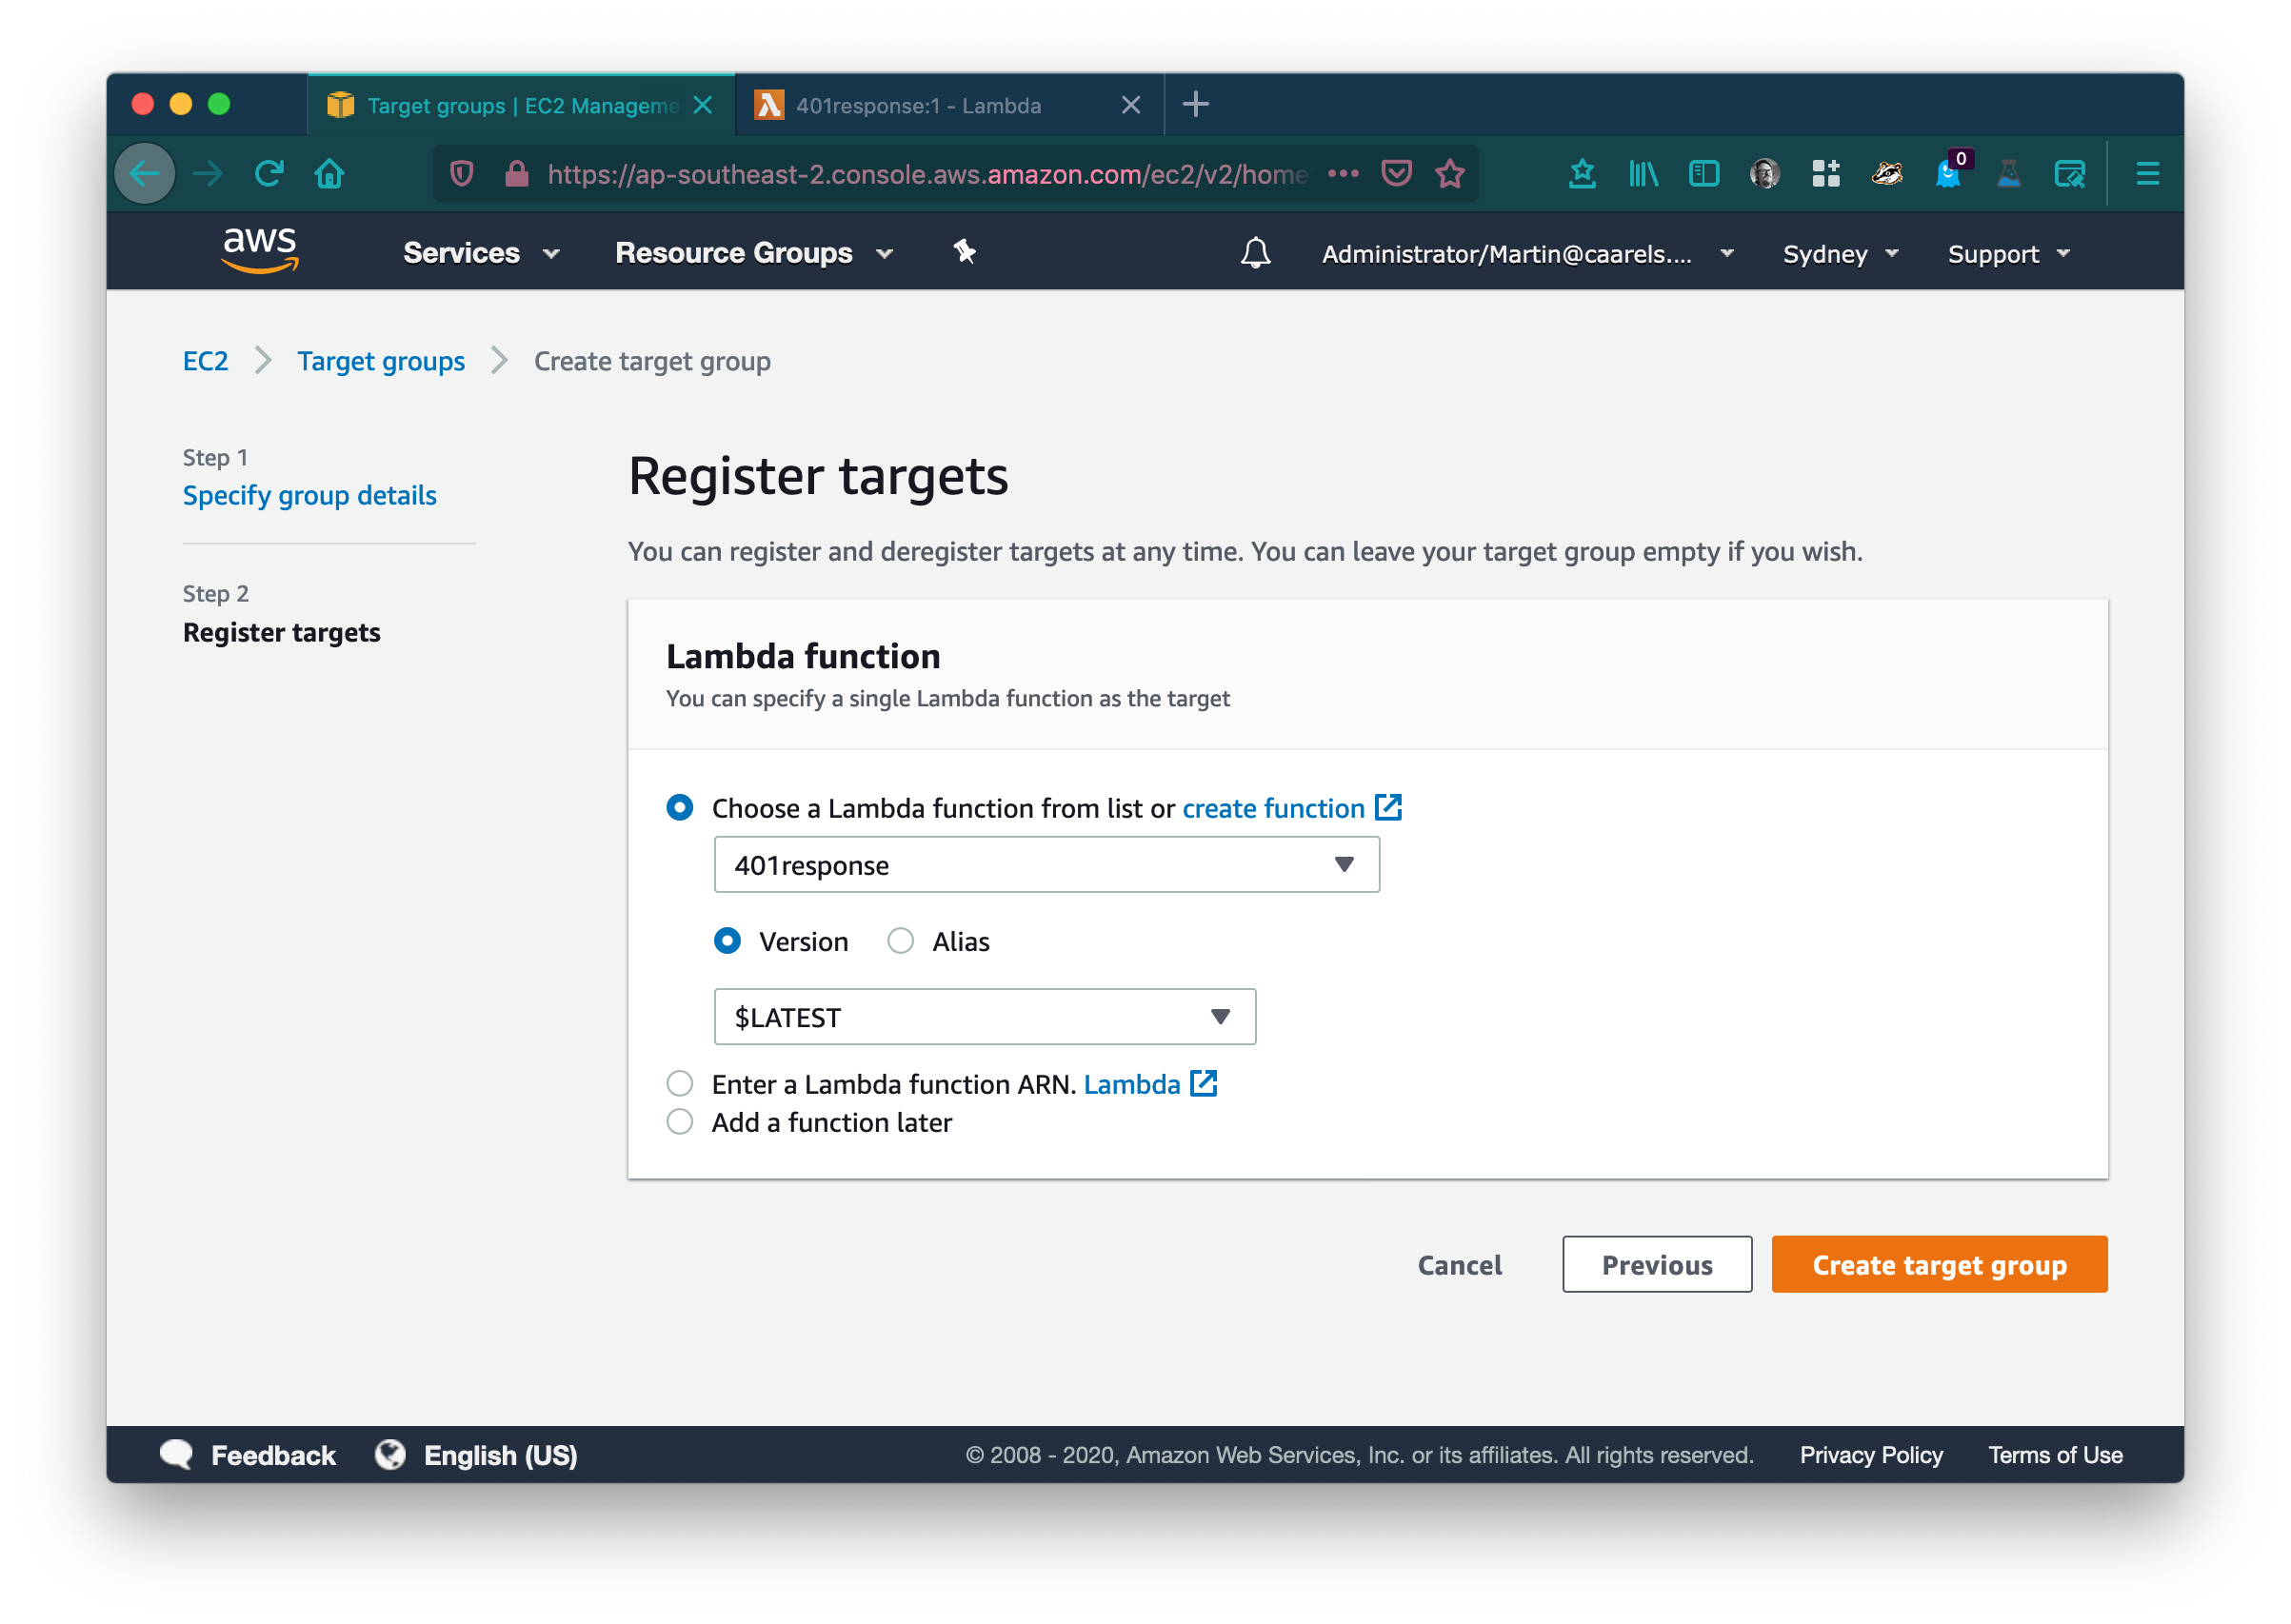
Leave the rest default and click next. In Register targets click create function
 This will open a new tab in your browser in the Lambda service catalog.
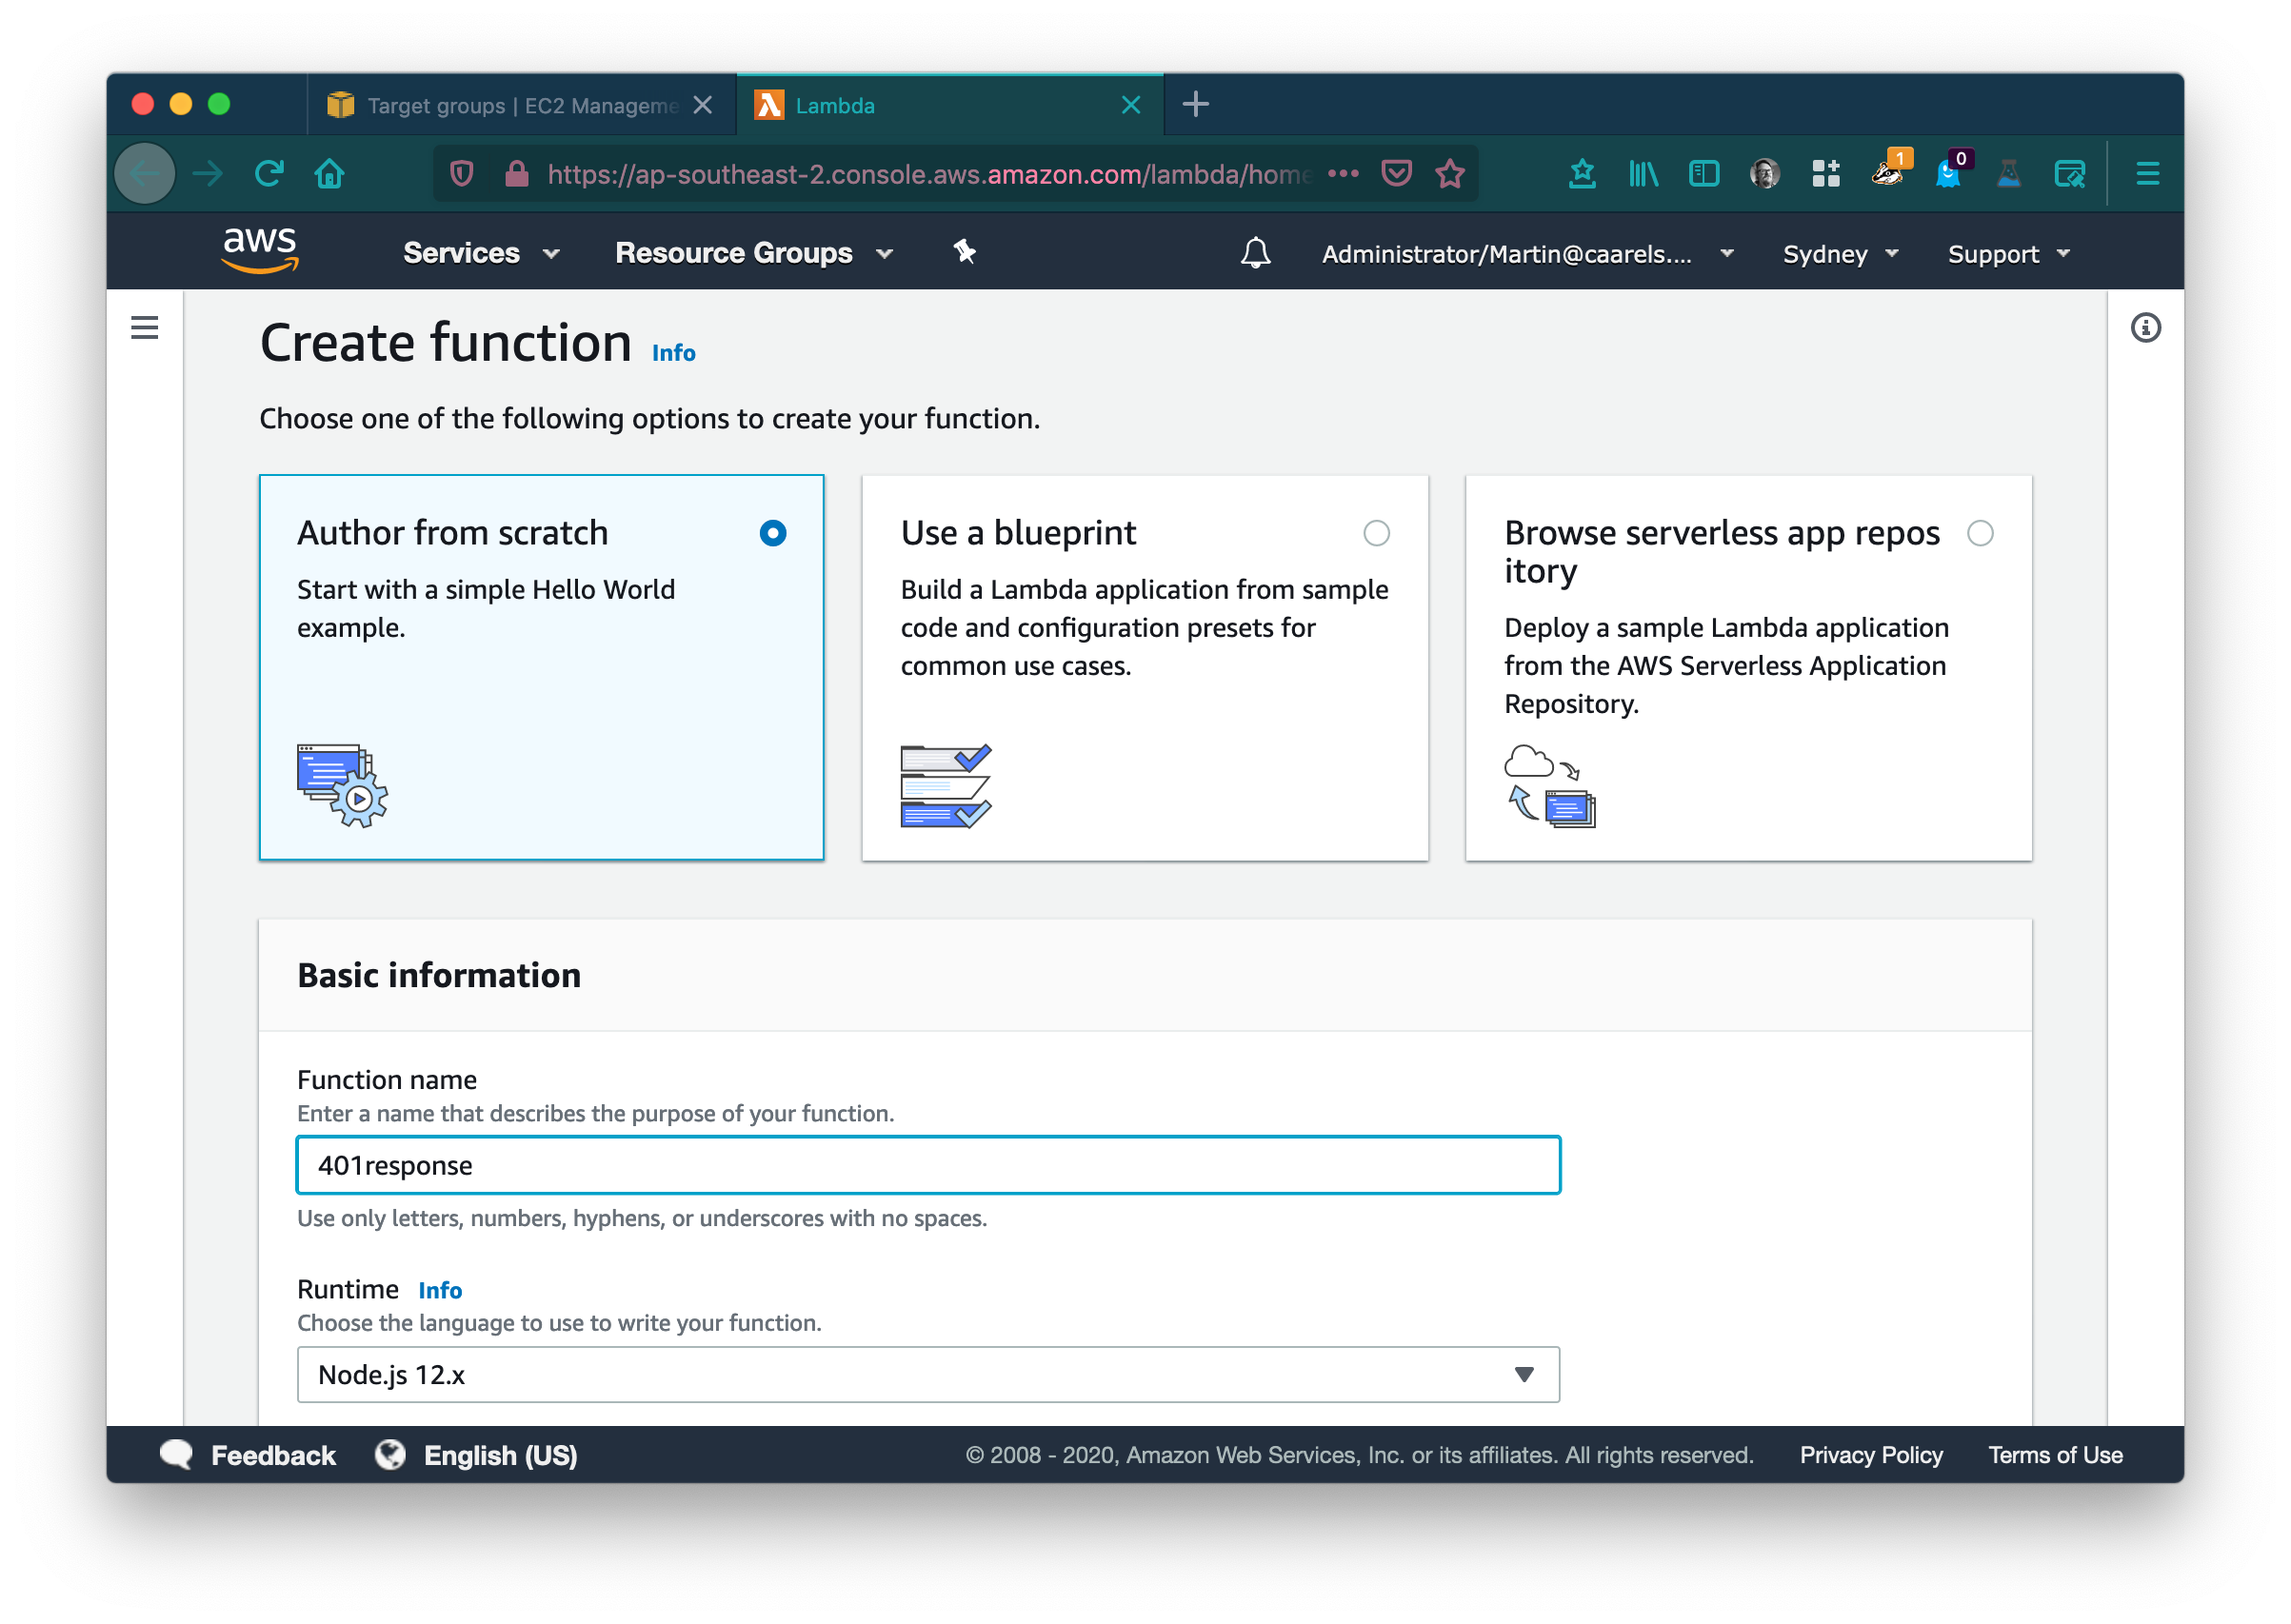
Keep the selection on Author from scratch, give the function a descriptive name, and select an appropriate runtime, here i have selected Node.js 12.x. Click Create Function. In the newly create function click Add trigger
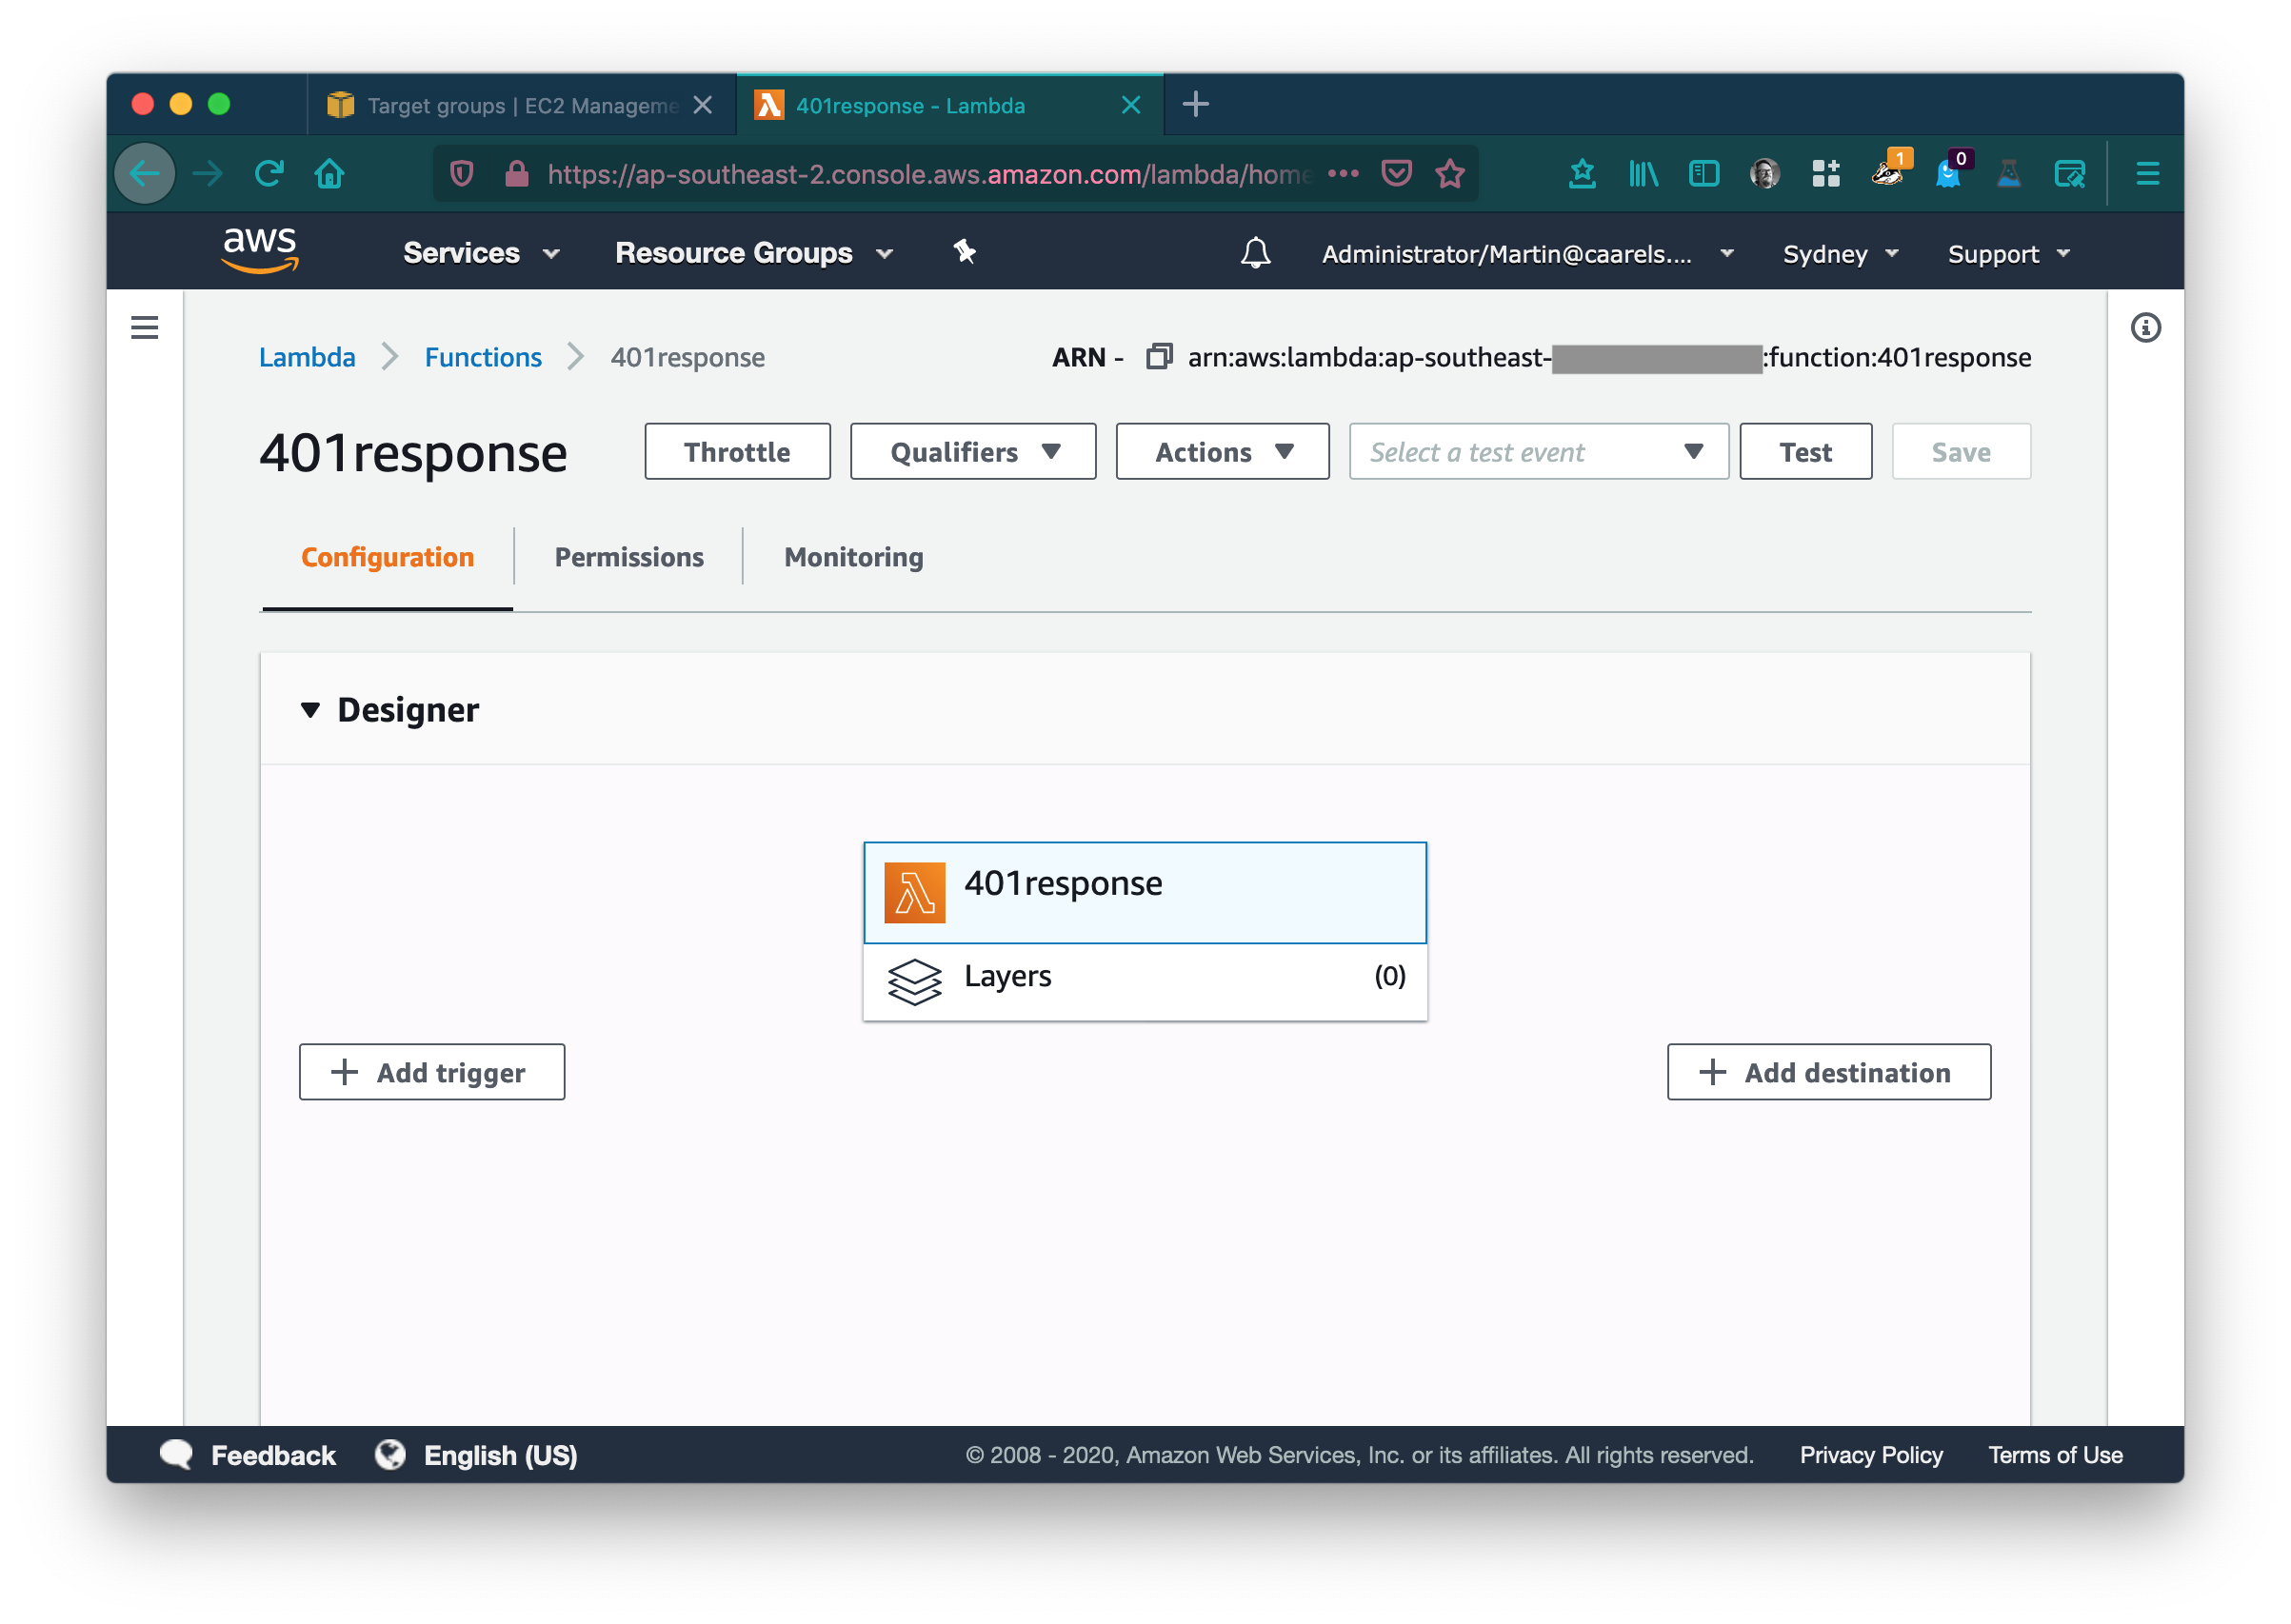 From the list of possible triggers select Application Load Balancer.
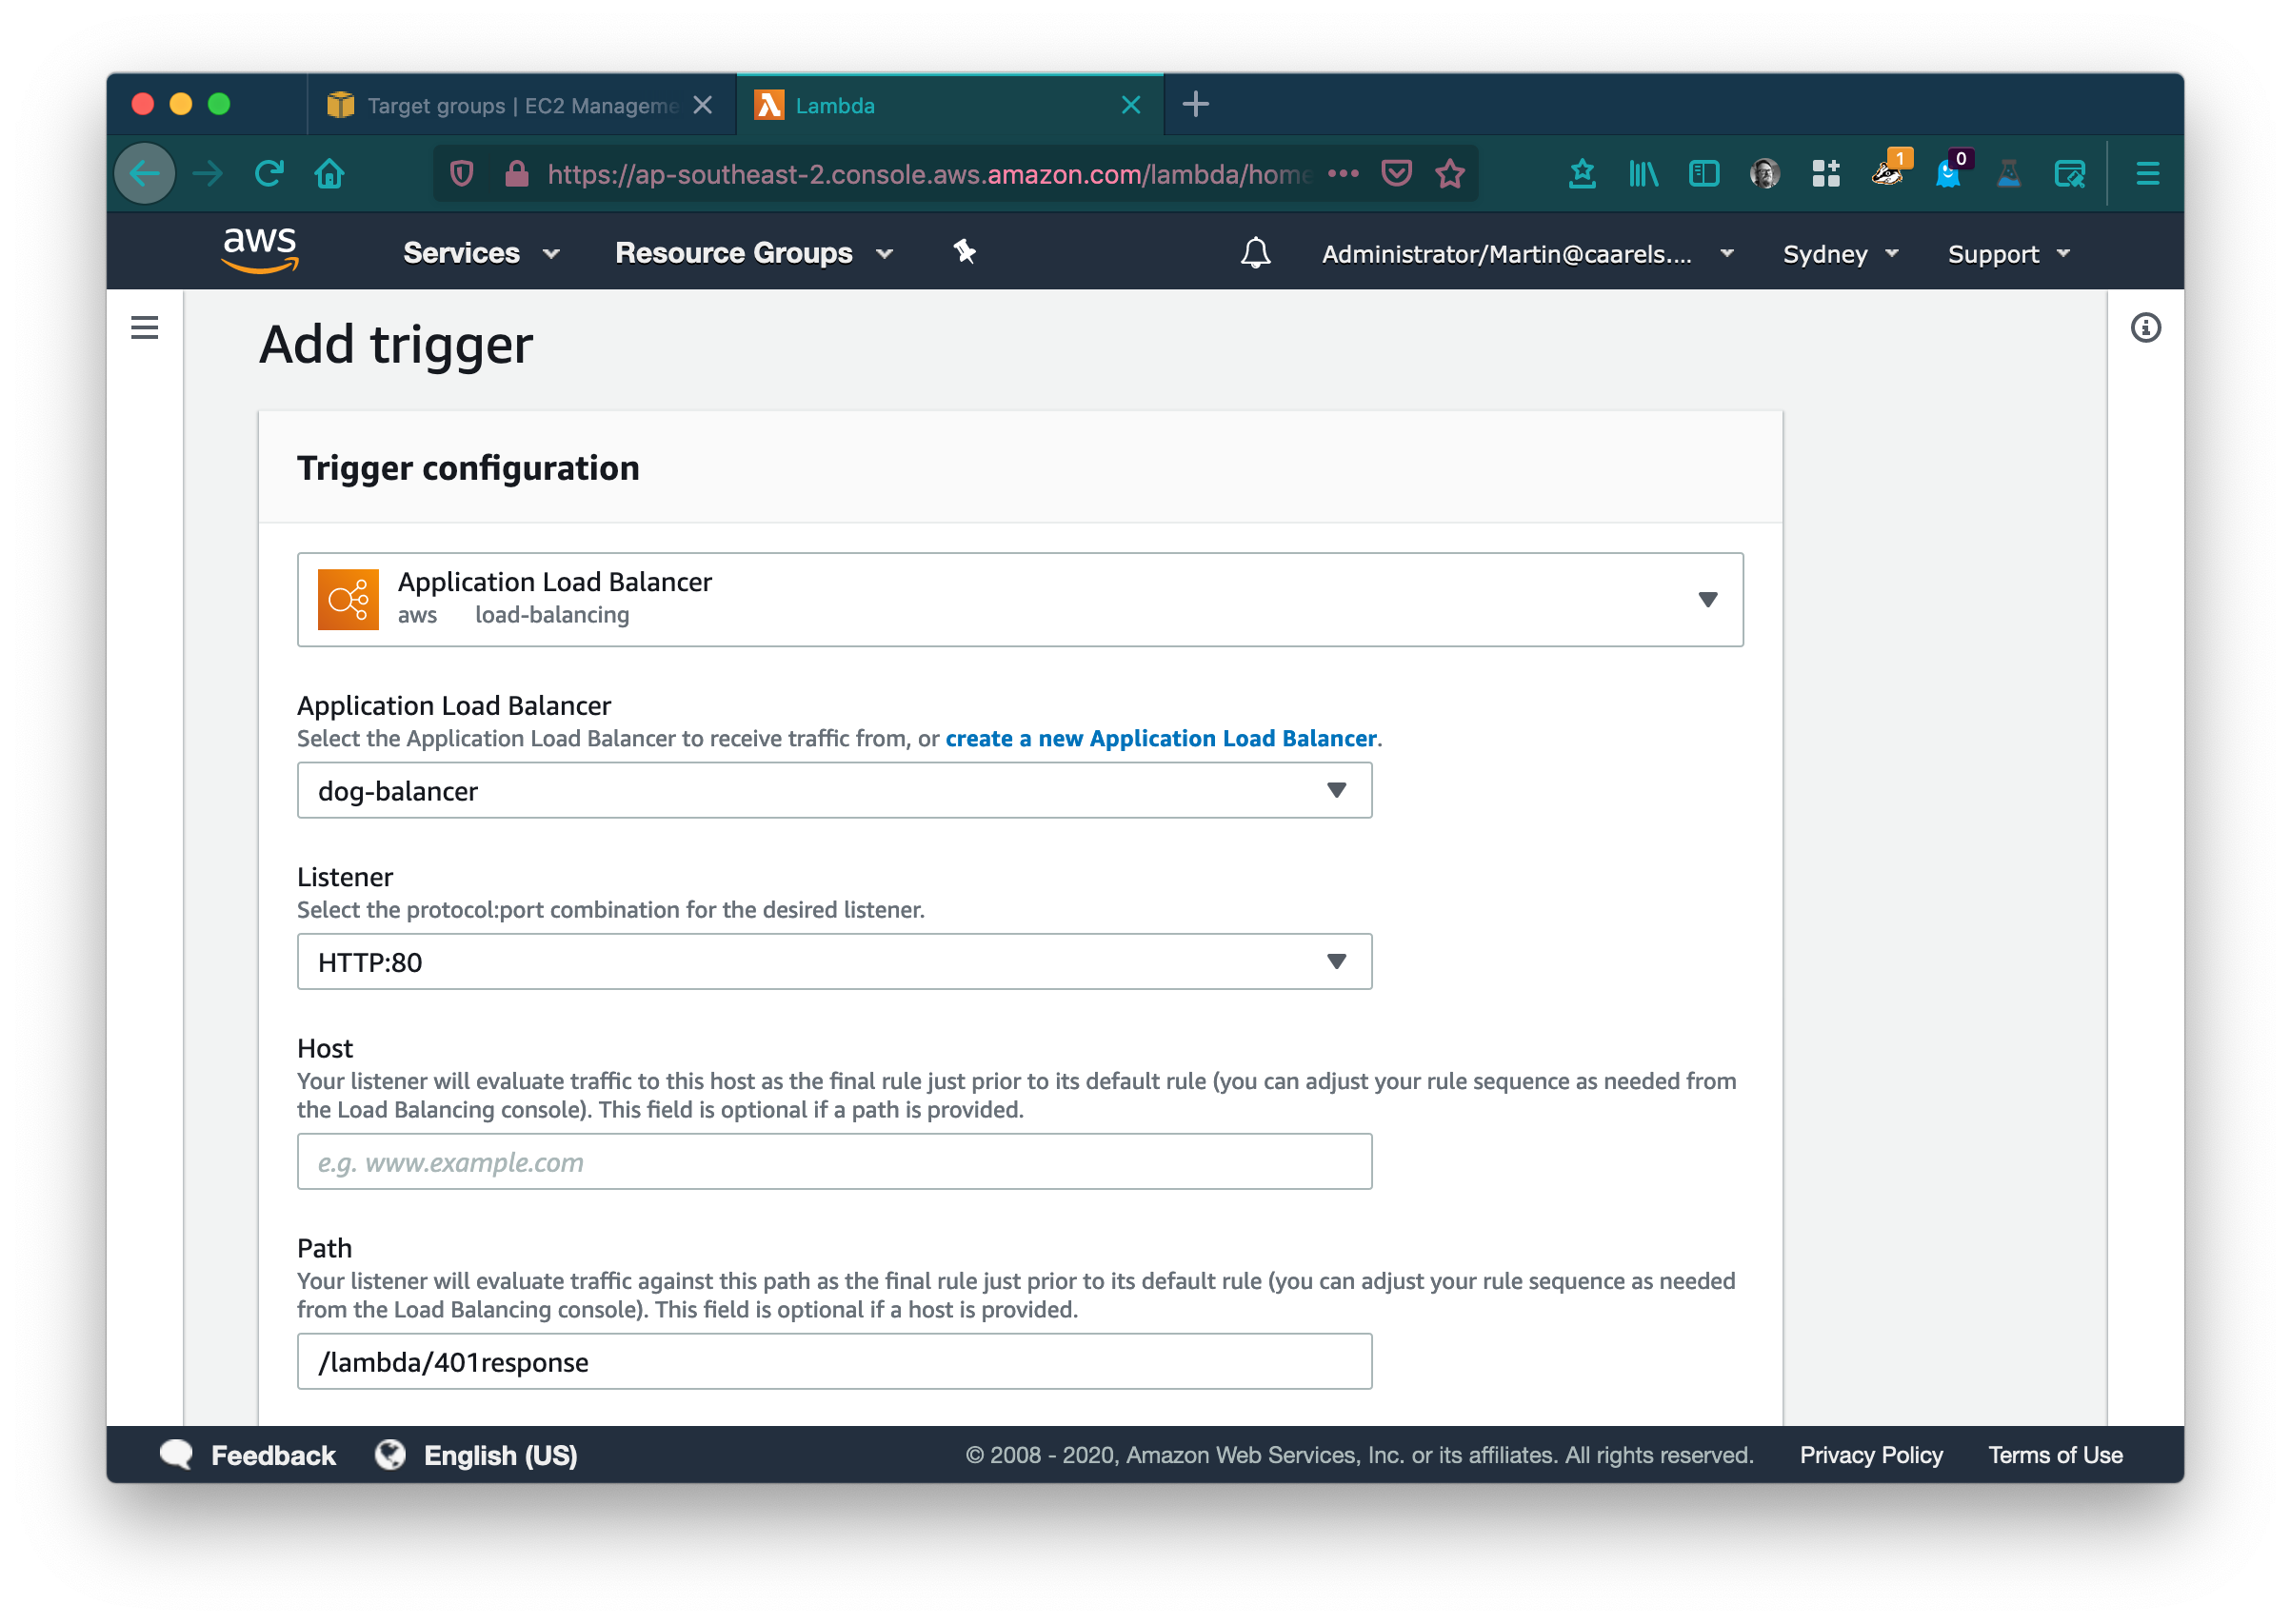
Select your load balancer and its default listener and click Add. Adding this trigger will allow the load balancer to forward request to this lambda. Click the Lambda name (401response in my case) in the designer and scroll down to the application code.
Replace the code with the examples provided below, python if you use python or nodeJS if you would like to use that:
Lambda Code Examples
Python
1
2
3
4
5
6
7
8
9
10
def lambda_handler(event, context):
  response = {
    "statusCode": 401,
    "statusDescription": "401 Unauthorized",
    "headers": {
      "WWW-Authenticate": "Basic"
    },
    "body": "Unauthorized"
  }
  return response
Nodejs
1
2
3
4
5
6
7
8
9
10
11
exports.handler = async (event) => {
  const response = {
    "statusCode": 401,
    "statusDescription": "401 Unauthorized",
    "headers": {
      "WWW-Authenticate": "Basic"
    },
    "body": "Unauthorized"
  }
  return response;
};
Click Save and in the Actions drop down menu click publish new version.
 Leave the description empty (or not if you wish to be descriptive) and click publish. Return to the previous tab in your browser and refresh the page, select the lambda we have just created from the list of possible targets.
 Click Create target group.
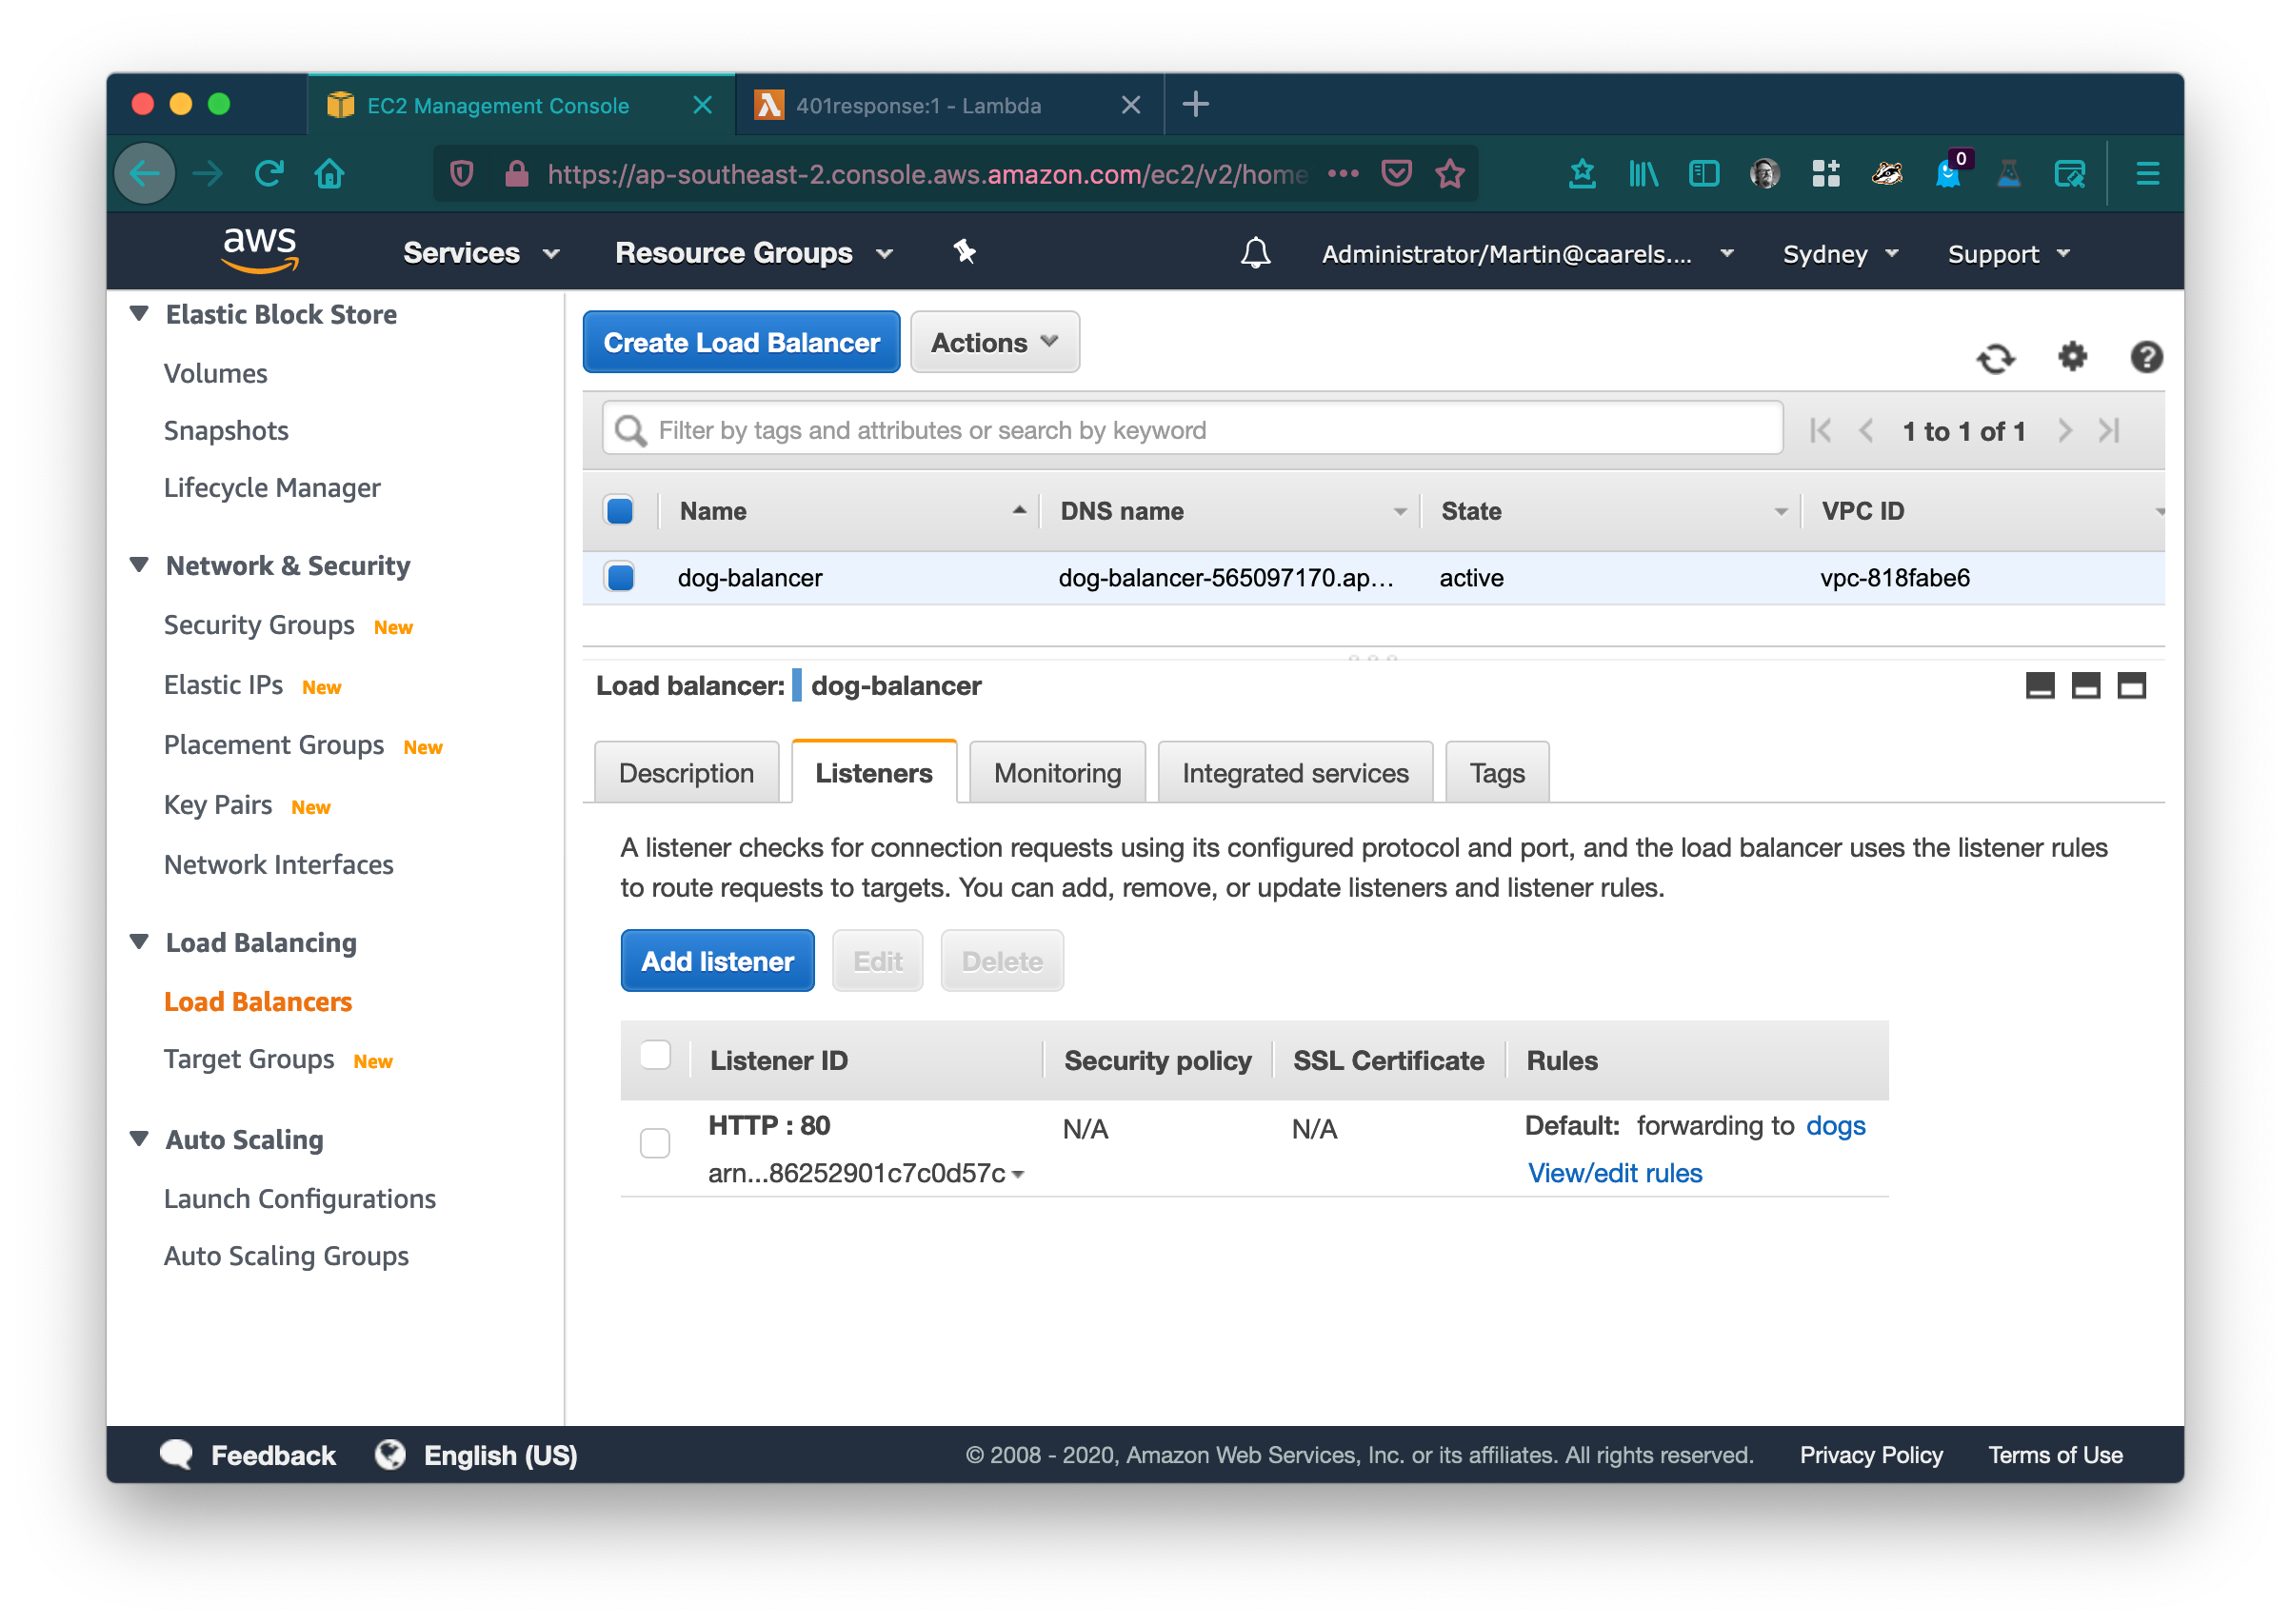
In the AWS console go to Load balancers in the EC2 service category. Select your load balancer, Select the Listeners tab, in the default listener click View/edit rules.
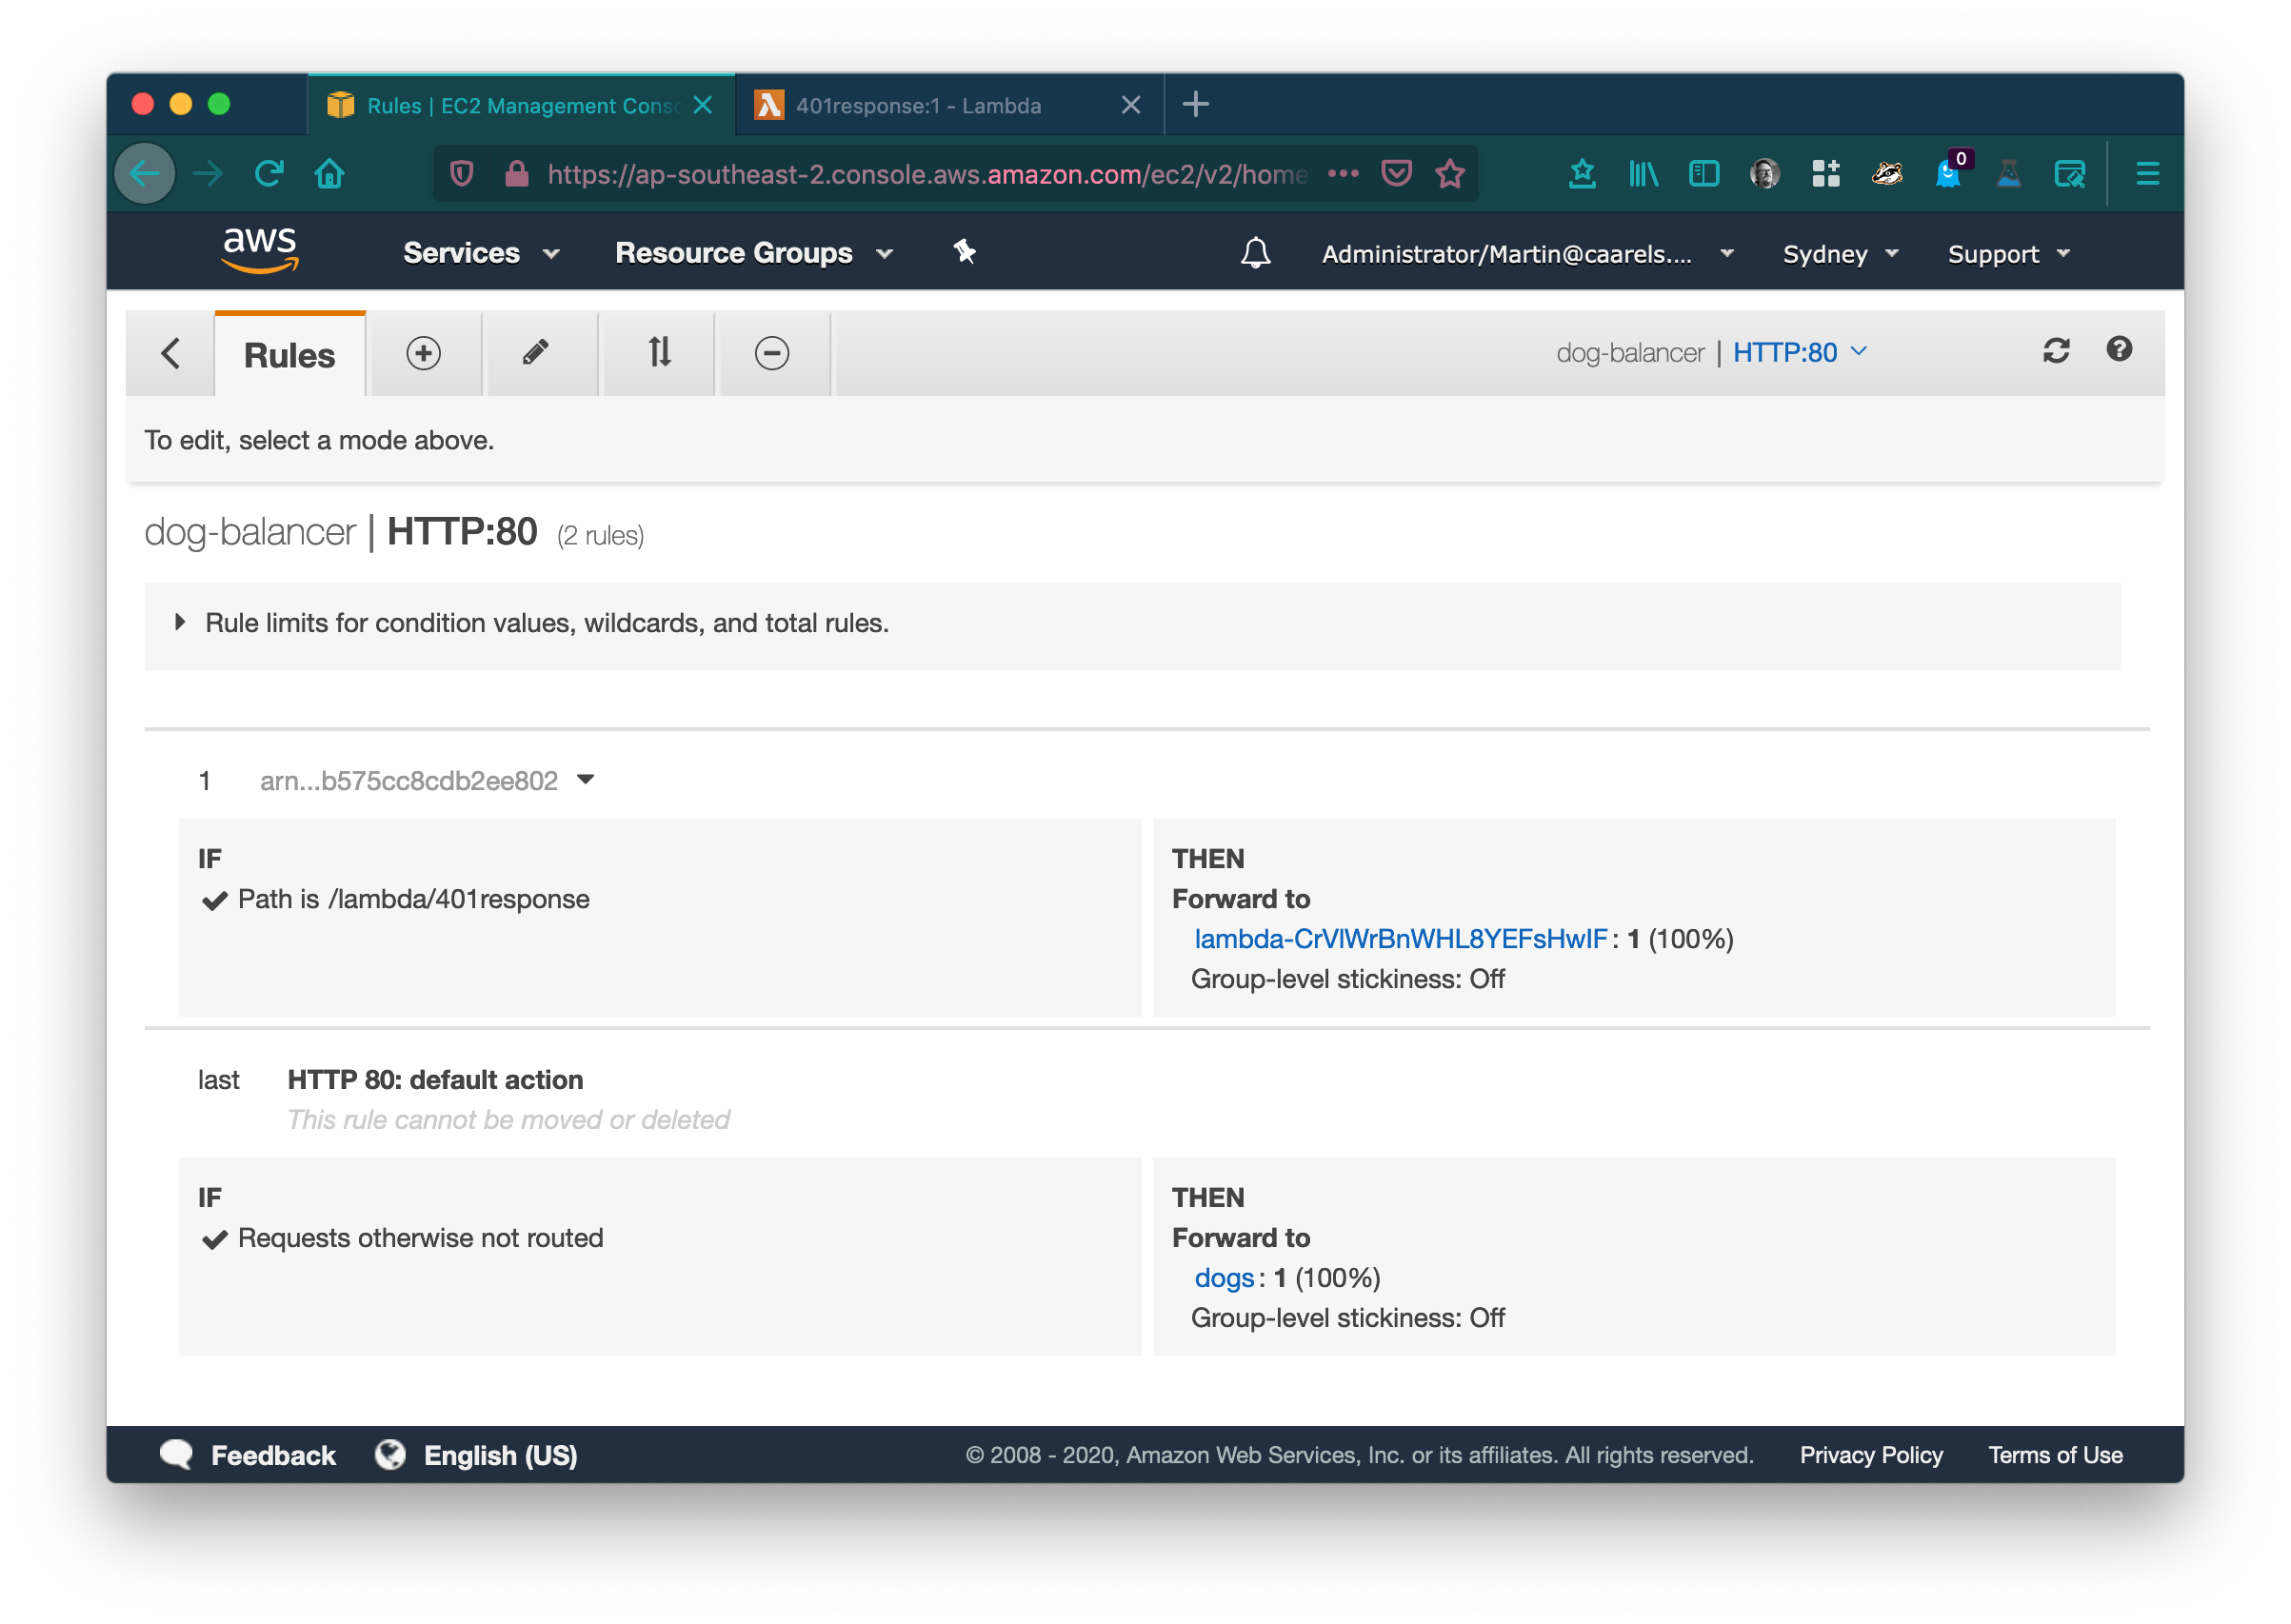
 Remove the Lambda rule, and modify the default rule to always forward to the 401 reponse lambda.
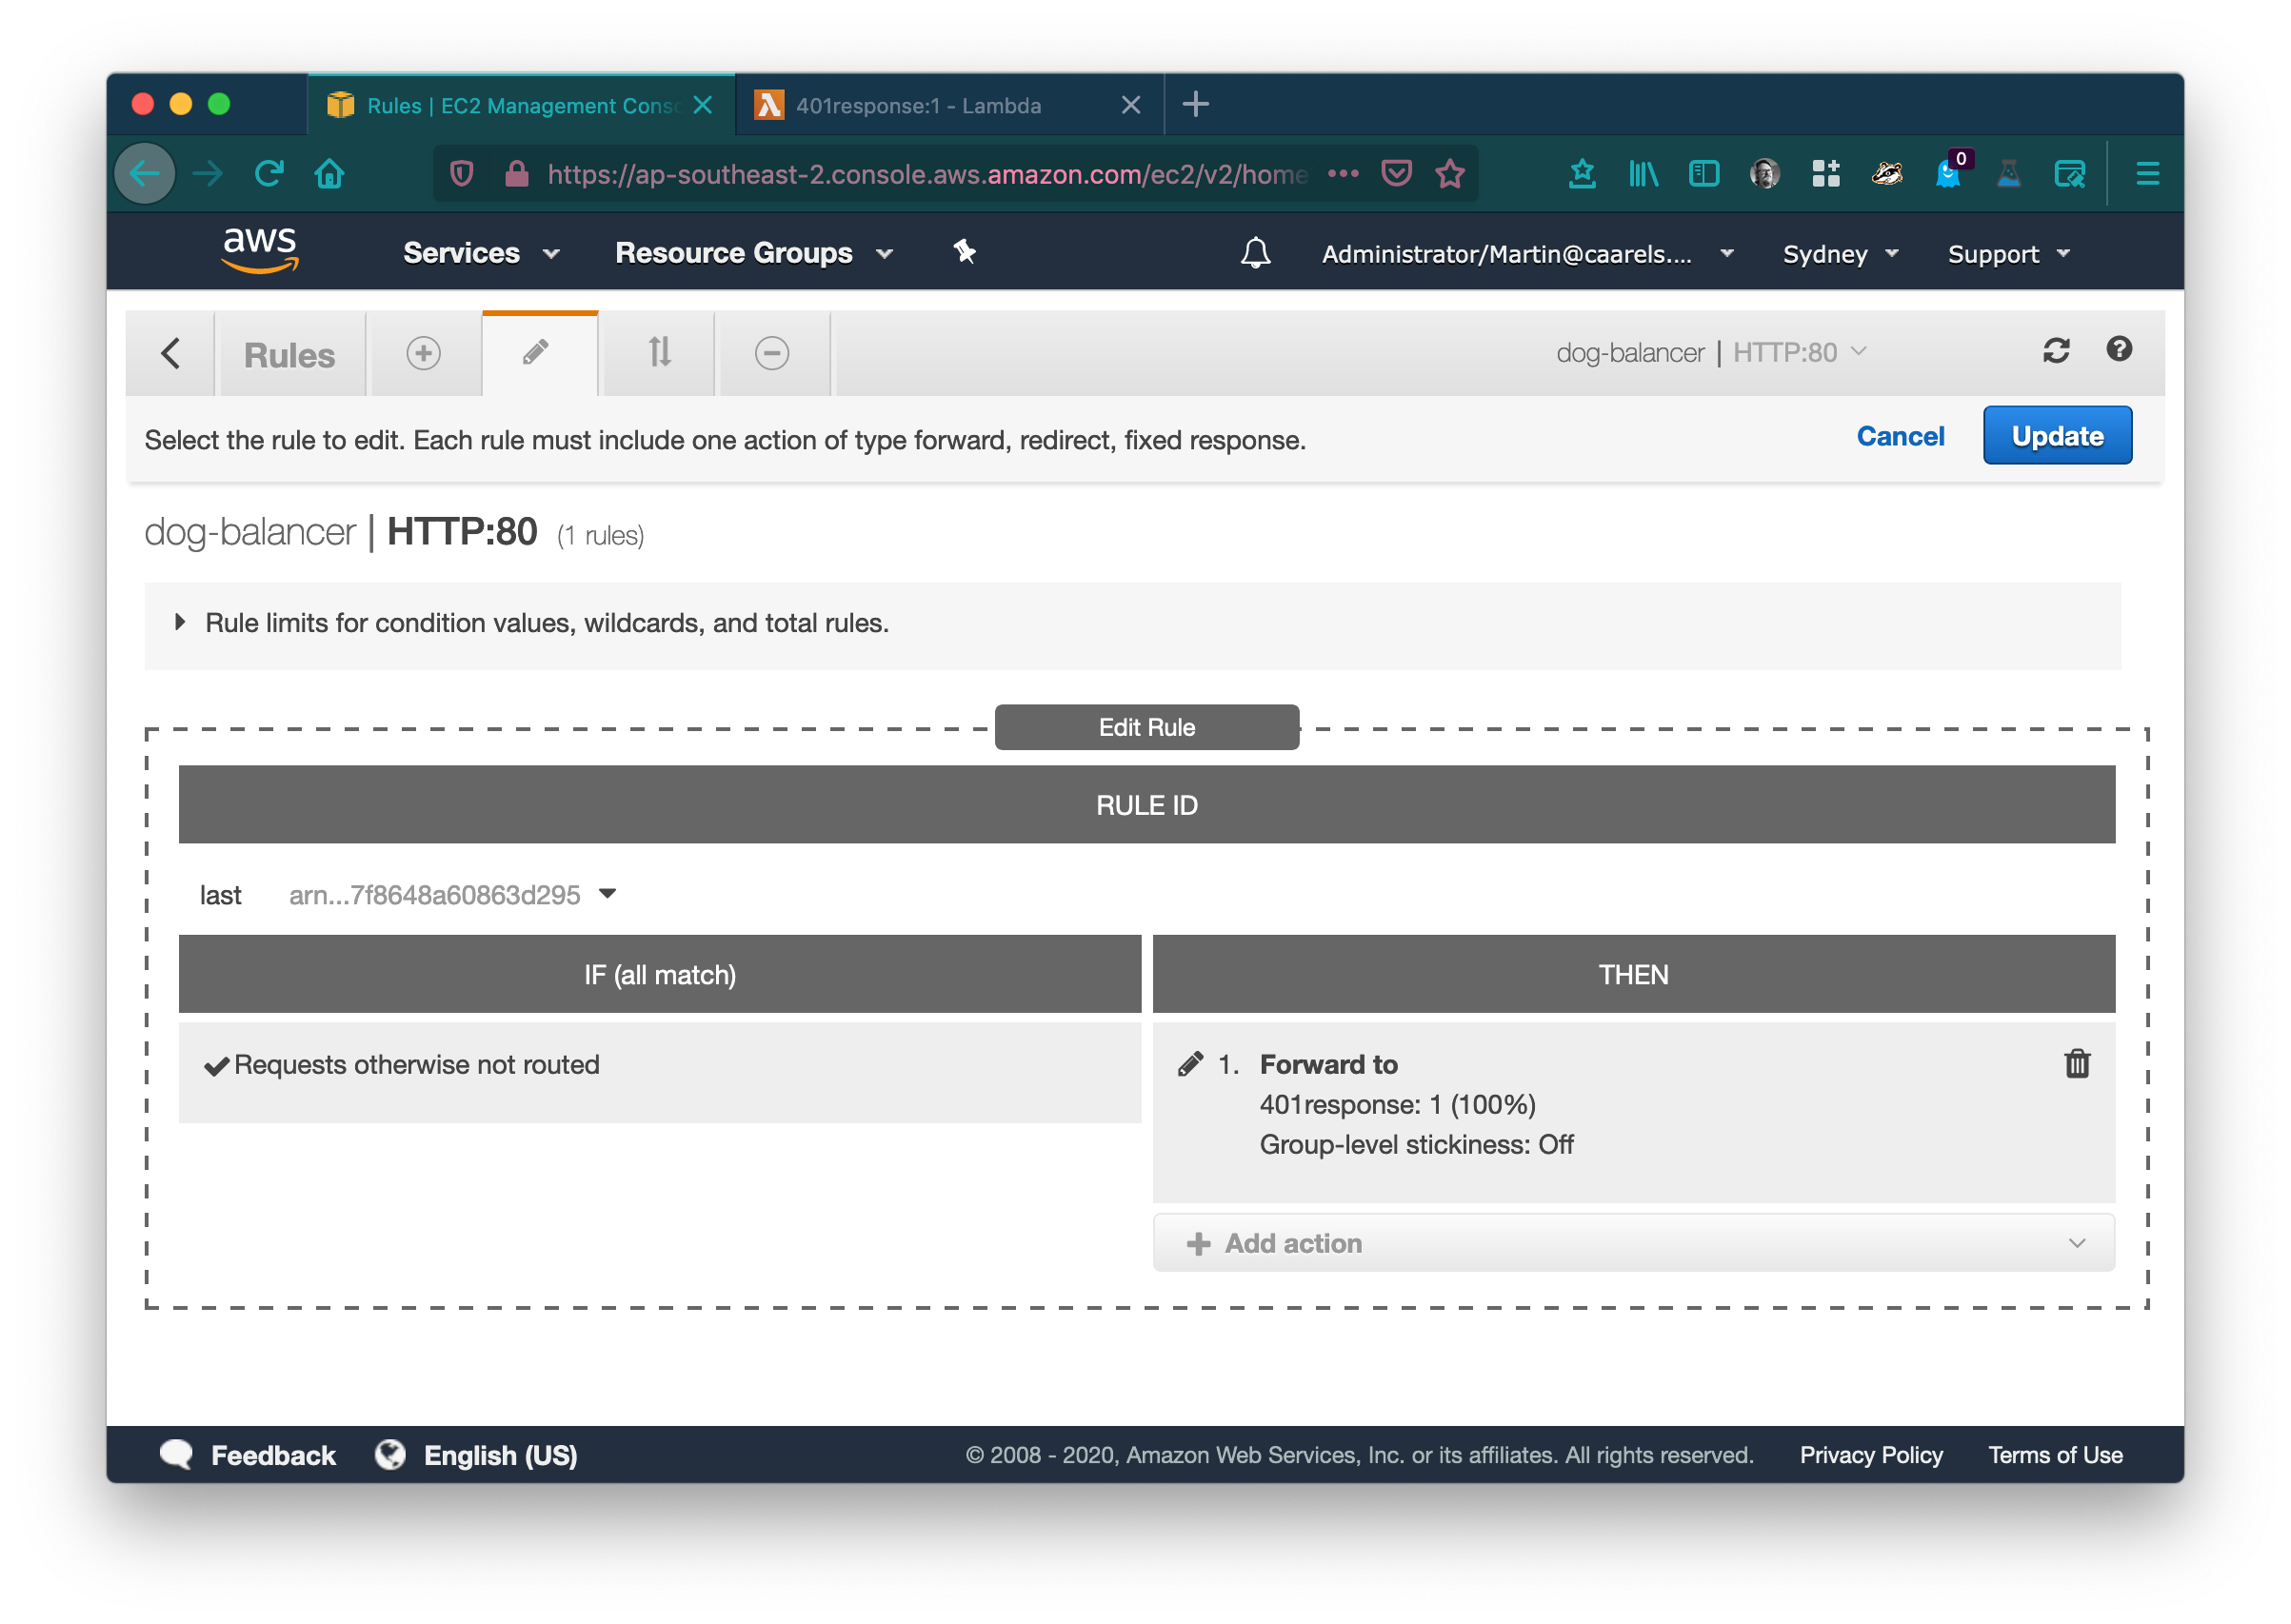 Click Update to save your changes.
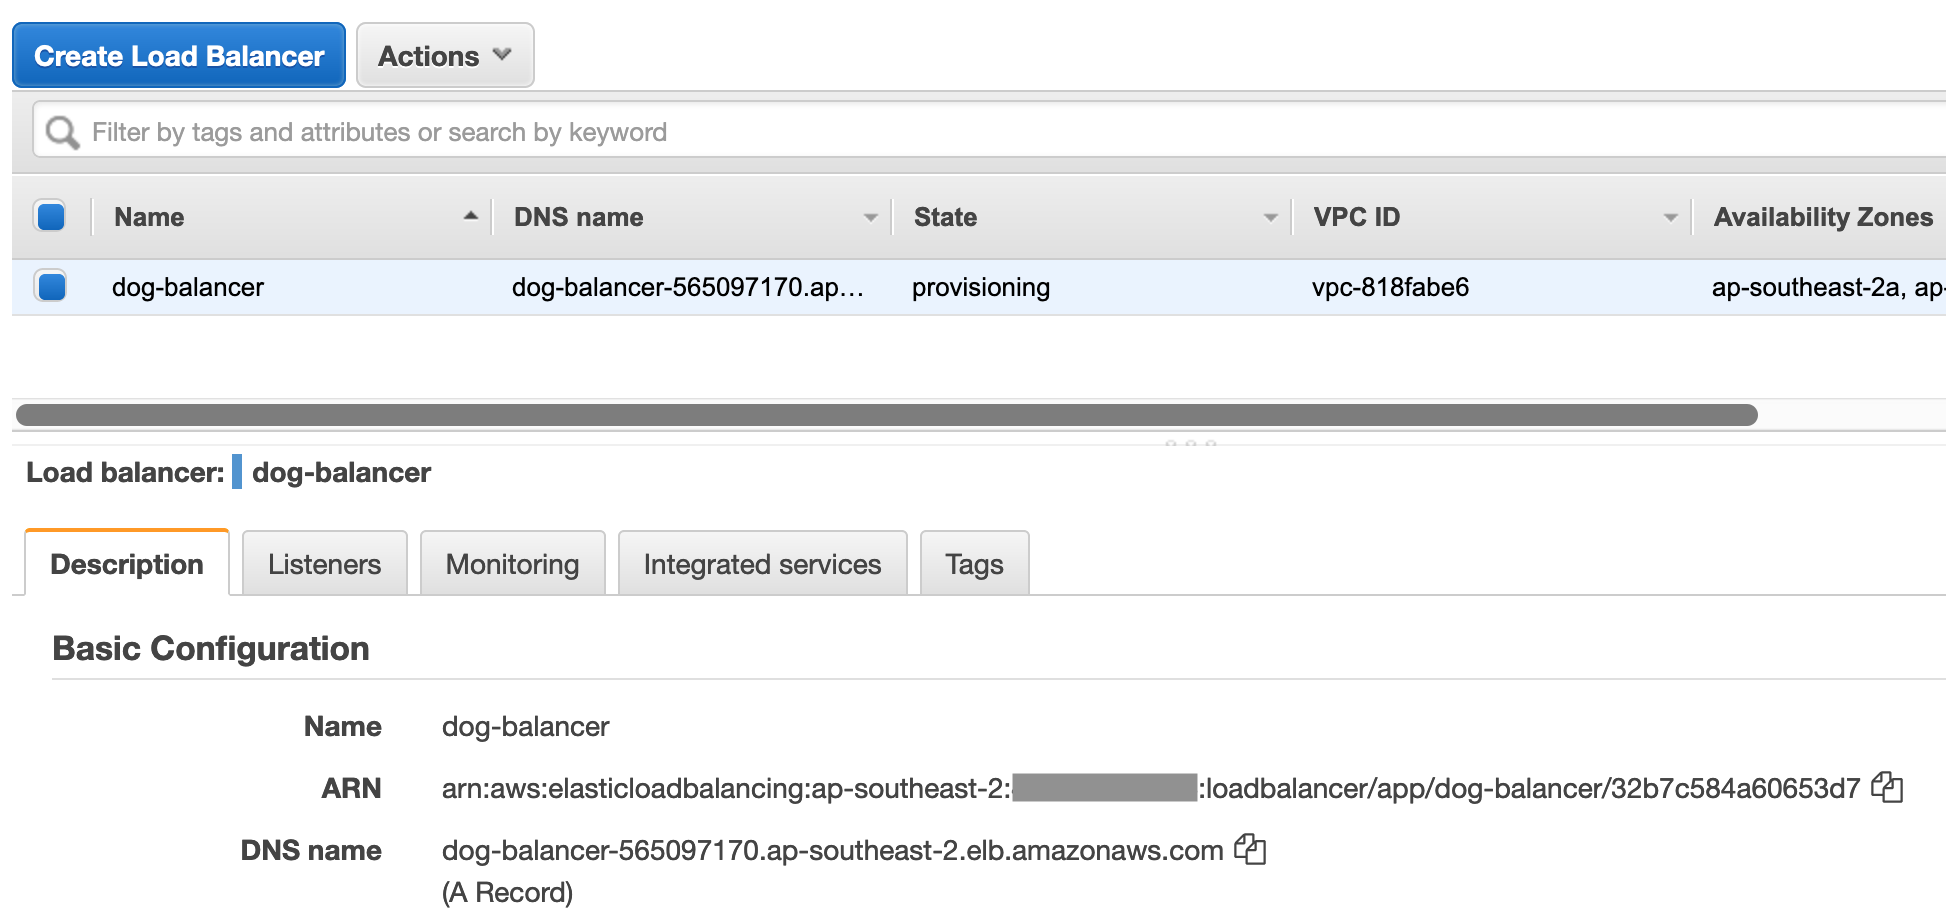
Let’s give that a quick test by browsing to your loadbalancer’s DNS Name which you can find in your loadbalancer’s Description tab.
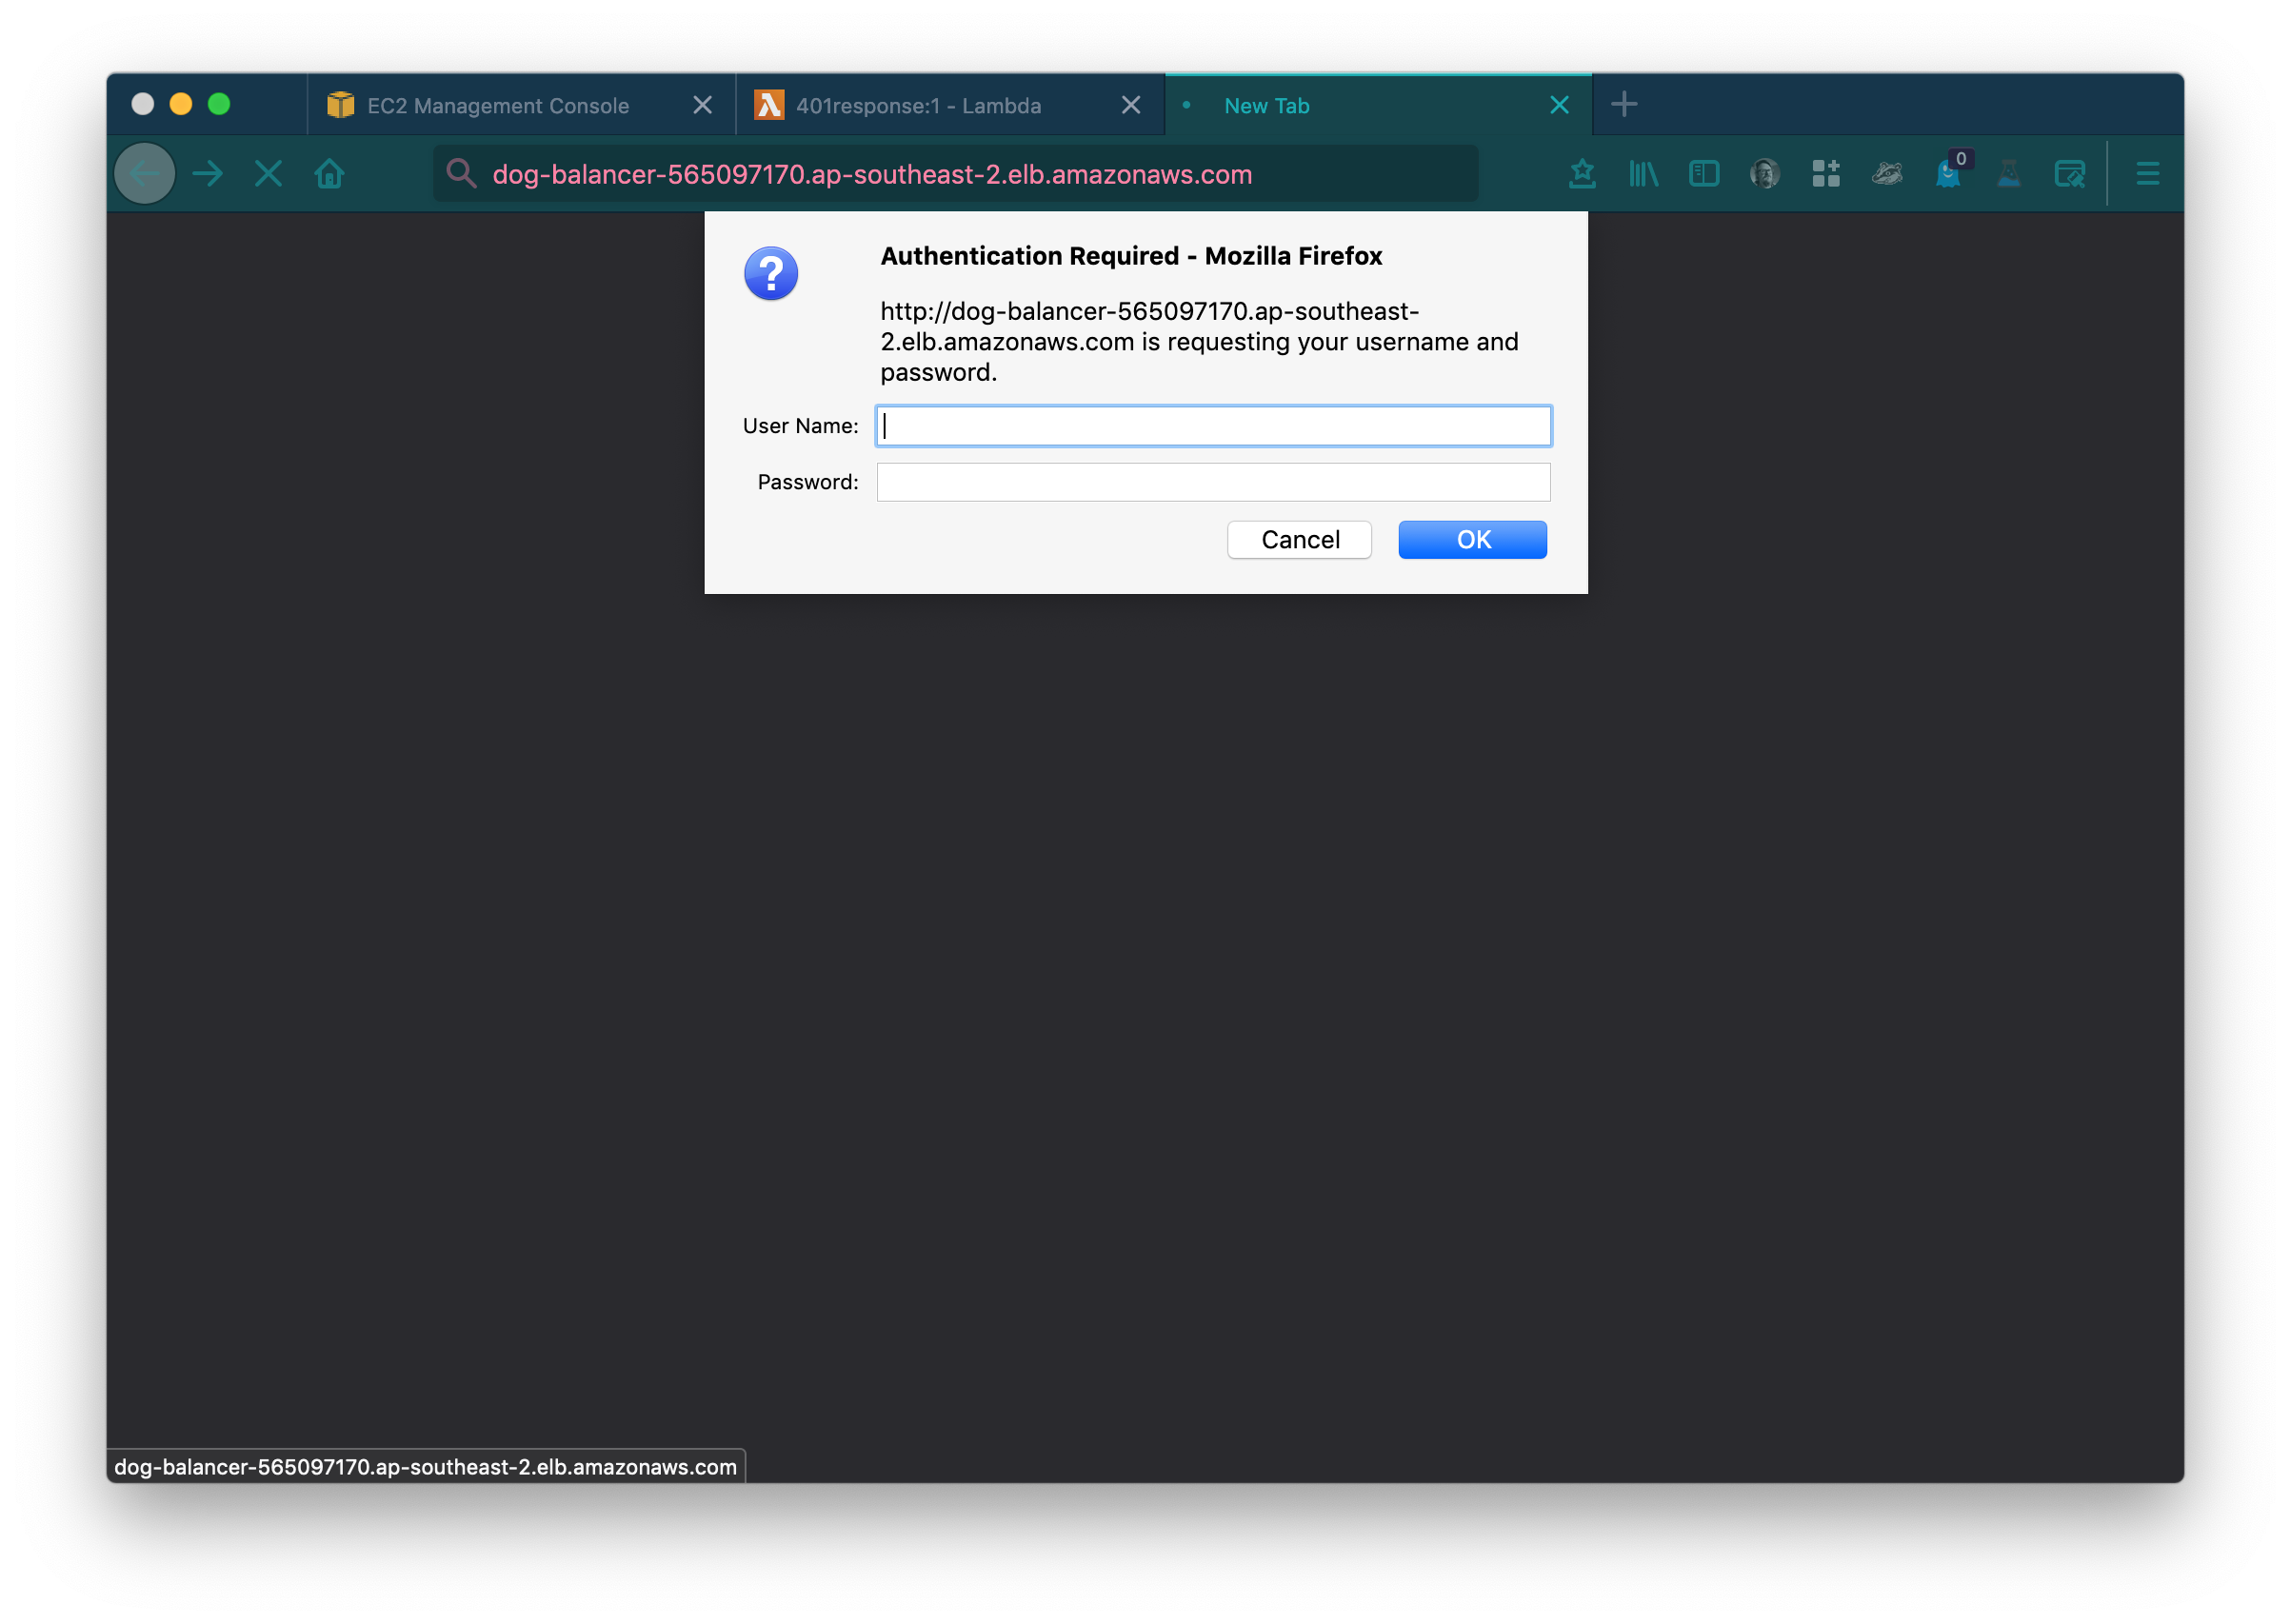
Success!
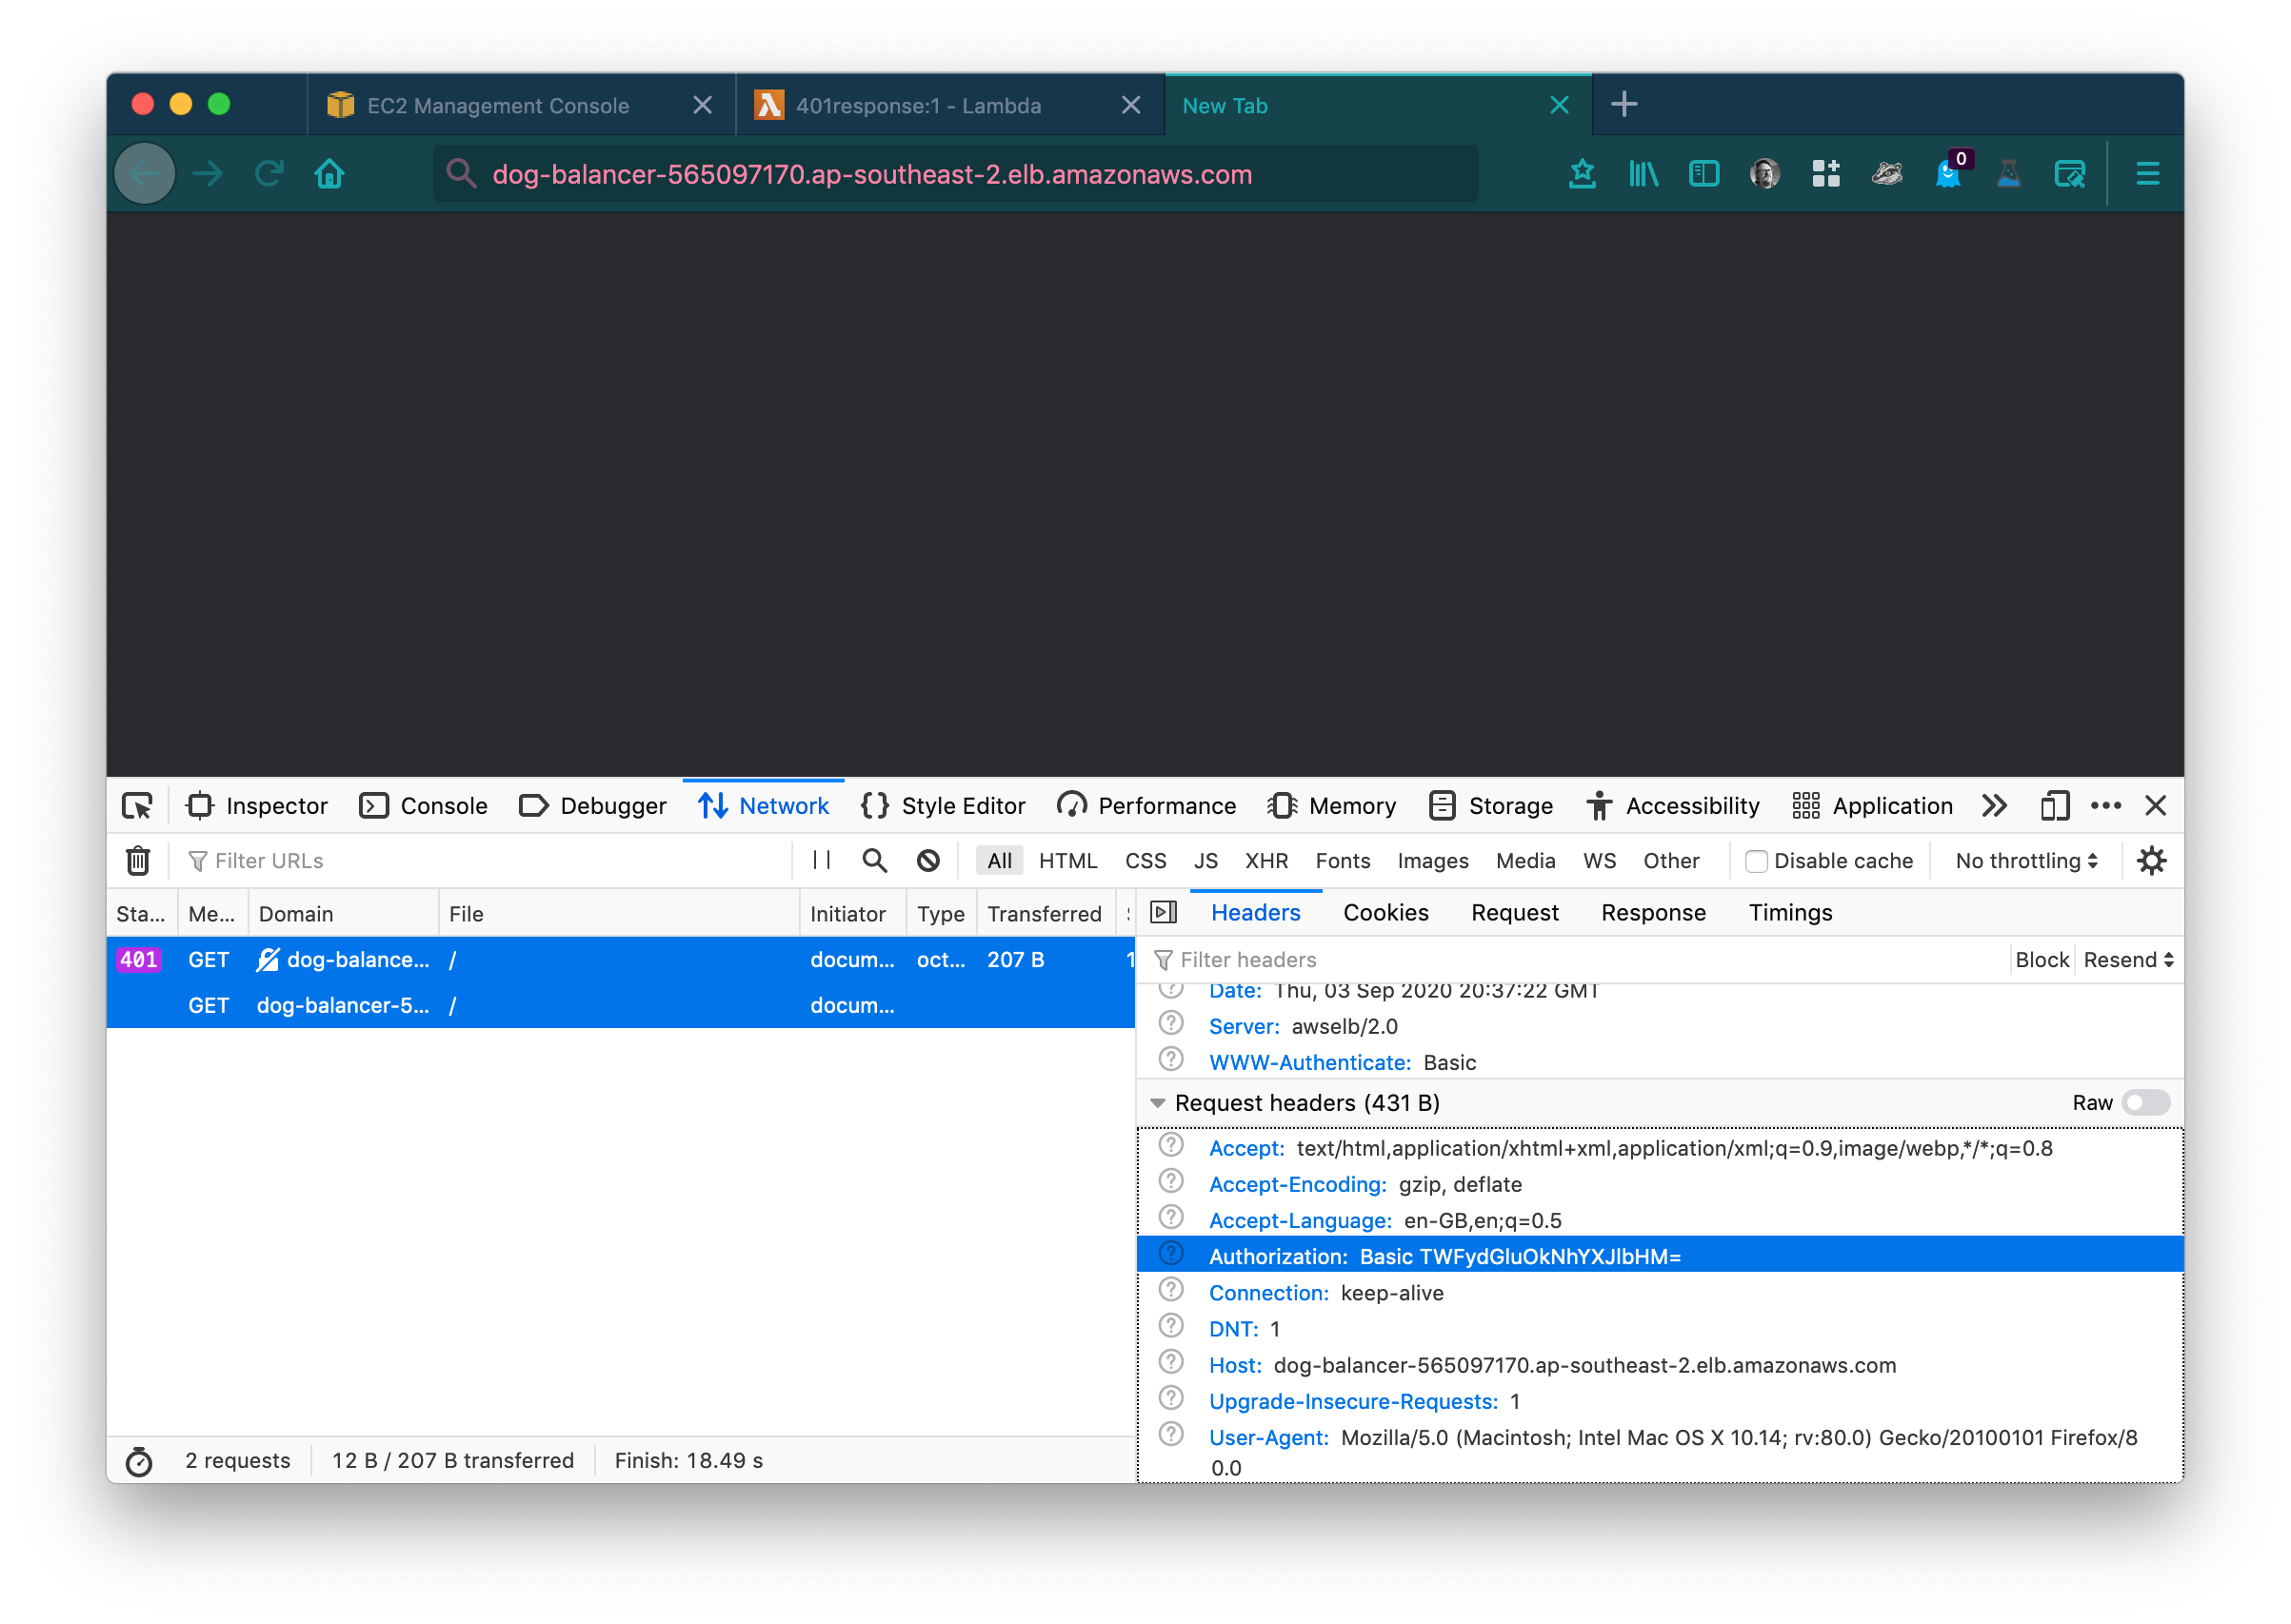
At this stage you can use your webbrowser to create the base64 Authorization header for you.
- Open a new tab in your web browser.
- Open Developer Mode
- Select the Network tab in developer mode.
- Open the DNS Name URL for your loadbalancer.
- Fill out a username / password.
- Click ok.
- Press escape.
- Select your request in the network tab of developer mode.
- Behold, the authorization request the browser created for you.
![usernamepass2]()
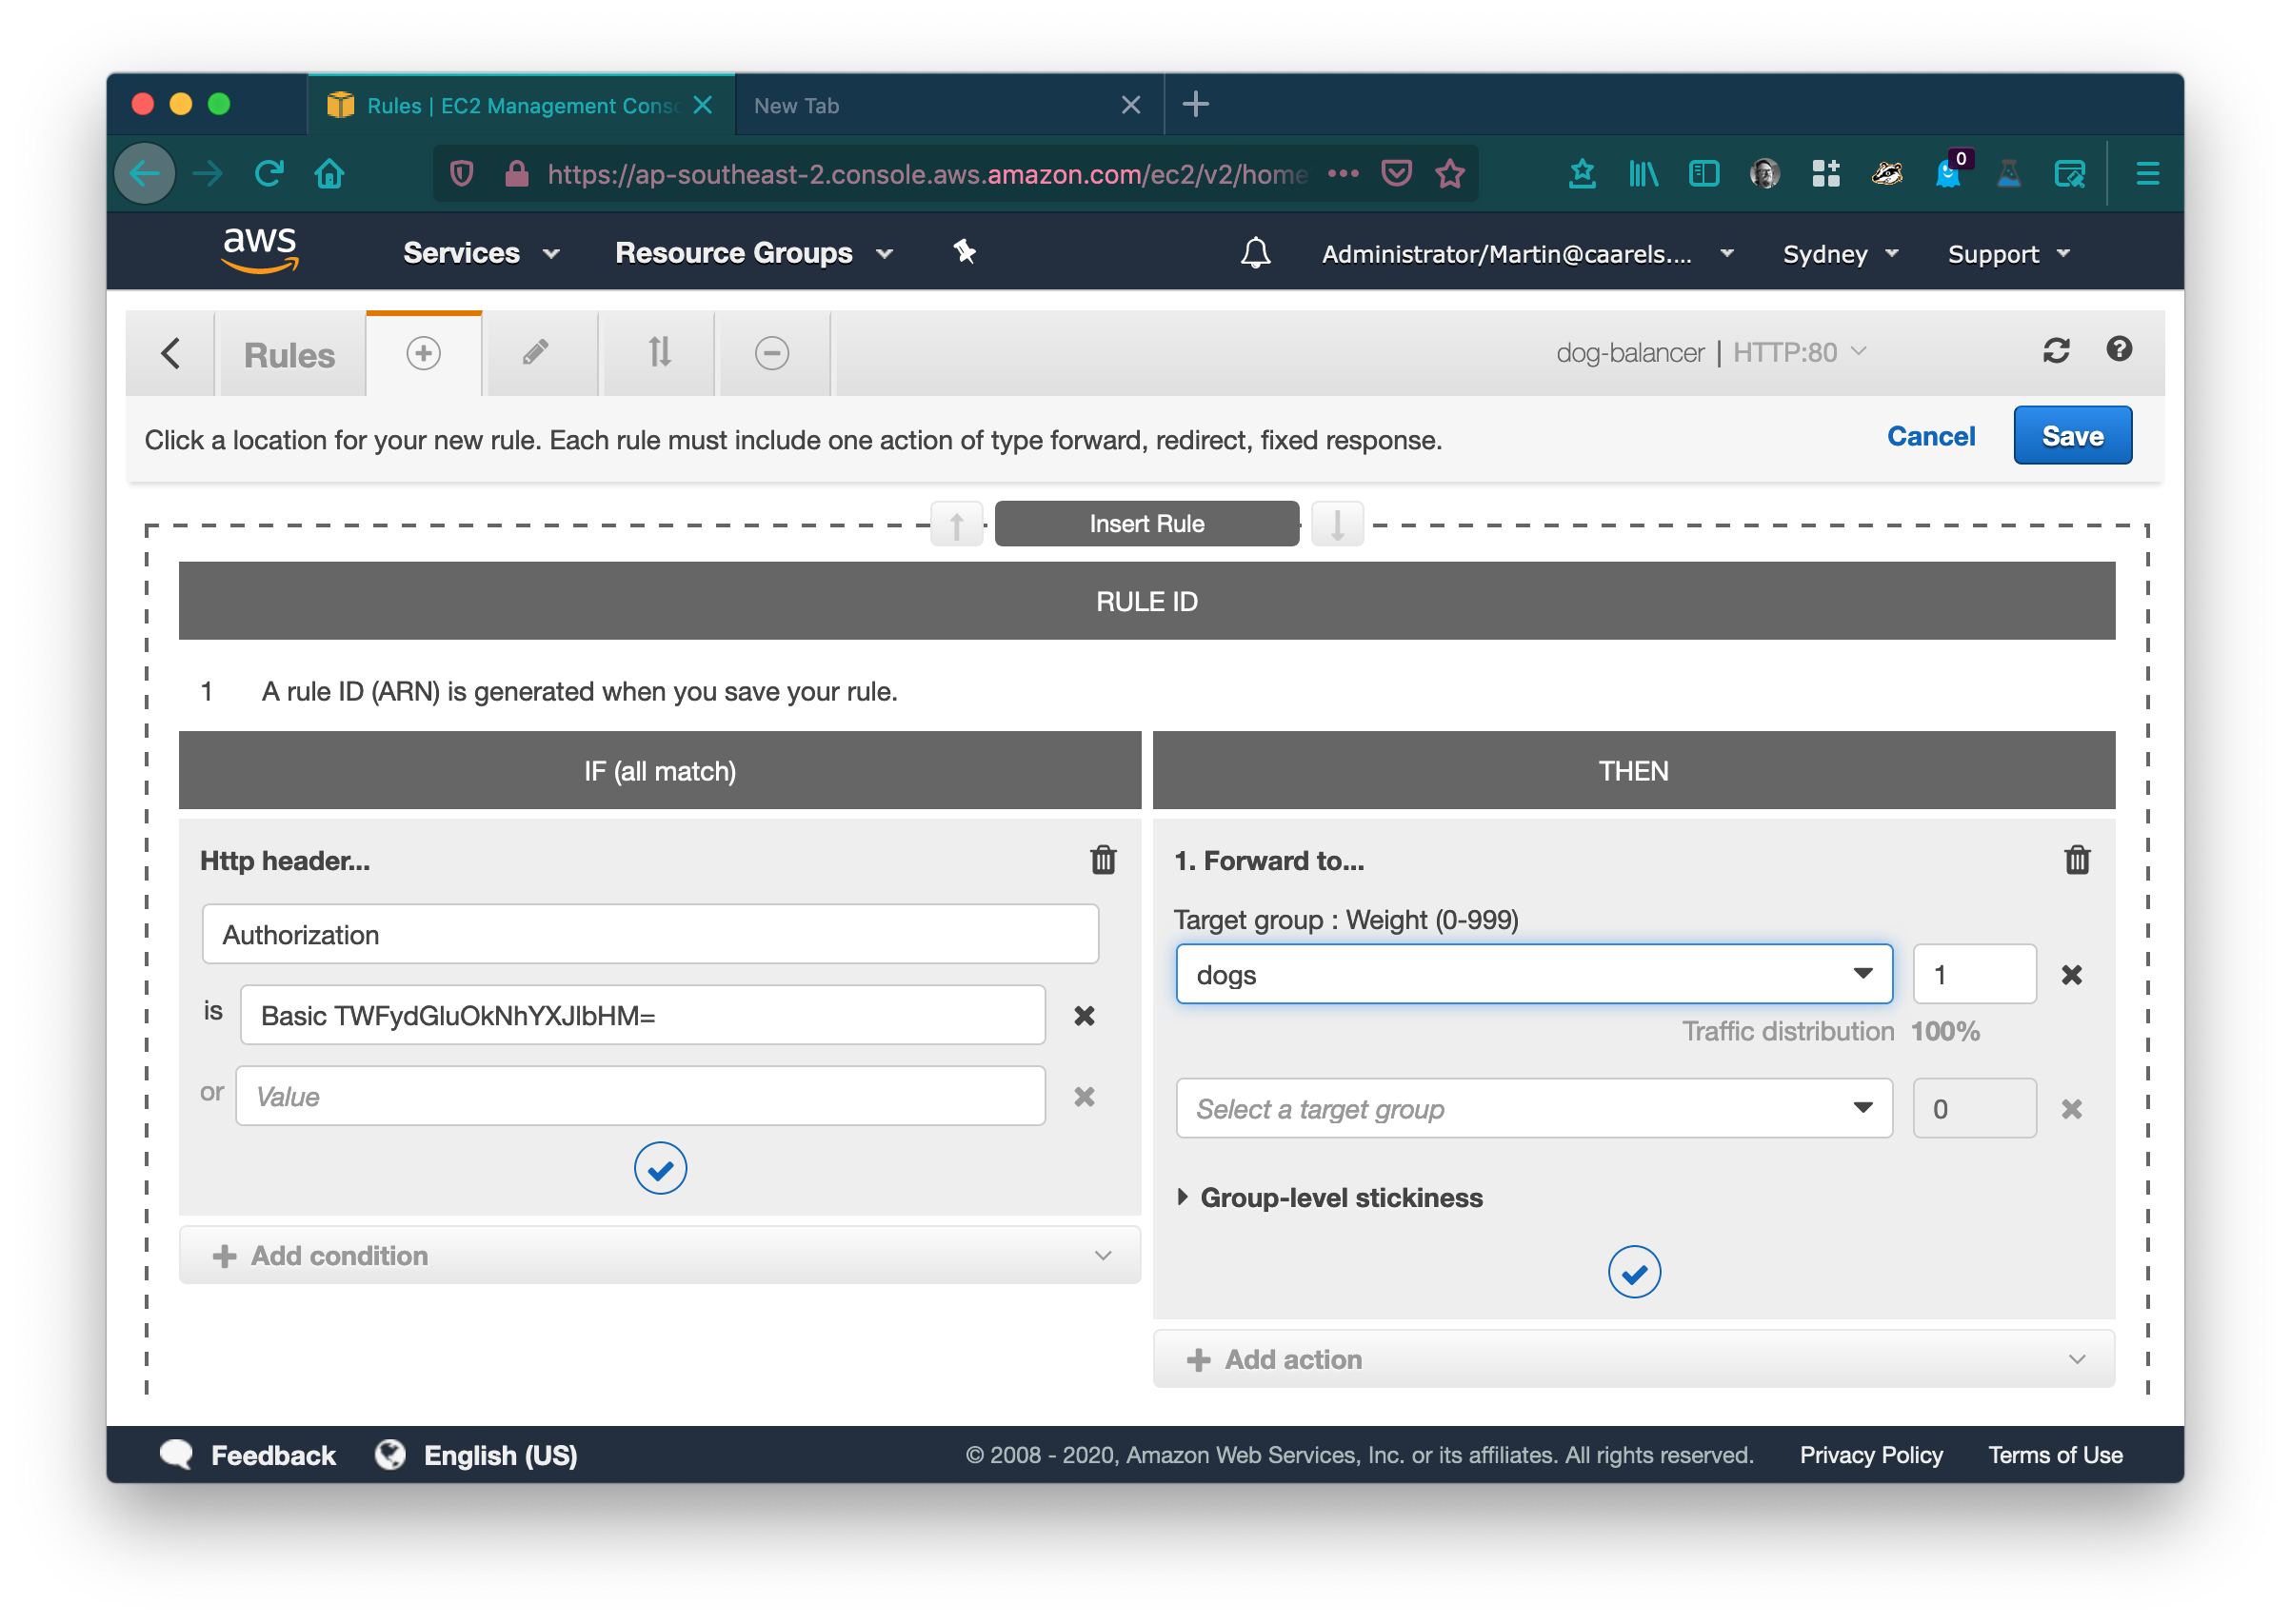
Return to your AWS console tab in your webbrowser, and return to the loadbalancer listener rules.
- Select the add rules tab.
- Click Insert rule.
- Click add condition.
- Select HTTP Header.
- Header type = Authorization
- Value = Basic TWFydGluOkNhYXJlbHM= (this is the value you generated using the webbrowser developer mode, simply copy/paste the value.)
- Click Add action.
- Select Forward to.
- Select the target group that contains your webbrowser[s].
- Click the blue checkmark to add the new rule.
![newrule]()
Test it by browsing to the loadbalancer DNS name url again, and using the username and password you used before:
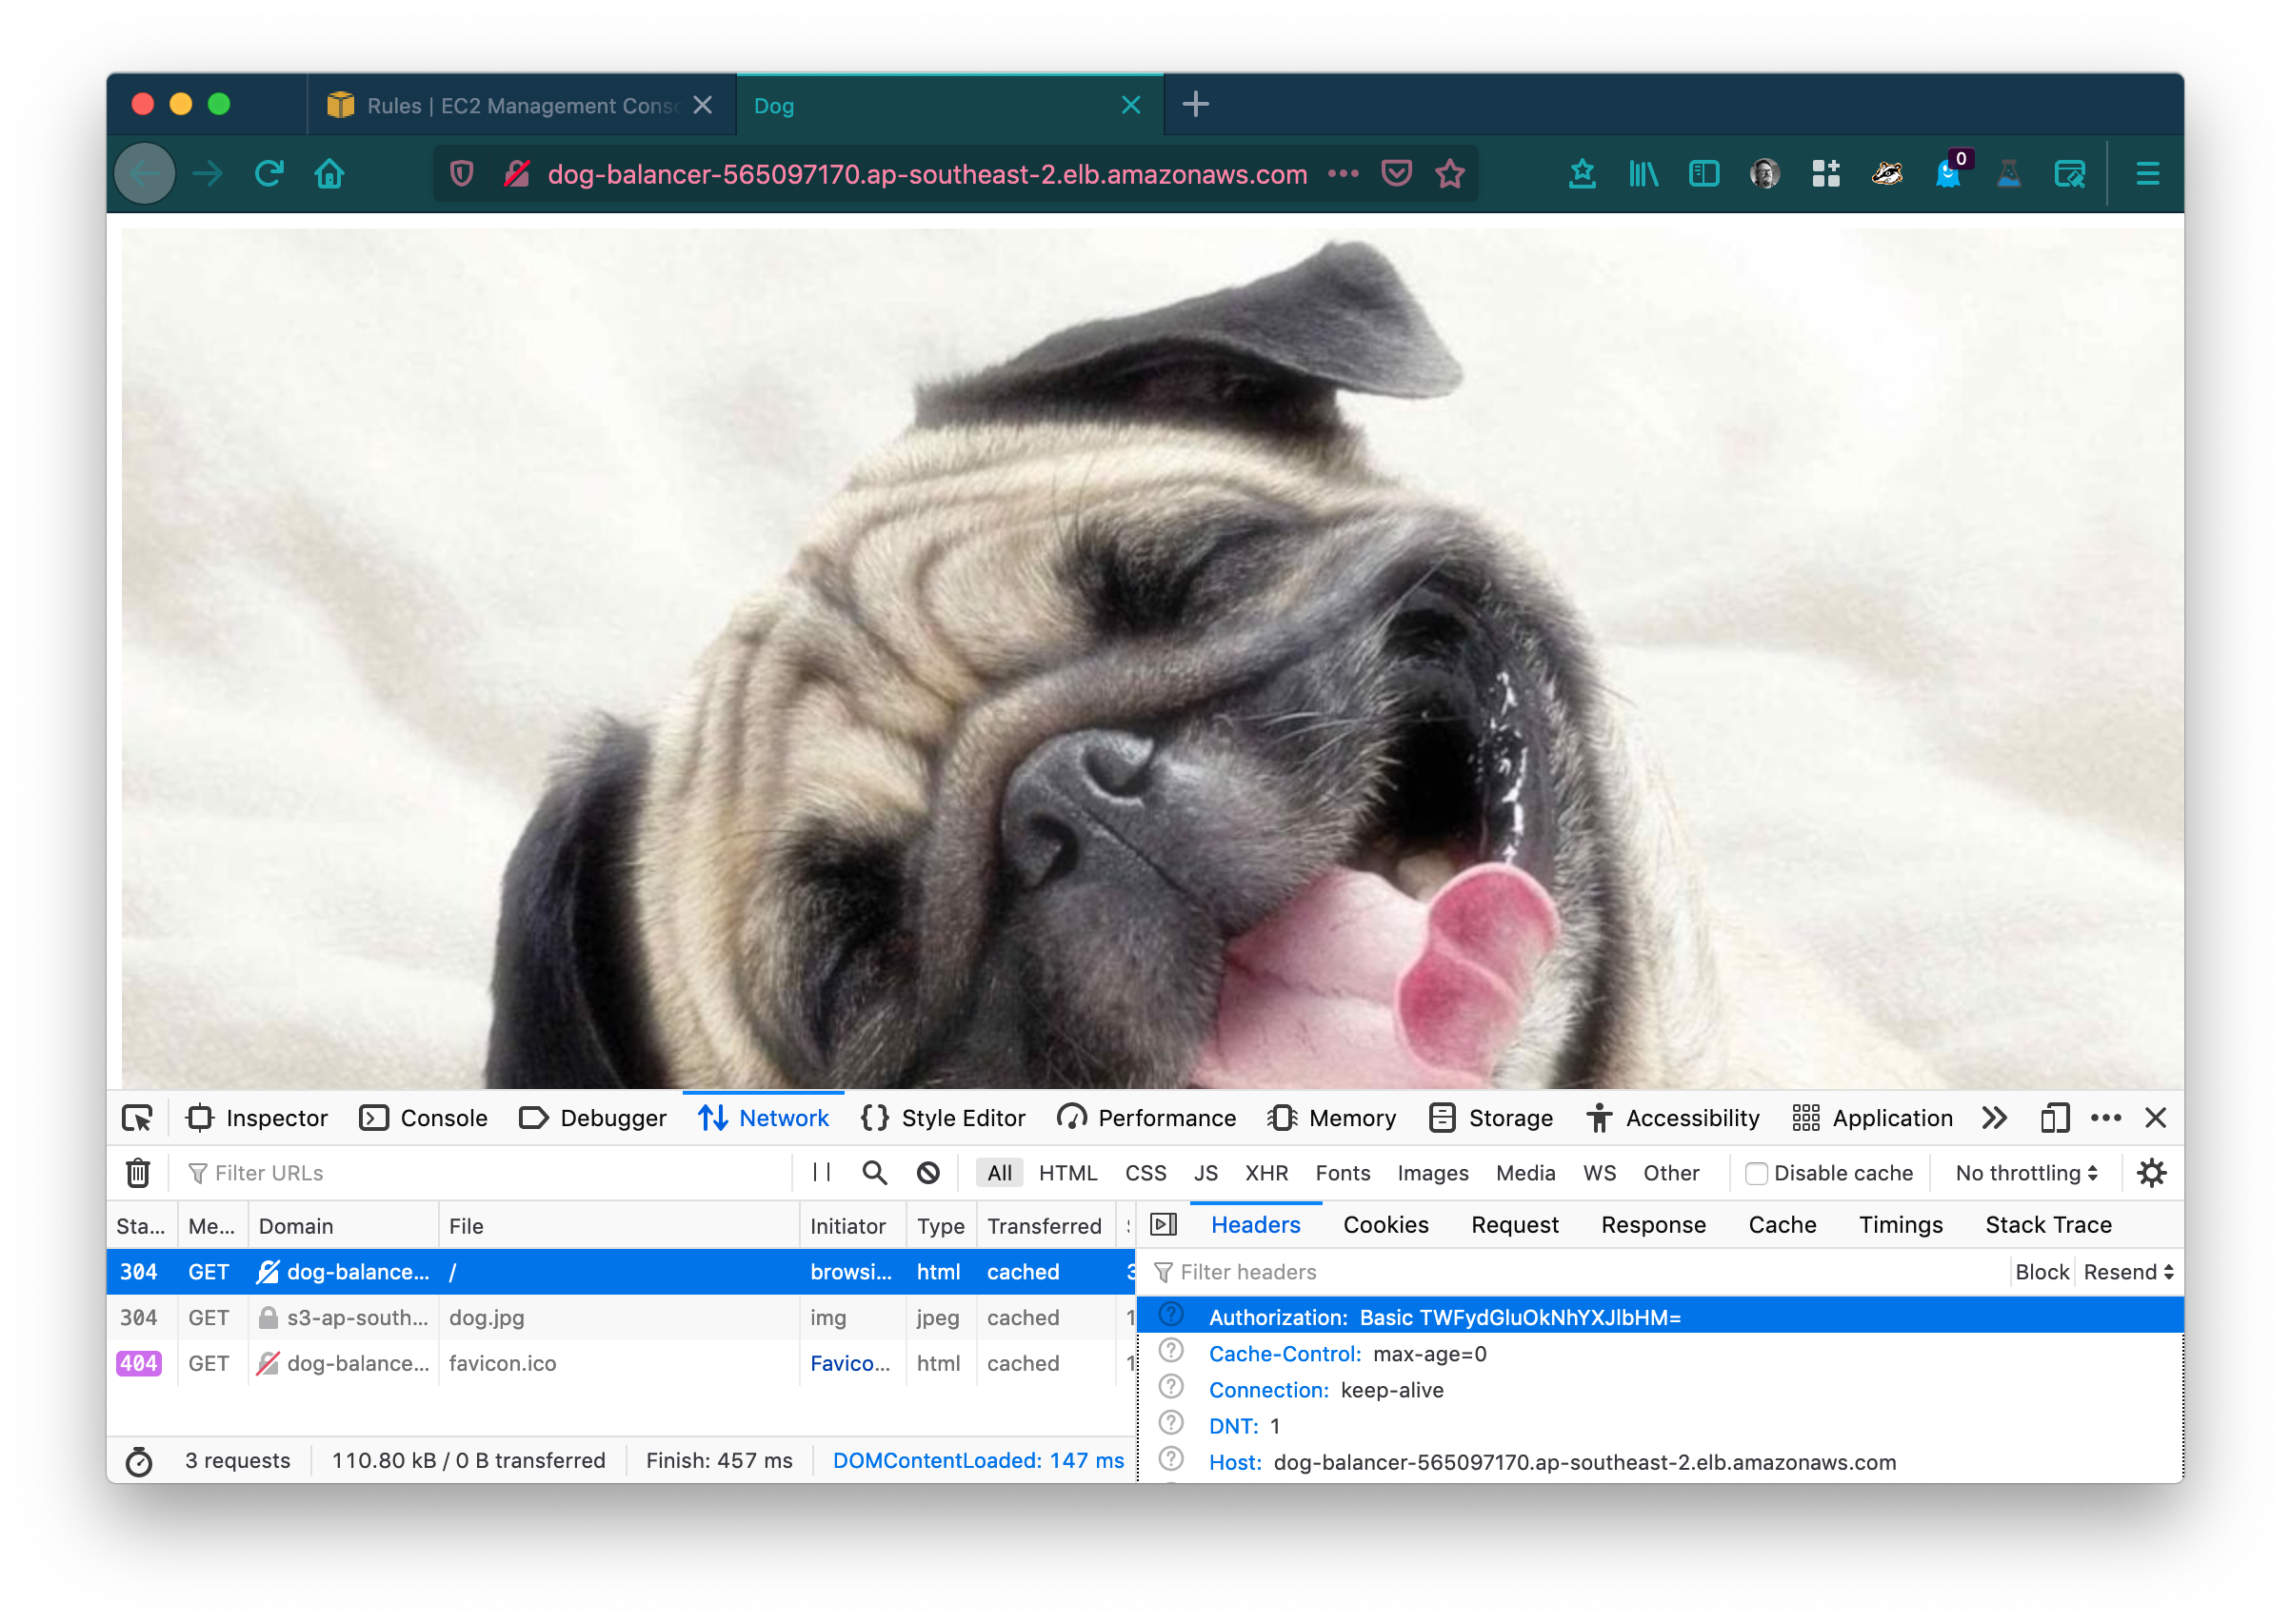
Nice.
Disclaimer
In no way does this replace a enterprise grade authentication system, do not use this to “protect” things that are important. You are responsible for the choices you make, please do not get annoyed with me if your servers catch fire because you implemented what I wrote in a blog.
Bonus:
You can have multiple “users” by adding extra rules in the loadbalancer listener rules.
Questions:
Why not just return a 401 response in the listener rules instead of having a lambda?
Great question, obviously you have been paying attention, yes it is true, you can have loadbalancer listener rules return basic status codes such as 404 and 401. Unfortunately without the inclusion of the WWW-Authenticate: Basic response header, your webbrowser will not prompt you with a username / password dialog, and you will simply be greeted with an empty screen.