I used to be a Linux Engineer, and it will come as no surprise that one of my most used tools was/is SSH. I love SSH, whether its for my homelab environment, AWS network access, or copying stuff using rsync, the possibilities of SSH are endless. (foreshadowing) SSH is like the VIP all access pass to your servers, but with top-notch security and encryption so tight, it’s like wrapping your data in a bulletproof vest. And setting it up? Piece of cake once you get the hang of it. So yeah, I am a big fan of SSH.
Bastion hosts though, not so much.
Those of us that use SSH will inevitably have wrestled with “Bastion Hosts” or “Gateway servers” or “Jump Boxes”. Whatever you call them, they are a permanent exposure to the unwashed masses of the internet, or if you are using VPN’s VLAN’s they are still exposed to Tommy the intern who will think he is on his test machine and kill the entire thing…
Bastion Hosts come with administrative overhead, they need to be secure, up-to-date with patching and run pretty much continuously, so as with all things, there is a cost involved with running them.
What’s the alternative?
Well, for your AWS environment now there is Amazon EC2 Instance Connect
Setting it up
Assuming you have a VPC with a bastion host set up already, here are the steps for implementing Amazon EC2 Instance Connect.
Security Group
In order for the EC2 Instance Connect endpoint to be allowed to connect to the EC2 instances we need to configure security groups that will allow this to happen. I like to create a single “self referencing” security group that allows communication between the endpoint and the instances on all ports.
Create a new security group called ec2-instance-connect
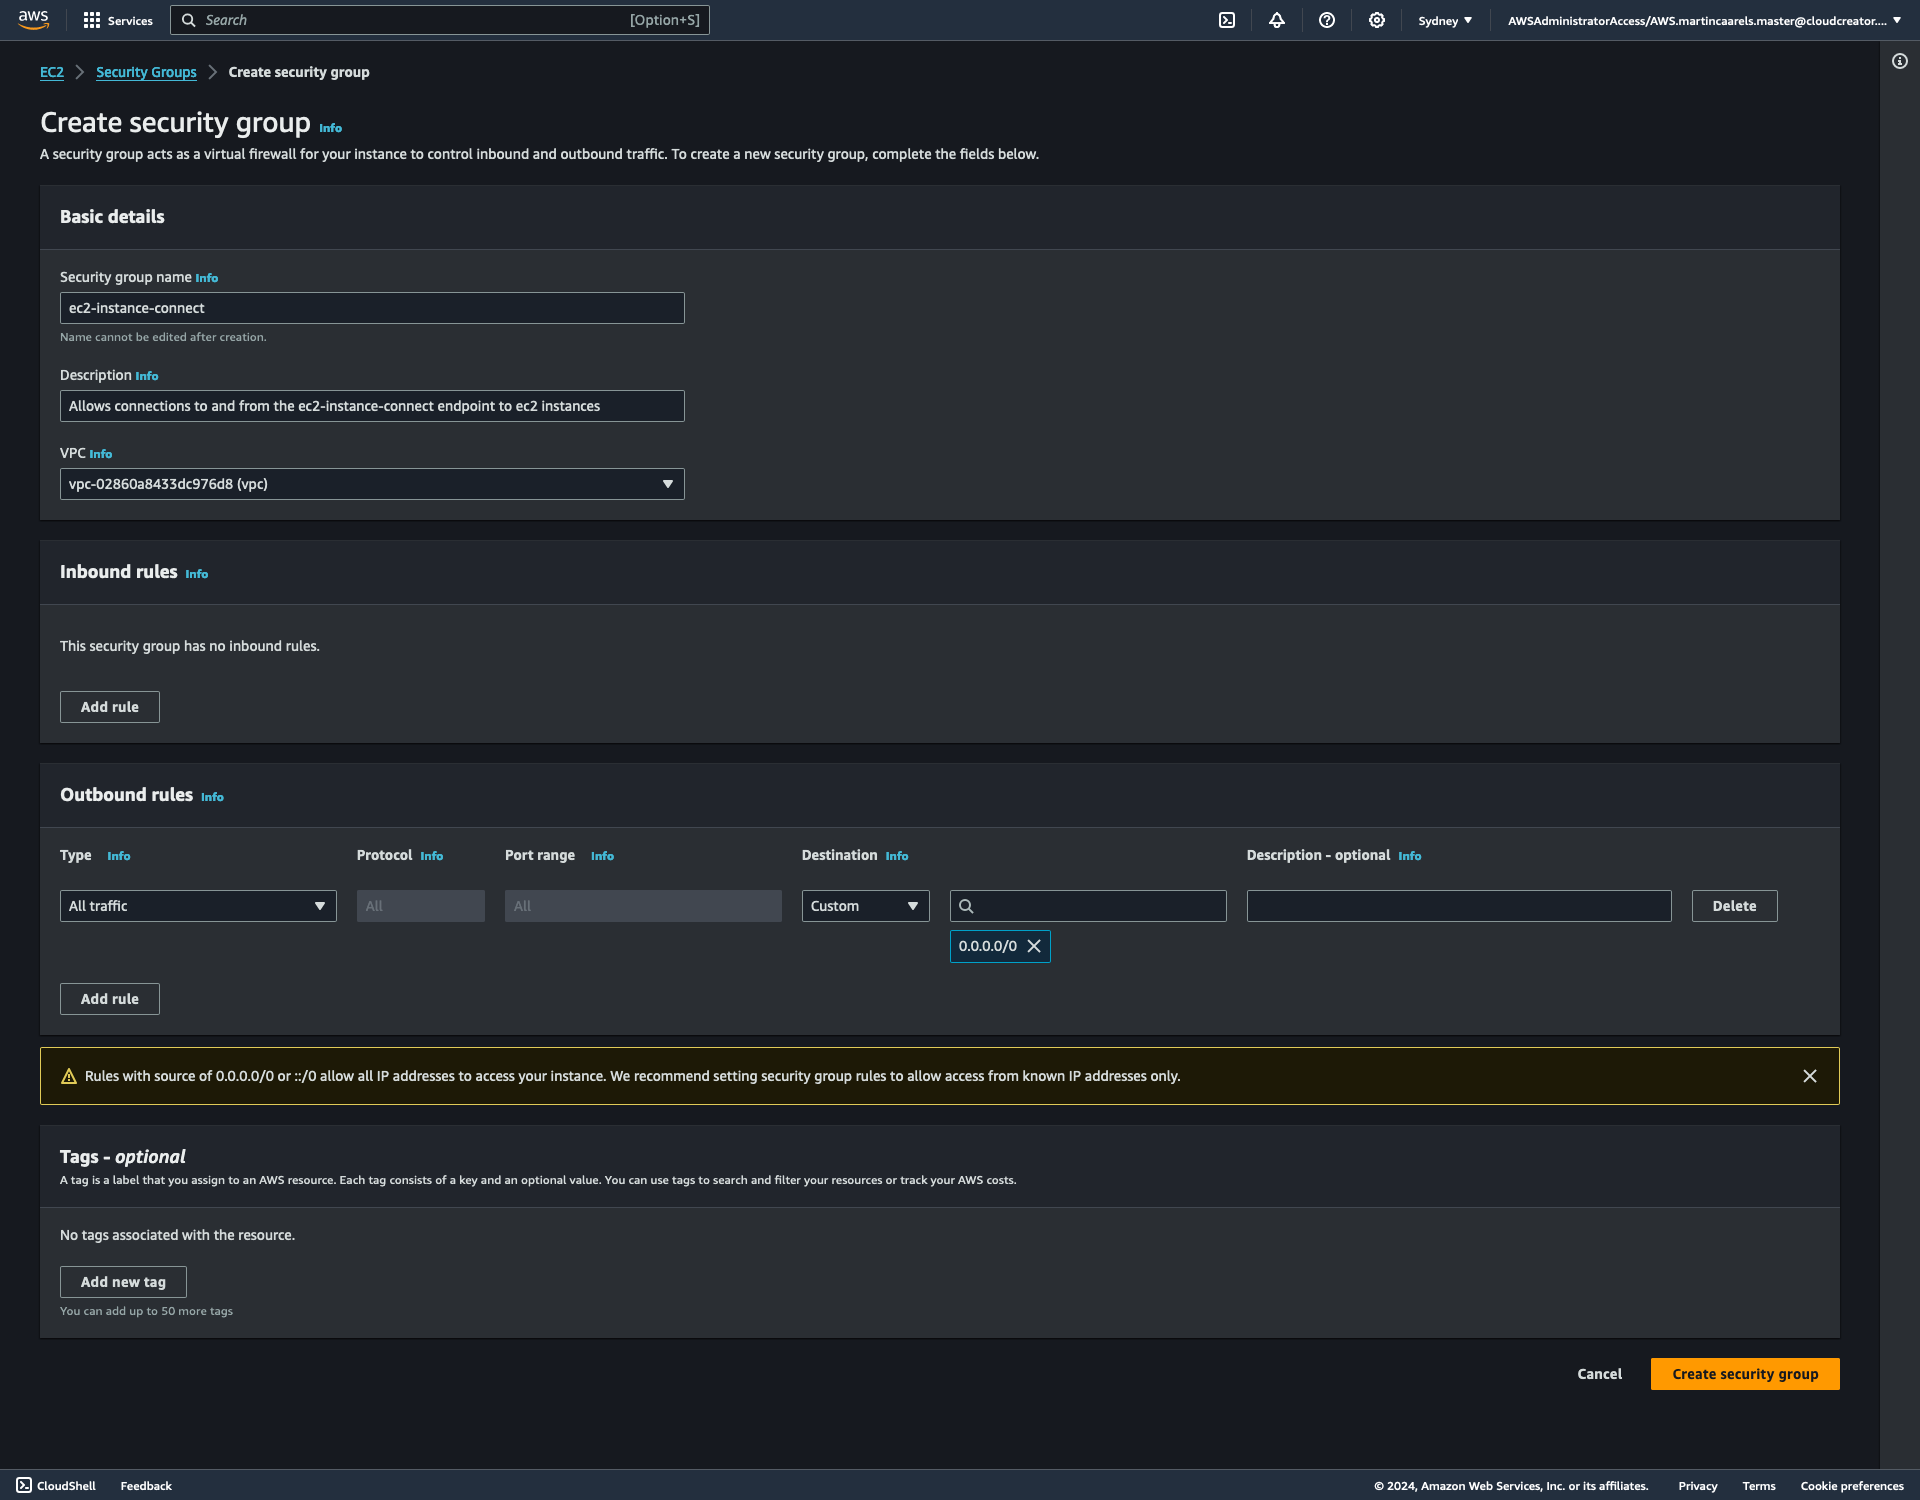 Do not define any inbound rules, after its creation edit the security group and add the following inbound rule:
1
2
3
Type: All
Ports: ALl
Source: SELF
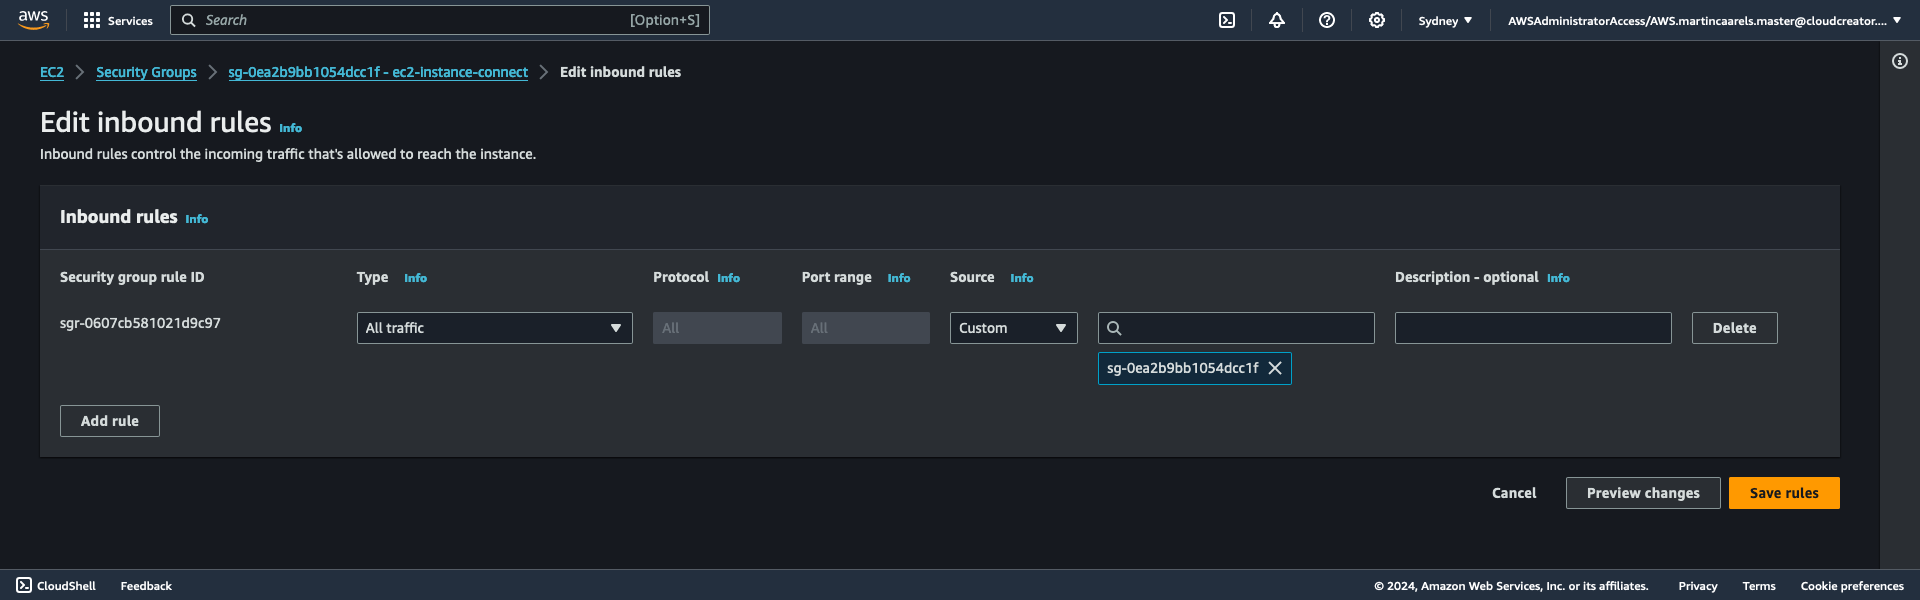 This is why we have to create it first and then modify it after creation, in order to reference itself, the security group needs a security group ID, you can see it at the top in the context menu:
EC2 > Security Groups > sg-0ea2b9bb1054dcc1f - ec2-instance-connect
The security group ID is the bit starting with sg-
In the creation page of the security group it does not yet have an ID, so it can not reference itself quite yet.
What this does is very cool, any network entity in AWS that has this security group applied to it will be allowed to communicate on all ports with any other network entity that is in this security group.
Endpoint
Go to your VPC management page and go to the endpoints section, create a new endpoint and choose the following settings:
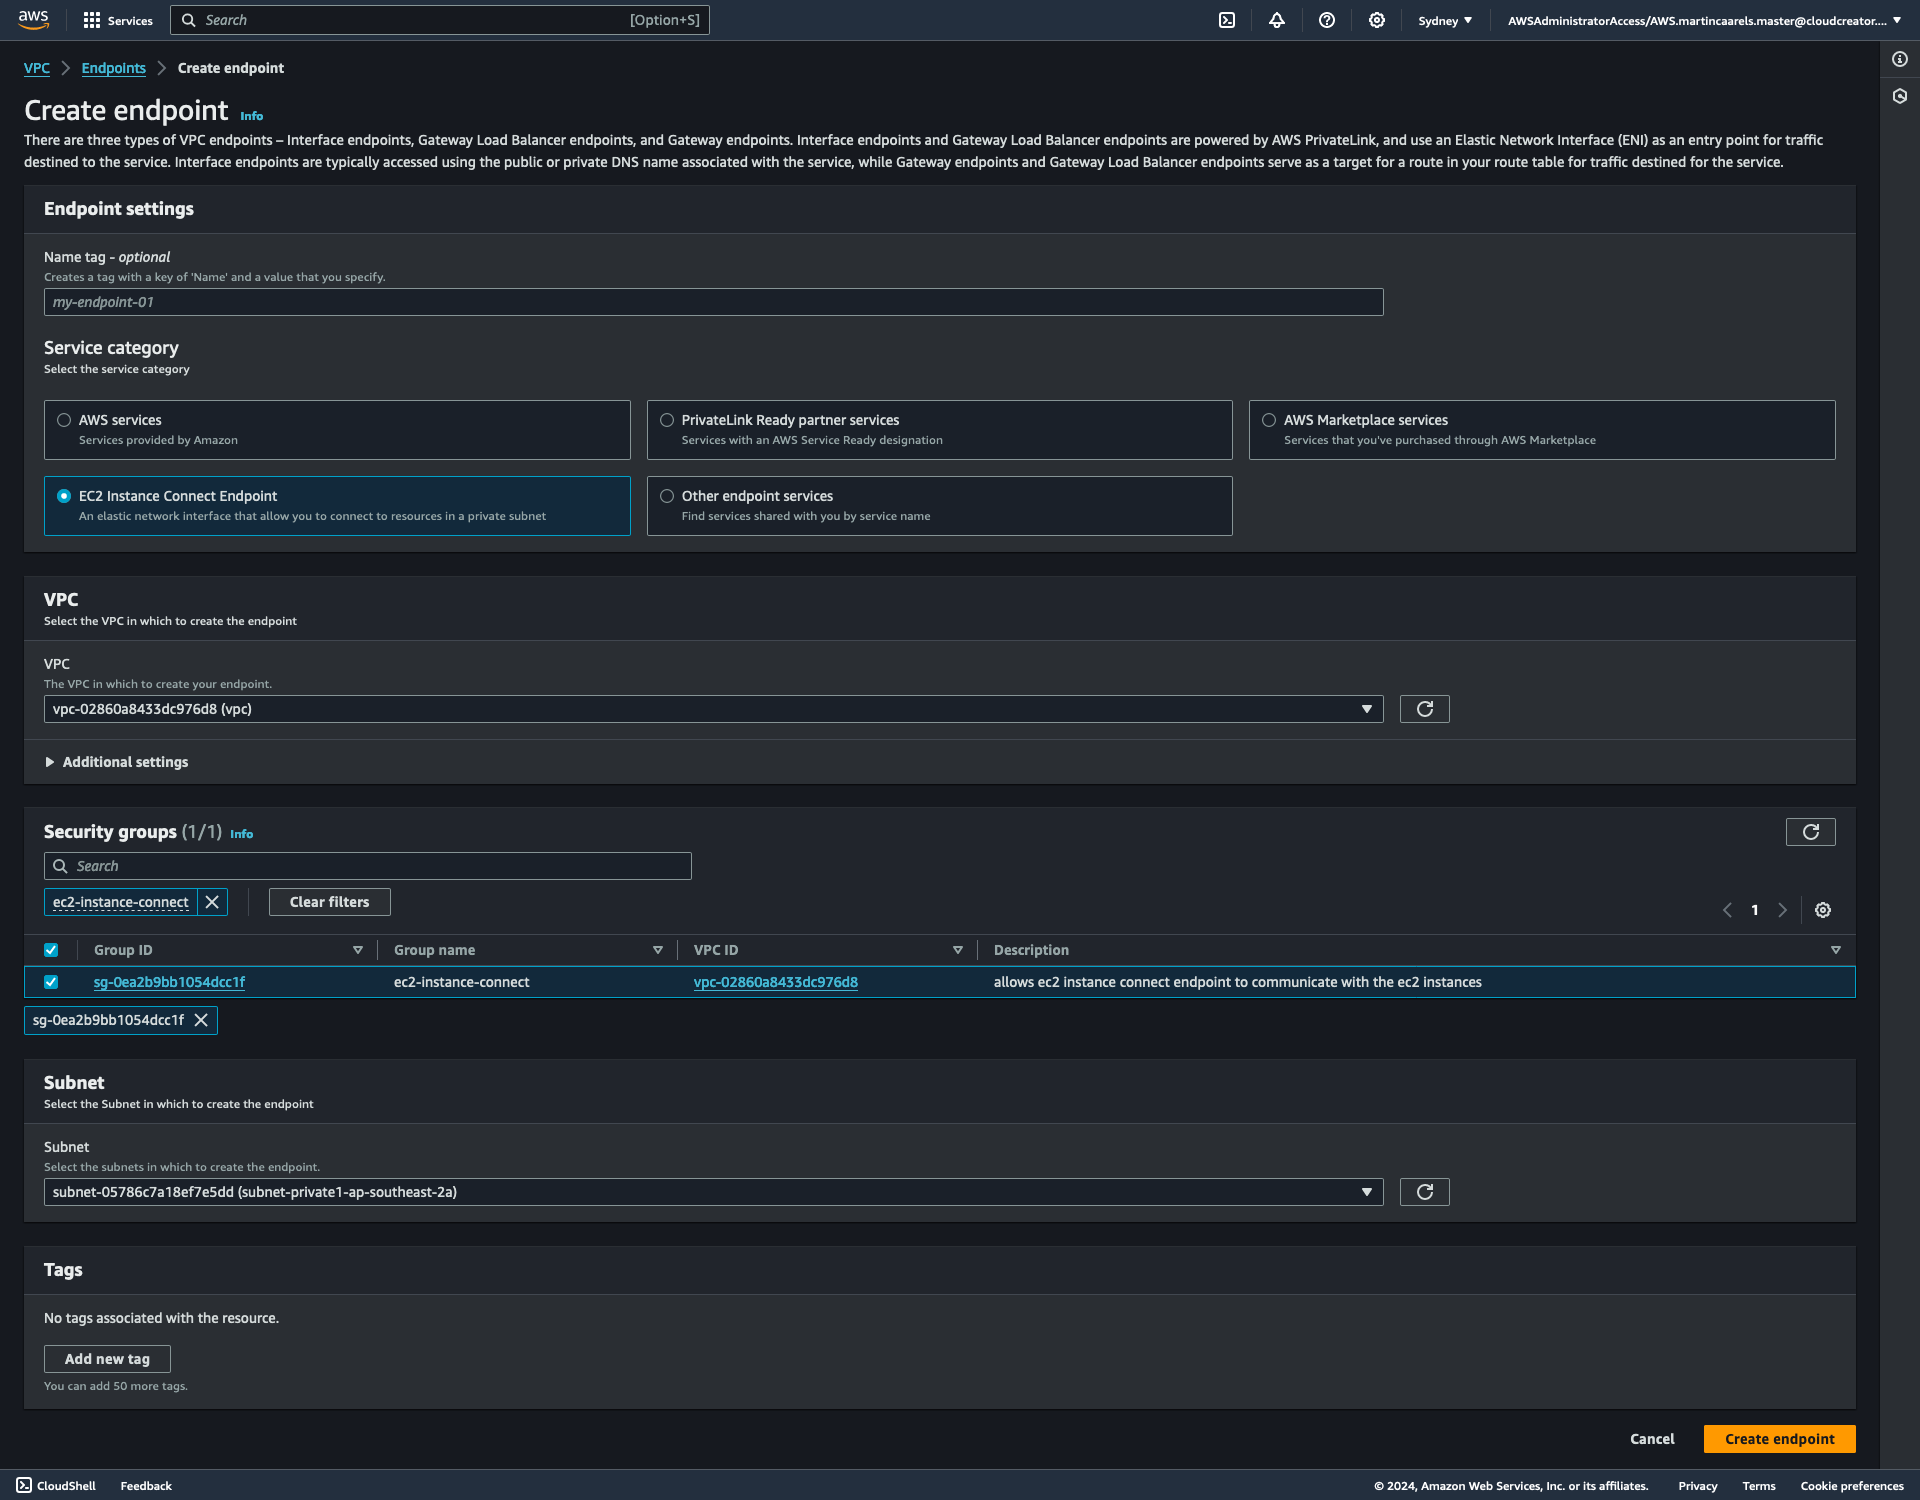 Make sure you select the security group we created earlier.
Its worth pointing out that the endpoint is created in one subnet only, i.e. one Availability Zone. If EC2-Instance-Connect is critical for your business, there is a single point of failure.
I’ve tried creating more than one, but at this time AWS will only allow you to have one per VPC:
 Current quotas are:
| Description | Quota |
|---|---|
| Maximum number of EC2 Instance Connect Endpoints per AWS account per AWS Region | 5 |
| Maximum number of EC2 Instance Connect Endpoints per VPC | 1 |
| Maximum number of EC2 Instance Connect Endpoints per subnet | 1 |
| Maximum number of concurrent connections per EC2 Instance Connect Endpoint | 20 |
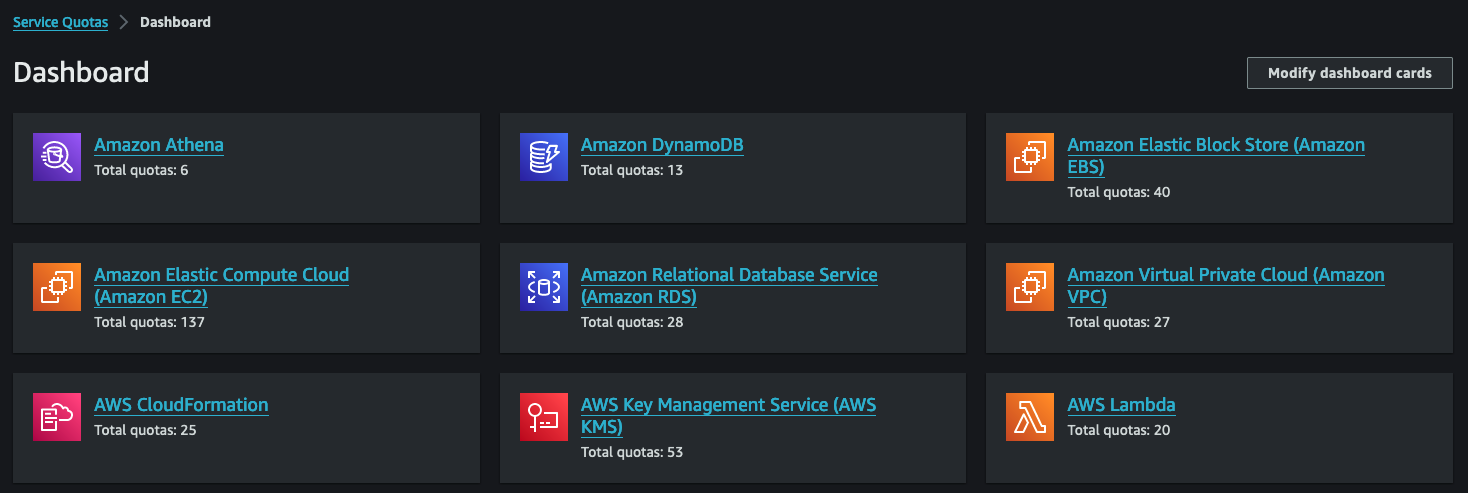
I had a look in the Service Quotas Console, but I could not find an entry for EC2 instance connect endpoints.
Instance
EC2 Instance Connect comes preinstalled on the following AMIs:
- AL2023
- Amazon Linux 2 2.0.20190618 or later
- macOS Sonoma 14.2.1 or later
- macOS Ventura 13.6.3 or later
- macOS Monterey 12.7.2 or later
- Ubuntu 20.04 or later
EC2 Instance Connect is not preinstalled on the following AMIs, but you can install it:
- Amazon Linux 2 prior to version 2.0.20190618
- CentOS Stream 8 and 9
- macOS Sonoma prior to 14.2.1, Ventura prior to 13.6.3, and Monterey prior to 12.7.2
- Red Hat Enterprise Linux (RHEL) 8 and 9
- Ubuntu 16.04 or 18.04
I’m going to assume your instance is running one of the AMI’s that has it preinstalled.
Simply add the security group we created earlier to the instance security configuration.
Key Pair
Having the PKI setup is not strictly nescesary as long as some key exists. I have done some testing and the results are interesting.
| Instance Configuration | AWS Console | AWS CLI | SSH client |
|---|---|---|---|
| No keypair | ❌ Can not connect | ❌ Can not connect | ❌ Can not connect |
| Random Keypair (deleted after creation) | ✅ Can connect | ✅ Can connect | ❌ Can not connect |
| Owned Keypair (uploaded RSA) | ✅ Can connect | ✅ Can connect | ✅ Can connect |
What I think the agent is doing, is doing something clever to allow the EC2 Instance Connect endpoint to connect, but for that to work there needs to be an existing ~/.ssh/authorized_keys file.
With the random keyfile I simply generated a keypair, assigned it to the instance and immediately deleted it after the instance was created (to ensure the console didnt have access to the private key). that worked perfectly fine for AWS console and AWS CLI, but obviously not for pure SSH as it needs to negotiate encryption using PKI.
Testing it out
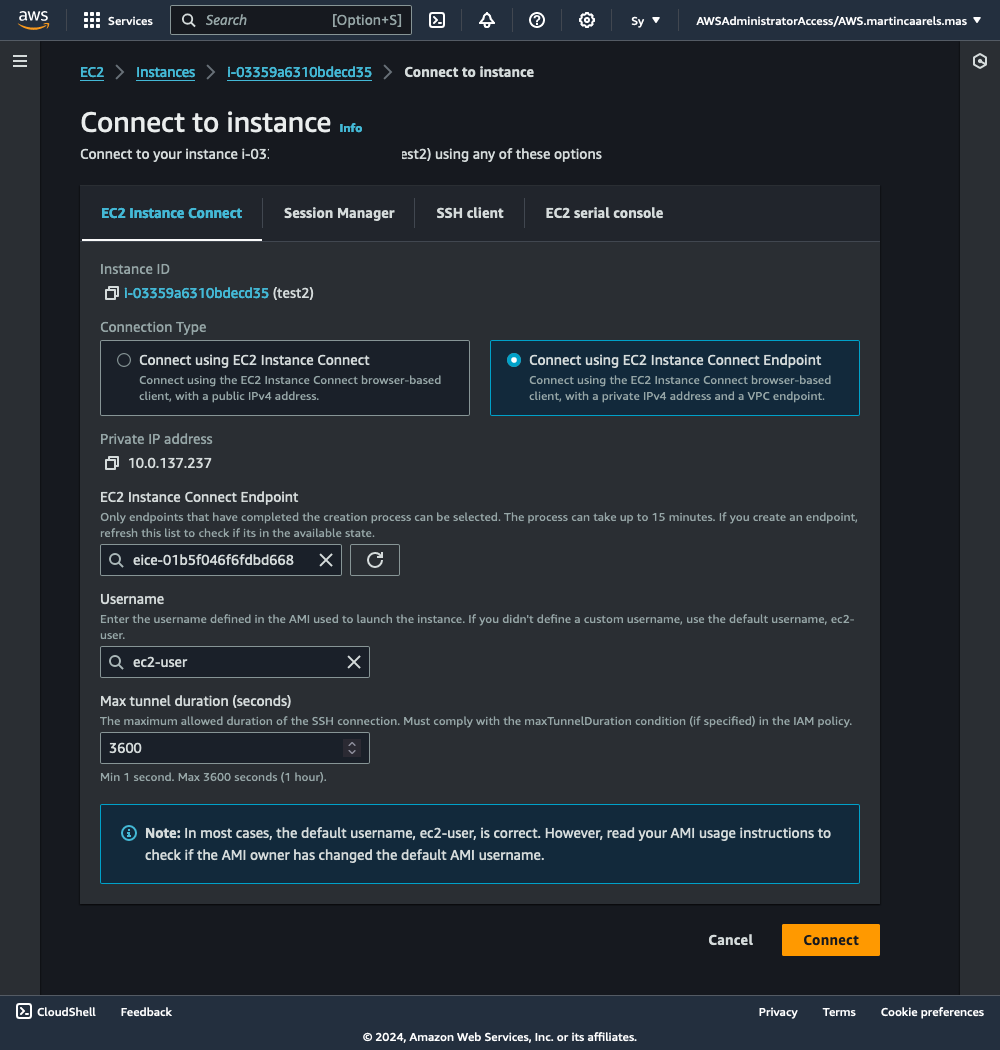
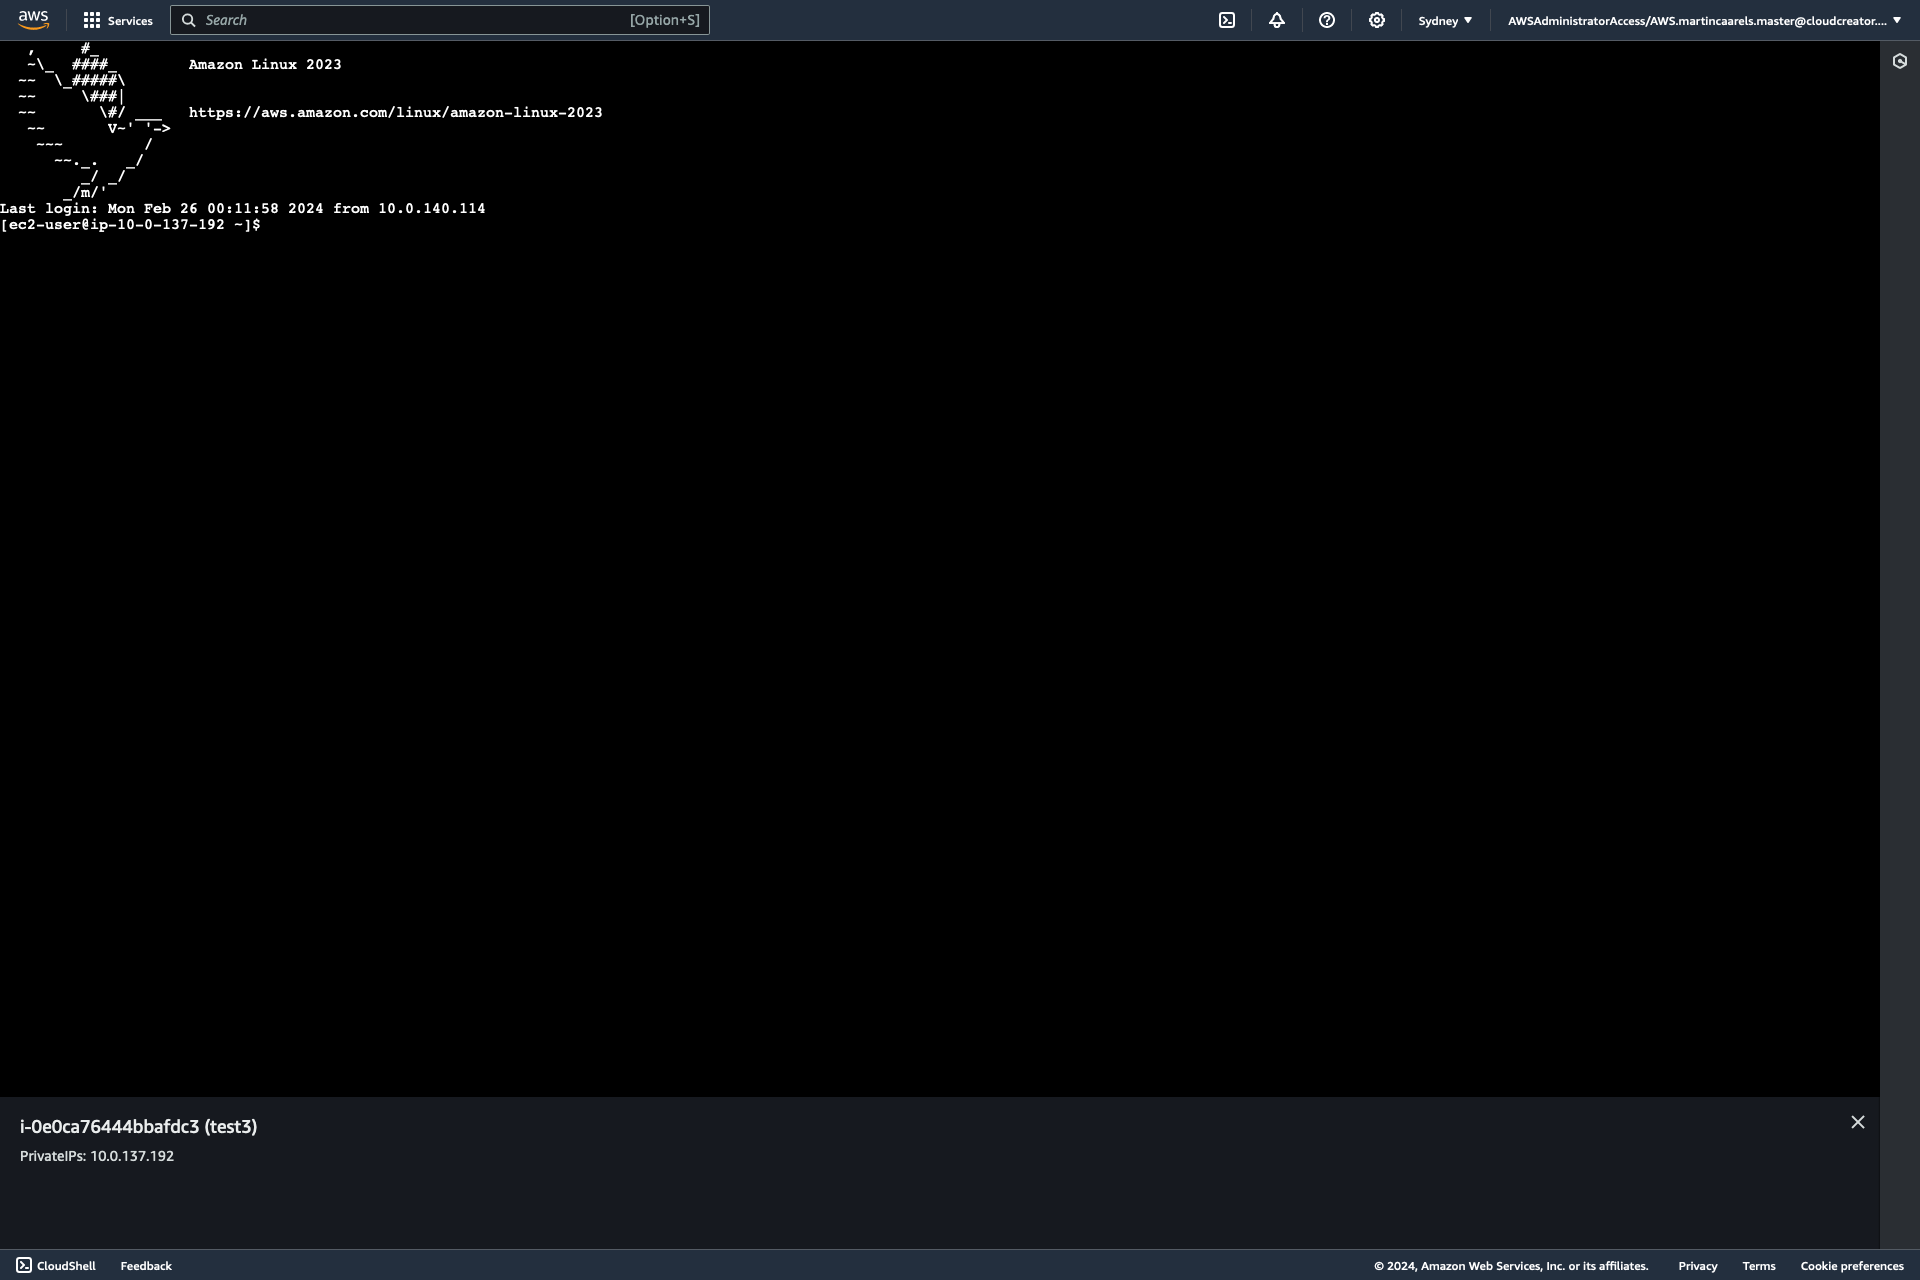
AWS Console
The simplest way to test it is using the AWS console.
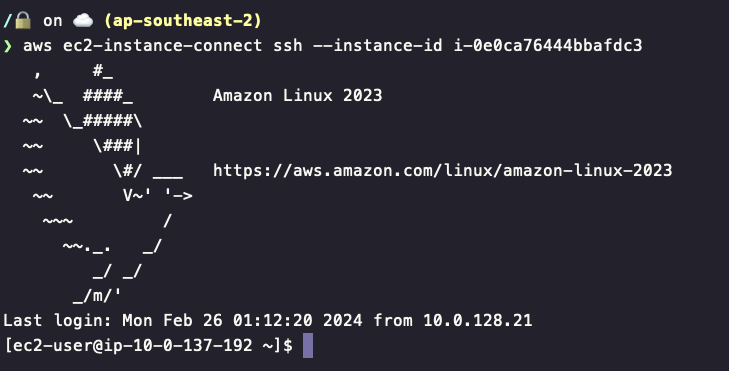
CLI
Cool kids use the CLI, first I will need to authenticate with AWS on my shell, I will not go into details on how to do that, look here if you need help.
I then run aws ec2-instance-connect ssh --instance-id i-0e0ca76444bbafdc3 where i-0e0ca76444bbafdc3 is my instance ID.
SSH
This is where its at, pure SSH, accept no substitutes!
text
To get SSH to play nice with EC2-Instance-Connect we will have to use the ProxyCommand option flag, wich uses the AWS-CLI tool to connect to and authenticate with the EC2-Instance-Connect endpoint.
I run the following command: ssh ec2-user@i-03359a6310bdecd35 -o ProxyCommand='aws ec2-instance-connect open-tunnel --instance-id i-03359a6310bdecd35'
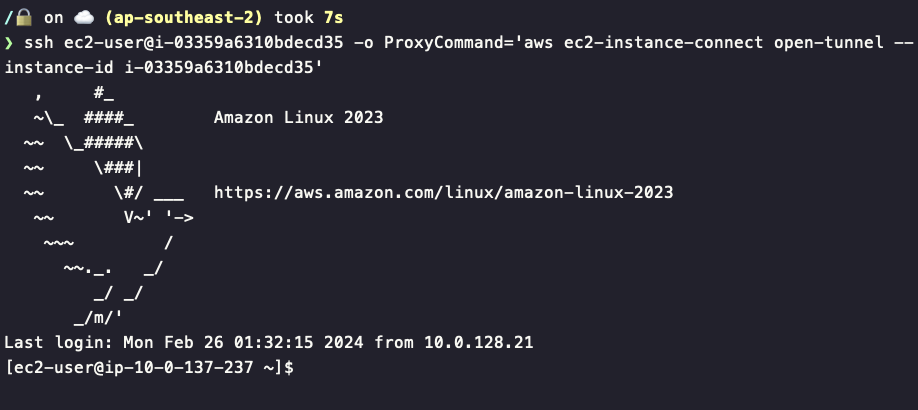
Now we are in business, being able to connect using pure SSH allows for some very interesting use cases.
SSH Magic
SSH Config
That command I ran earlier with the -o ProxyCommand= stuff was neat, but nobody wants to type that all the time, this is where the SSH Config comes in.
In your SSH config add the following:
1
2
3
4
Host ec2
  HostName i-03359a6310bdecd35
  User ec2-user
  ProxyCommand aws ec2-instance-connect open-tunnel --instance-id i-03359a6310bdecd35
Now all I have to do is run ssh ec2 and im in.
Tunnels
The internet is a series of tubes, as you well know, and tunnels are a bit like tubes, so lets set some up.
Tunnel to Target
You can tell SSH to create a tunnel to a target server using the SSH server as a stepping stone.
the command will look something like this: ssh -L <local_port>:<target_server>:<target_port> <ssh_server>
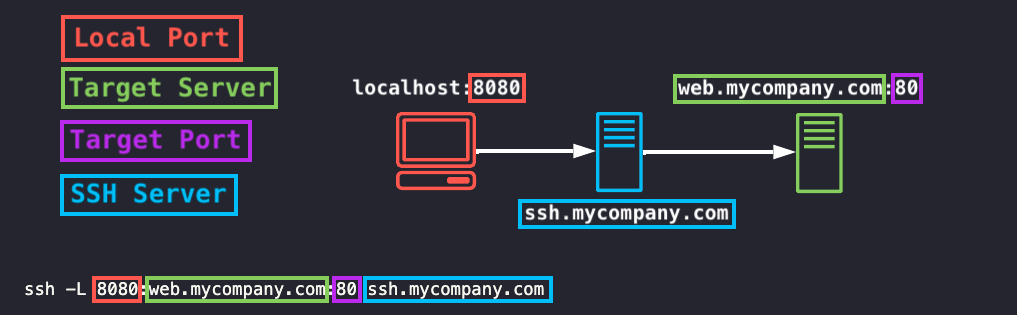
This will expose a port on your local machine, which you can then connect to by going to localhost:<local_port> and that will tunnel to the target server on the <target_port>.
Using the example image above, after running the command ssh -L 8080:web.mycompany.com:80 ssh.mycompany.com it would expose port 8080 on my local machine, which I could open by directing my webbrowser to http://localhost:8080 which would show me the webserver exposed on the server web.mycompany.com on port 80
Using EC2-Instance-Connect that would look like this:
ssh -L <local_port>:<target_server>:<target_port> <ssh_server> -o ProxyCommand='aws ec2-instance-connect open-tunnel --instance-id <ssh_server_ID>'
Tunnel to Self
Like the example before, you can have the SSH server and the target server be the same, that would result in the following:
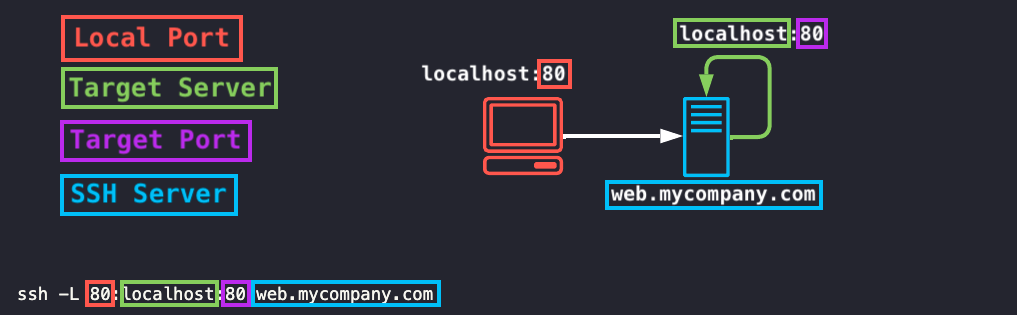 This is useful if you want to expose a server’s port locally without using an intermediate server.
Doing this with EC2-Instance-Connect it would look like this:
This is useful if you want to expose a server’s port locally without using an intermediate server.
Doing this with EC2-Instance-Connect it would look like this:
ssh -L <local_port>:localhost:<target_port> <target_server> -o ProxyCommand='aws ec2-instance-connect open-tunnel --instance-id <ssh_server_ID>'
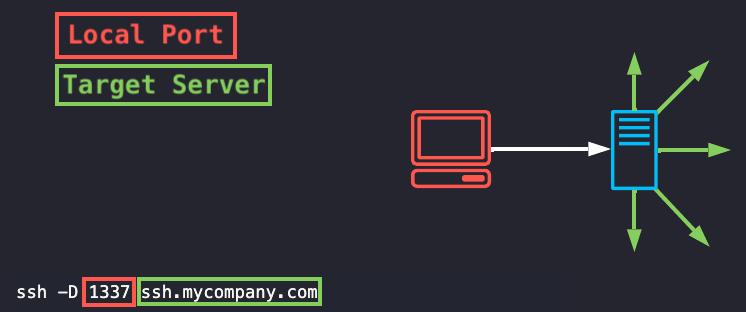
Socks Proxy
If you want complete SSH tunneling freedom, a “Socks Proxy” might be your answer.
What this does is, it sets up a SSH tunnel to a target server, exposing a local port as a proxy which you can use with your web browser (among other things). this will give you the freedom to try other ports as you need them.
 Using EC2-Instance-Connect you would run the command like this:
ssh -D <local_port> <target_server> -o ProxyCommand='aws ec2-instance-connect open-tunnel --instance-id <ssh_server_ID>
Then in your web browser (or other application that can leverage socks proxies) simply add a proxy, like this:
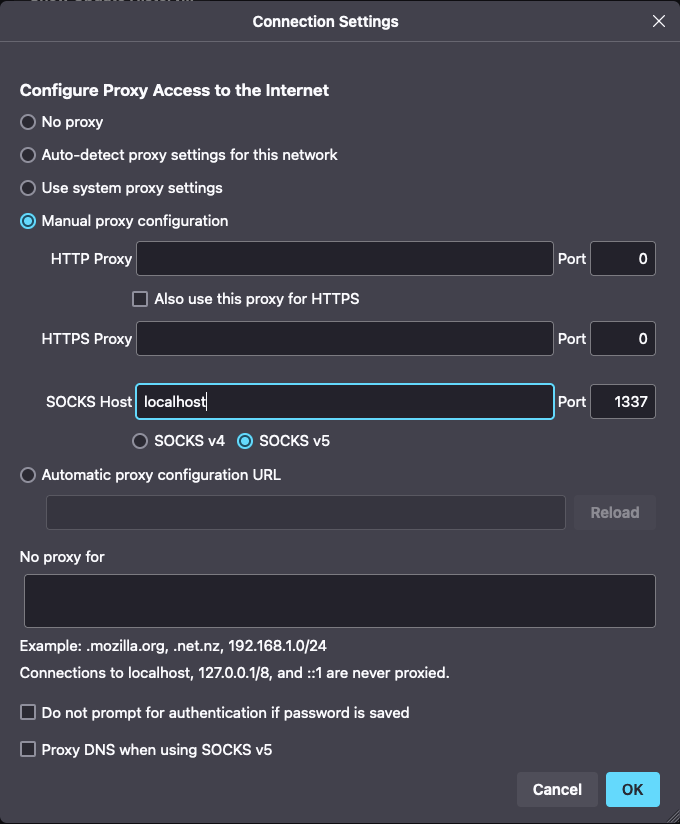
In your browser you can now enter anything that the SSH server would be able to connect to.
Pretend like you are running the browser from the SSH server.

Rsync
With the EC2 instance added to the SSH Config described earlier, you can now use rsync to synchronise files from your local machine to the server or vice versa:
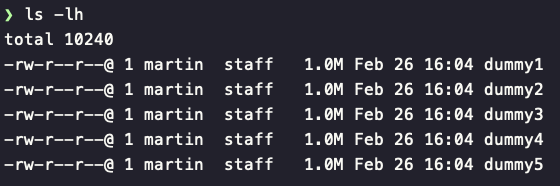
As a test I’ve created 5 files of 1MiB each,
 I then rsync them to the server designated in my SSH config as
 ec2
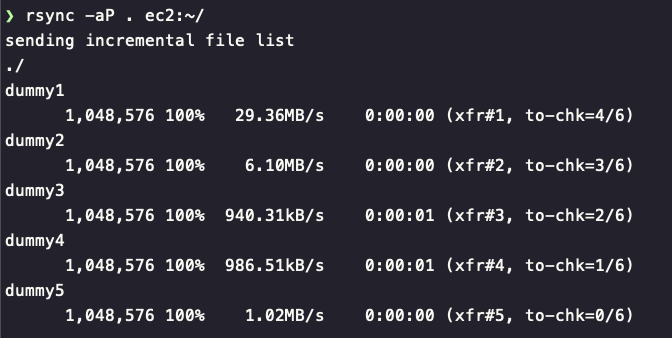 And that synchronises the files up to the EC2 instances just as expected:

⚠️ Please keep in mind cross AZ charges apply.
If your endpoint is in another Availability Zone than the server you are transferring files to, you will incur a cost for moving data from AZ1 to AZ2.
Remote Docker Host
Now that we know how to set up tunnels, we can connect to unix sockets over SSH, this will allow us to connect to a docker daemon hosted on an AWS EC2 instance while running the docker commands on our local machine. to set it up, install docker on an EC2 instance by executing the following commands:
1
2
3
 sudo yum install docker
 systemctl enable docker
 systemctl start docker
We will also need to allow the ec2-user to connect to the docker socket by making it a member of the docker group. issue the following commands:
1
2
 usermod -aG docker ec2-user
 id ec2-user
that id command should show that the user is a member of the docker group.
On your local machine ensure that the docker client is installed but that there is no docker daemon running. Create a tunnel to the instance connecting to the docker socket using the following command:
ssh -L localhost:2377:/var/run/docker.sock <ssh_server> -o ProxyCommand='aws ec2-instance-connect open-tunnel --instance-id <ssh_server_ID>'
or if you have a working SSH config rule for your server:
ssh -L localhost:2377:/var/run/docker.sock ec2
Then create the following environment variable:
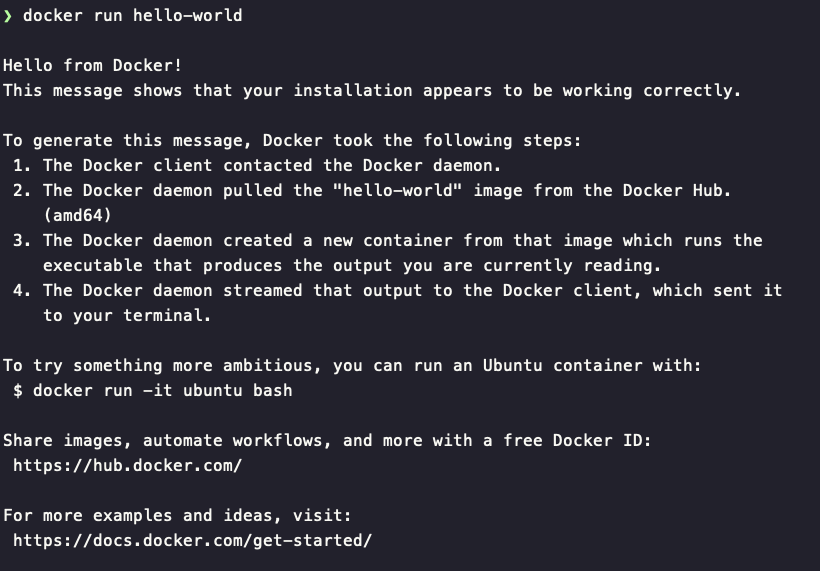
export DOCKER_HOST="localhost:2377"
That should be it, now when you run docker commands locally, it should behave normally, but the containers are actually running on the EC2 instance.
Other Cool Tricks
Let your imagination run wild, VS-code has this cool thing where you can run it remotely, ive set it up and its very interesting, link here.
Background Running
The commands I showed earlier are for demonstration purposes only, if you want to do this in earnest you will probably want the tunnels to run in the background. Use the following flags in your SSH command to get the best results:
1
2
-f Requests to go to background just before command execution.
-N Do not execute a remote command.
For further flags/options look here Don’t forget to kill the tunnel process if you do not need it anymore.
References
Amazon EC2 Instance Connect News
Instance Connect Documentation